Wood Furniture Restoration – Quick Tips!
WOOD FURNITURE RESTORATION ISN’T HARD BUT DOES REQUIRE YOUR TIME. HERE ARE SEVERAL DIFFERENT METHODS FOR RESTORING OLD FURNITURE.
I recently rescued three pieces of vintage furniture that I restored. Wood furniture restoration is something I really enjoy doing. Some pieces are much easier than others but it’s always worth it in the end.
When I come across an amazing antique piece I rarely can pass it up even if it needs a considerable amount of furniture repair. Usually, these pieces can be found at great prices which makes it worth the time and effort to refinish.
If you have a family heirloom that’s seen better days, the good news is that it can be restored. The catch is you need to be willing to put in the work. Most times, it’s more work than you think it will be.
I’m not a professional but I have enough years of experience doing wood restoration that I feel I can give advice.
furniture repair
The existing finish on old pieces can have any amount of things wrong with them. Most can be repaired. The only furniture I’ll usually pass up is if it’s missing pieces or parts.
water damage

Water stains can range from drink rings to more extreme damage, such as a piece that may have been in a flood. For the latter, I would skip trying to fix that.
One wood furniture restoration I did last year was this desk makeover. Sadly, it had dark cup rings. I tried many popular suggestions to remove those such as using mayonnaise or a hot iron.
Unfortunately, none worked and some even made it worse.
The only solution I’ve found for water rings on wood is to sand it down. If you’re lucky you can just sand that area but usually that isn’t the case and you’ll have to sand the whole piece.
deep scratches
Another problem I come across often is scratches in the finish. I’ve tried products designed for this such as the furniture crayons that are advertised to correct this problem and none of those worked.
For scratches, you have two options.
Option one is to use a wood filler on the damaged areas. If you go this route, you will have to paint the piece. Lately, I prefer natural wood over painted but in some cases, painting may be best.
For example, I recently picked up a desk for my daughter that was so damaged, I had no choice but to paint it. The desk was free so I wasn’t surprised when I saw the condition.

This desk was missing one small part in the front but it was exactly the size she needed so we decided we could live with that.
And obviously, the price was right.
I lightly sanded this one and filled the damaged areas with wood filler before painting it. The good thing about painting a piece of furniture is that a light sanding will be enough, no need to totally strip the piece.

Once the wood filler was cured I sanded down that area again. The next step was to paint it.
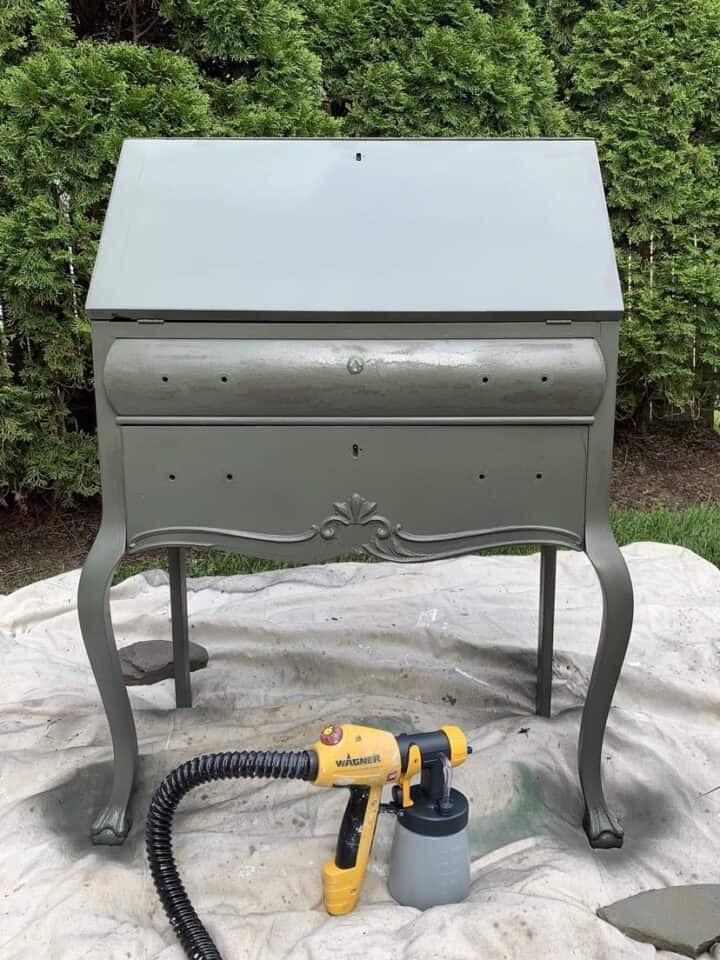
I used my paint sprayer because it does a great job of getting a super smooth finish. The color is called Everett from Fusion Mineral Paint and it’s really pretty.
As you can see in the above photo, the paint wasn’t covering the top drawer well. That drawer had a weird texture on it and it took many coats of paint to cover.
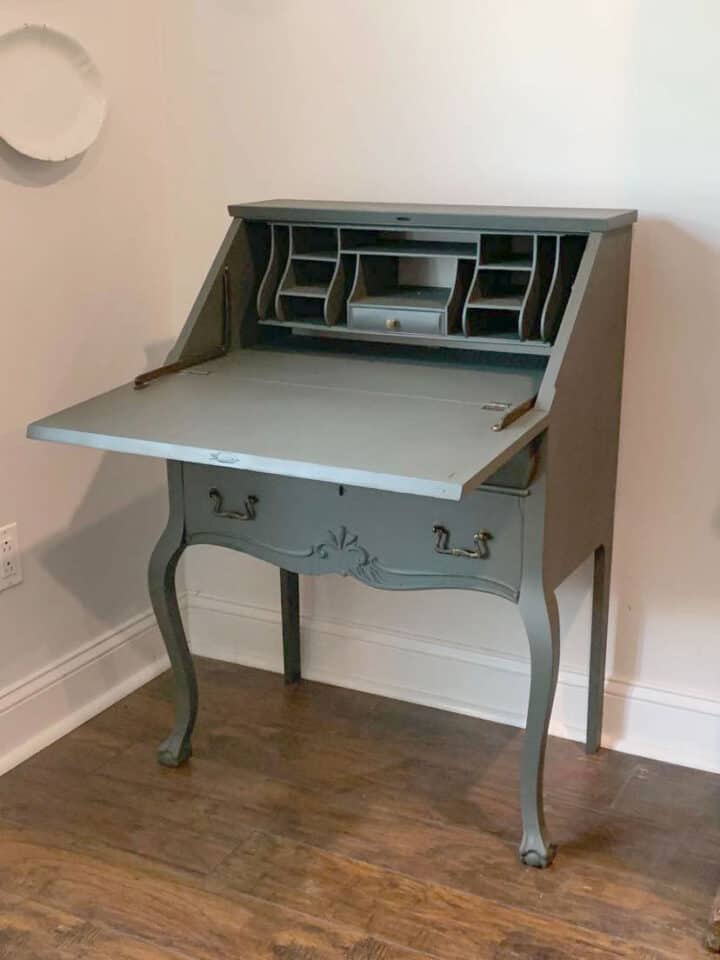
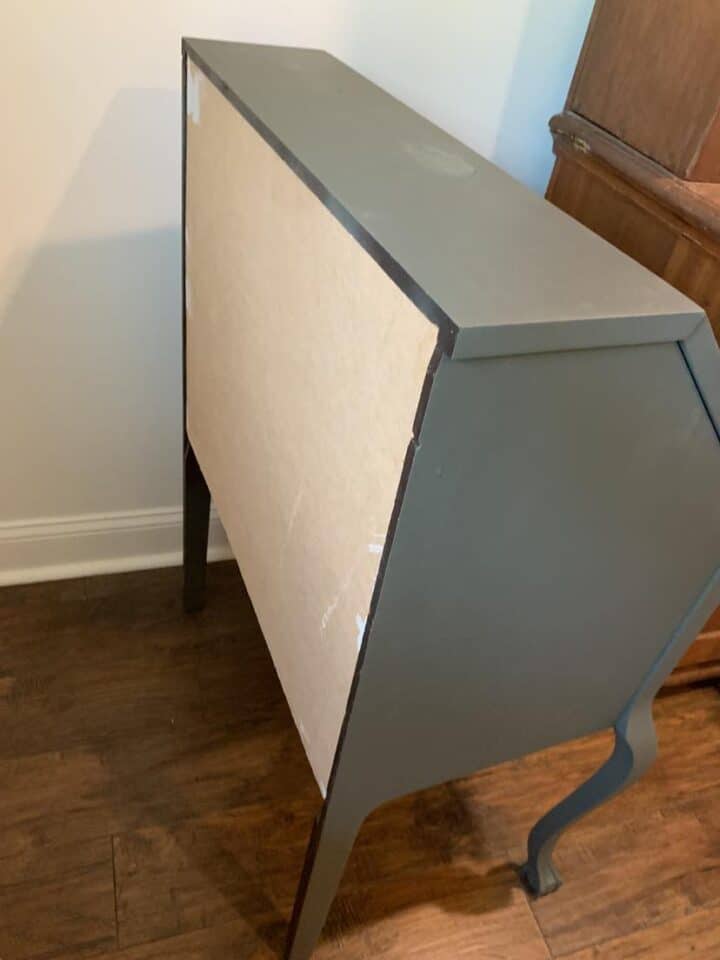
This desk required a little extra repair work. The original backing was so old that pieces were chipping off.
First, we removed the old backing. Then we went to the home store and bought a thin piece of wood to nail to the back.
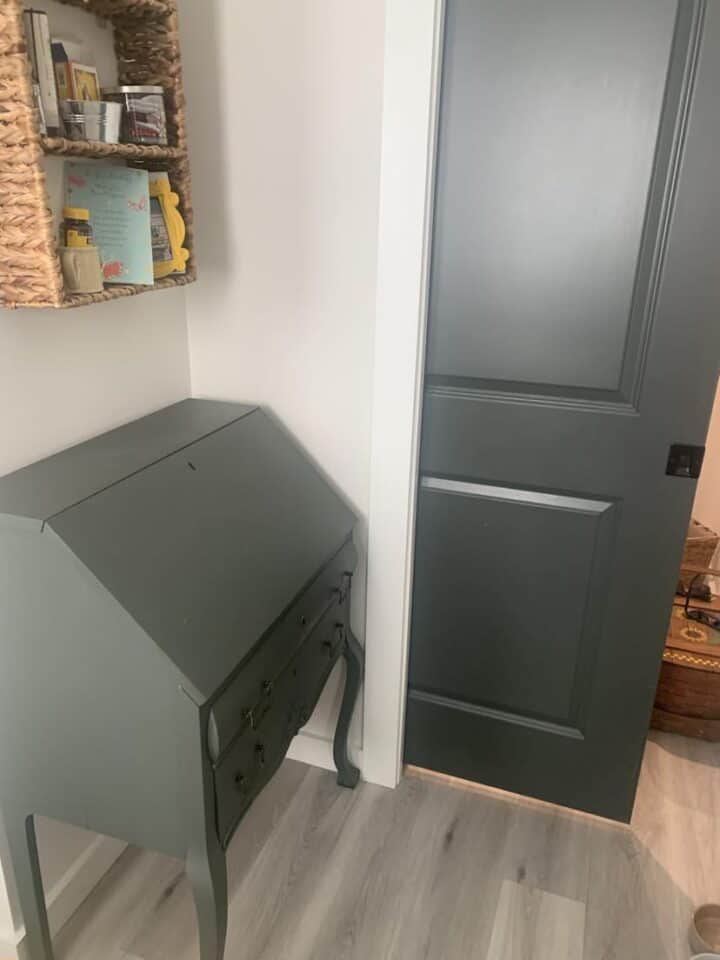
Here you can see how it looks in her apartment. It turns out the doors were painted almost the same color.
Option two for deep scratches is to sand it down completely. This option is the most work but will be worth it.
With stripping furniture, I usually use an orbital sander to remove the old finish. For smaller pieces or small areas, I also use a sanding block. A coarse grit for stripping and a smoother grit for finishing.
I’ve also recently discovered this simple but handy small sander that’s great for intricate areas and corners.

To remove old paint or varnish, you could also use a chemical stripper. That will help to peel away some of the old finish but in the end, you’ll still have to sand it because a paint stripper won’t remove everything.
If you’re lucky, the color of the wood underneath will be pretty. I was fortunate that the desk makeover I worked on last year had a beautiful wood tone underneath.
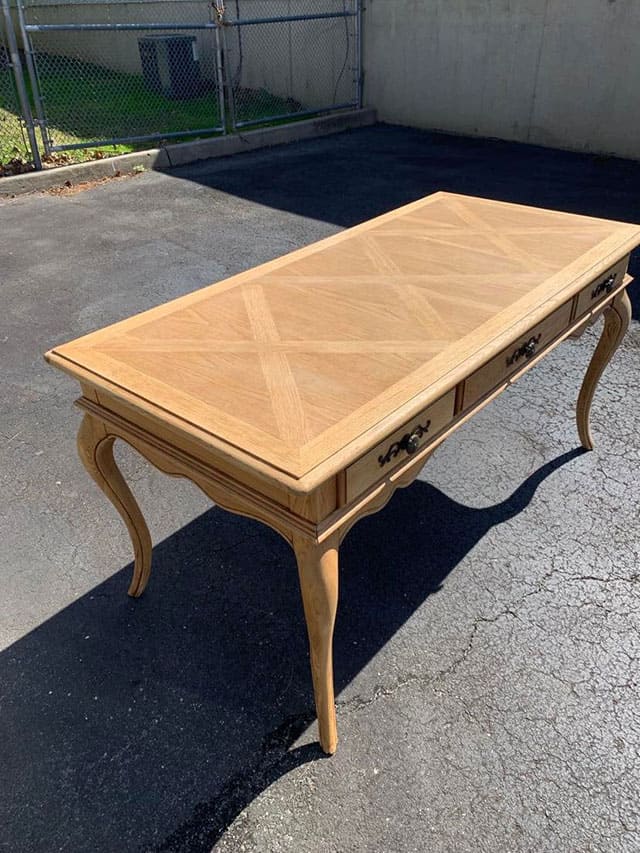
If not, you’ll likely need to restain it or paint it.
If you only have a few minor scratches you might be able to get away with touching it up with a product like furniture markers but if you want it to be perfect I suggest sanding.
wood cleaner

Some old wooden furniture may look worse than it actually is. If you’re lucky, you may find a piece that just needs a good cleaning.
For cleaning wood furniture, the best option I’ve found is a homemade solution.
All you need is a clean cloth, warm water, white vinegar, and dish detergent. This solution will clean and deodorize the piece. You may need to apply it multiple times on really dirty or greasy old wood furniture.
antique furniture restoration
Once your piece is prepped and cleaned you have a few options for restoring it.
Paint It
As I mentioned, I lean towards a natural wood finish but here is another piece I recently painted.
This table was a great find but I didn’t like the original color and it was scratched up.
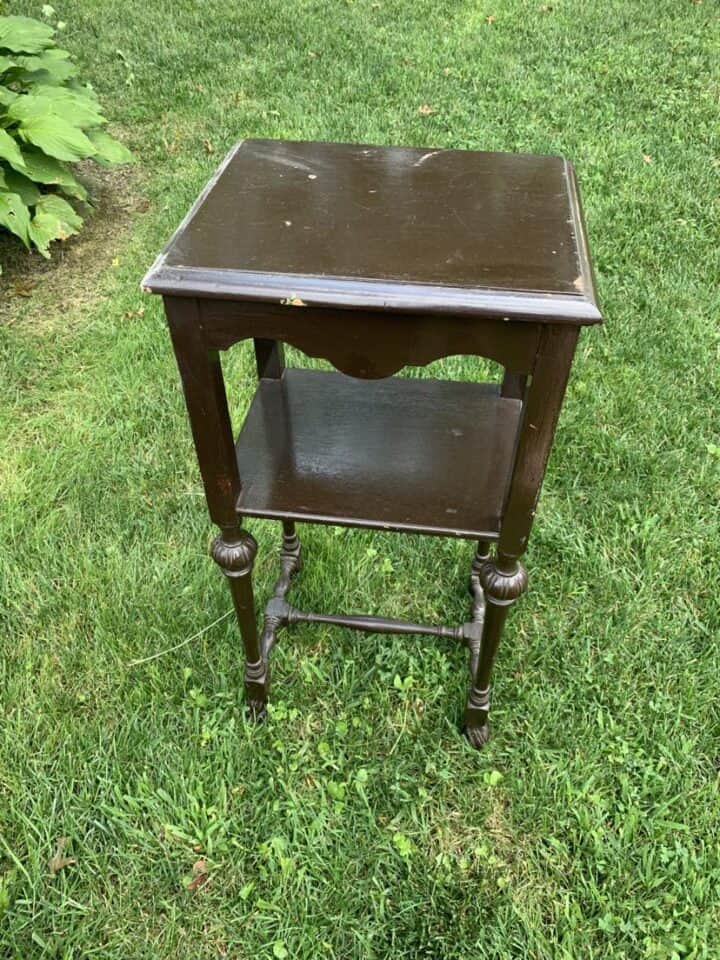
I cleaned this one well and rather than strip the entire piece, I gave it an overall light sanding. I wanted to roughen it up a bit.
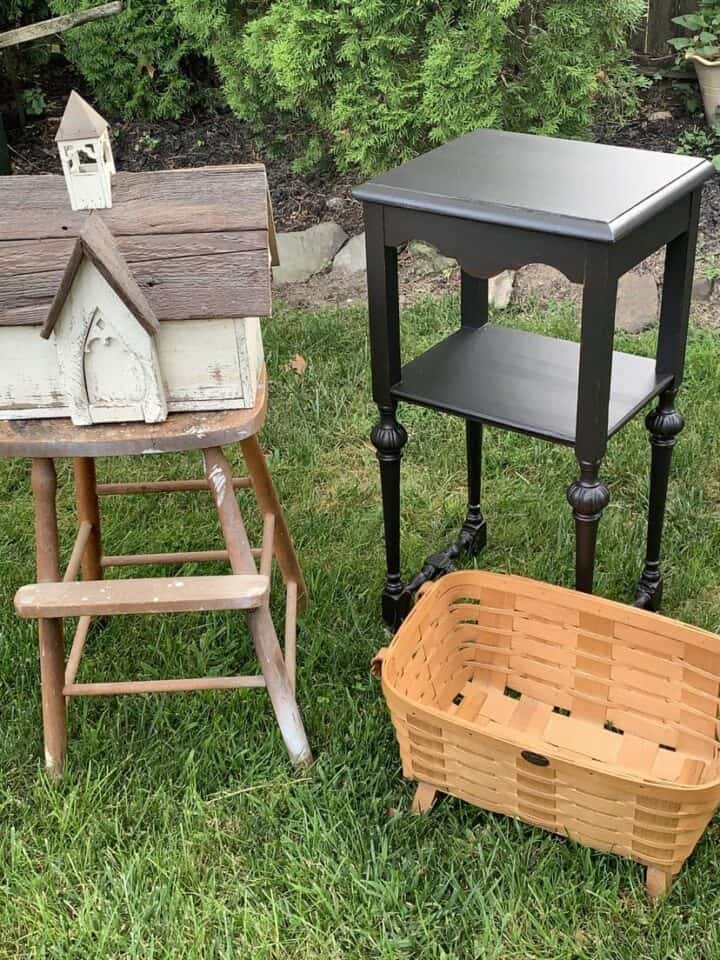
First, I added a coat of primer and then I painted it black. Last I used my favorite clear coat sealer (tough coat) to protect it.
I went with black on this one because I planned to resell it at my antique shop. Most furniture looks good restored to a soft black color and will work with most decor.
Here you can see how that turned out.
wood finishes – Staining
If you prefer to keep the look of wood, you can opt to stain it. I have found stains to be very tricky. Slight variations in the application can really change the look.
Often bleaching the wood first is recommended because if you don’t you might end up with a terrible orange tint later. You can see an example of that with my vintage bench makeover.
But recently I tried a gel stain on a gorgeous old pedestal table I picked up. The table was in great condition everywhere except the top surface.
Rather than strip this whole piece, which has a lot of intricate parts I decided to just do the top and see if I could match the color to the rest of the table.
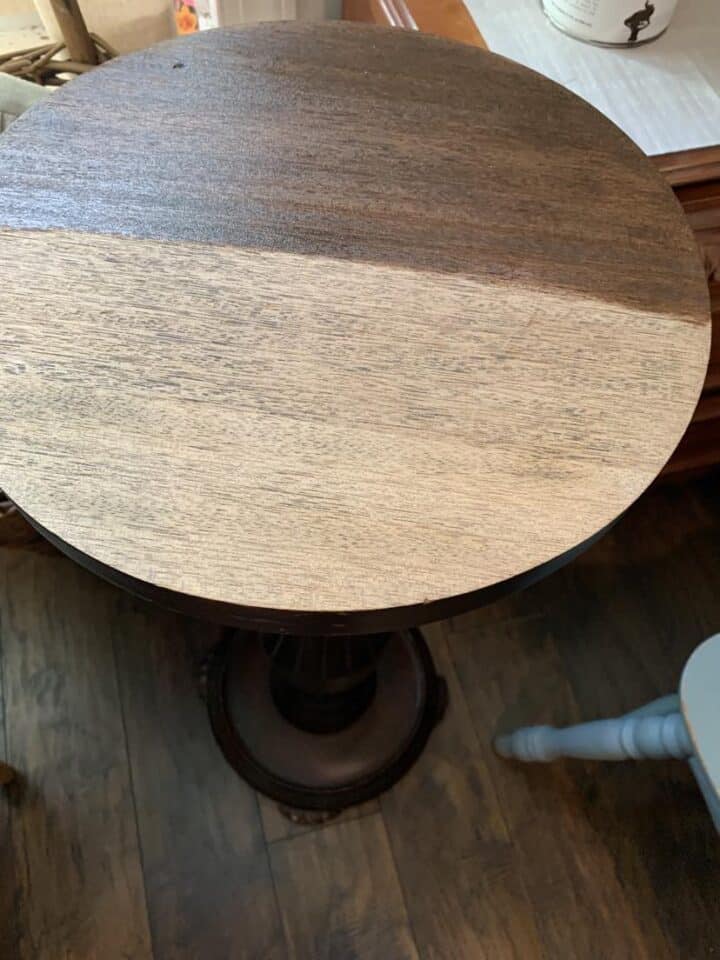
The wood tone on this piece was dark, as was the gel stain. The stain color I used here is called double espresso. Fortunately, this worked so well and the stain ended up matching the original look almost perfectly. You can’t tell the difference.
This gel stain is available in four different shades. I’m really hoping they start making it in more color choices.
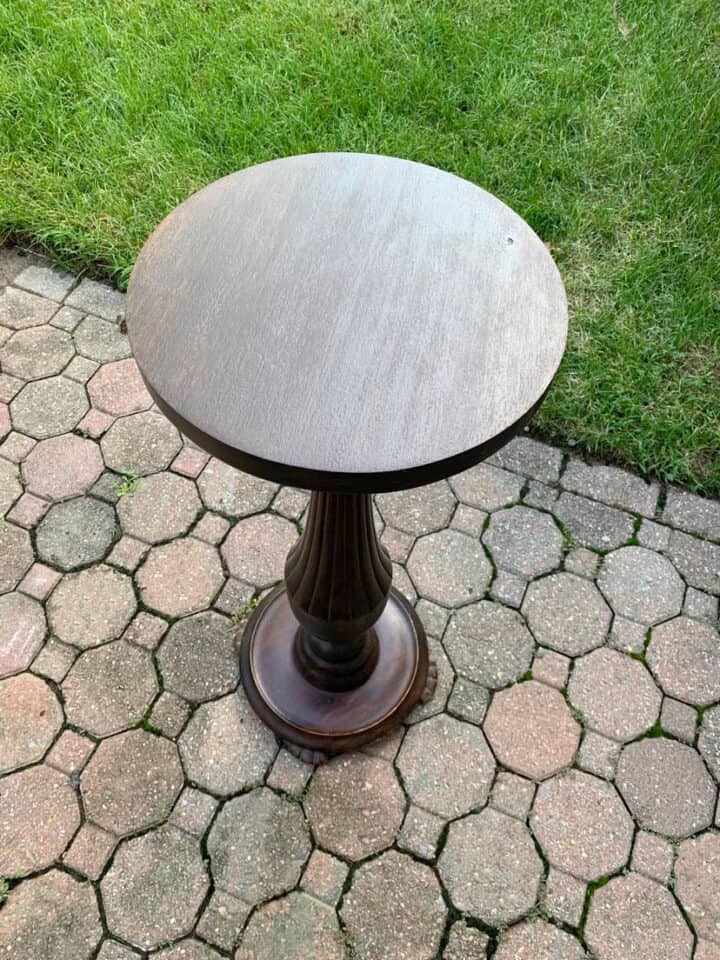
Notice the feet on the bottom of this table. It’s very old and amazingly, completely intact.

If you have a darker piece, I highly recommend this gel stain. It may just save you a ton of work.
No top coat is needed with this gel stain. It’s durable enough for furniture that gets a lot of daily use such as kitchen tables.
Clear Coat
Once you’ve restored a piece of old furniture the last step is to protect it. I’ve found the easiest way to do that is with a quality clear coat.
You want something with a durable finish that won’t turn yellow. Especially if it’s a piece that will get lots of use such as a dining table or a desk.

Almost without exception, my final coat is always Fusion Tough Coat in Matte. It’s totally transparent and doesn’t yellow. You can’t tell there is any top coat on it, which is what I like.
(If you prefer a high shine, it also comes in gloss.)
The clear coat I use in matte isn’t recommended by the company for use over darker colors. This is because the mattifying agents in the formula can cause a cloudy or streaky look.
Instead, they recommend using their Stain Finishing Oil (SFO) or the Tough Coat in gloss over darker colors.
However, I have used it over black paint before without issue. You can see more of that on this distressed table makeover. I’ve also used it to protect natural wood.
The Tough Coat in matte has never failed me.
If you do go with the matte over darker colors, the recommendation is to let the paint dry for at least 7 days first and apply it in thin layers.
Always keep in mind different products do different things so it’s a good idea to read the labels thoroughly!
I hope my tips will come in handy when you decide to do your own wood furniture refinishing.
Whichever method you use for wood furniture restoration, it’s a great way to rescue old furniture or to get a great piece without spending a lot of money.
Additionally, there are professionals who can help with antique restoration if you prefer not to do it yourself.
Old wooden furniture that has gotten a new life makes me happier than new furniture does!
MORE WOOD FURNITURE RESTORATION IDEAS YOU MAY LIKE:


The desk turned out beautifully, love the color.
Thanks, I do love that color too.
Beautiful transformation.
Thank you