Natural Desk Makeover
DIY DESK MAKEOVER – HOW TO REMOVE VARNISH TO REVEAL THE NATURAL WOOD TONE.
A friend texted me recently to ask if I wanted a desk she had been storing in her garage. She had picked it up curbside and hadn’t gotten around to refinishing it yet. Now she’s planning to move soon and needed to get rid of it.
Not one to turn down free furniture, I went and picked it up. I had planned to pop it in storage to work on later when the weather gets nicer, but when I got home it was about to rain and I had to get it off the truck so I brought it inside.
It’s a beautiful desk, (not sure if it’s vintage or not) but was in pretty bad shape.
Desk Makeover – The Before

I think my friend had started sanding it a bit, so the finish was uneven. The original wood tone was too dark and orange toned and it also had a deep black round water ring stain on the top. Definitely a project piece.
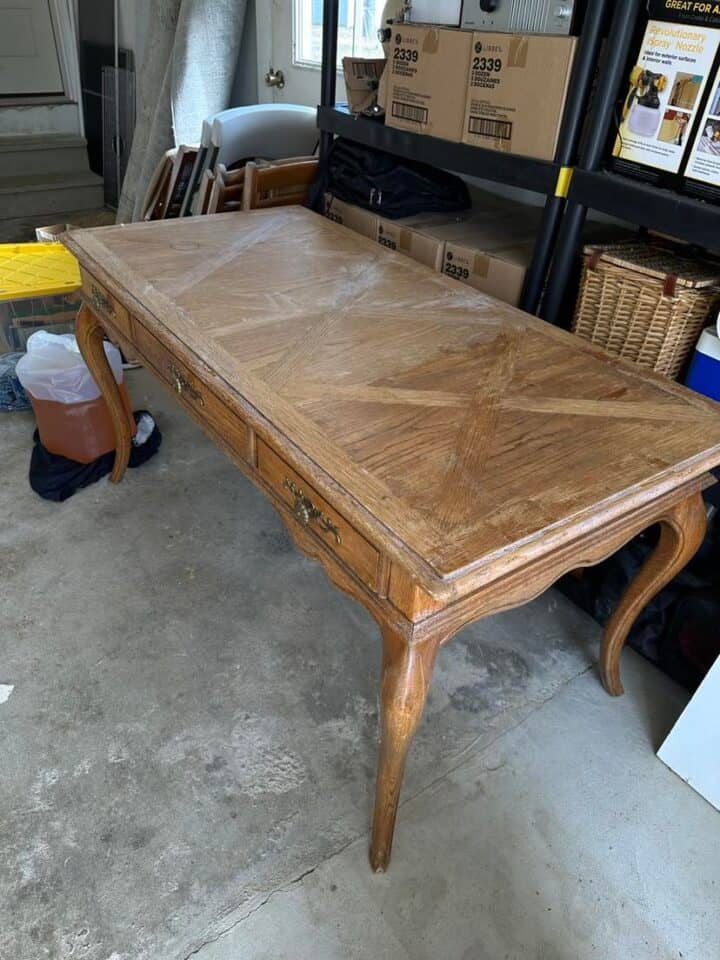
Because it ended up in my house that day I decided to work on it sooner rather than later.
How To remove water rings from wood

First, I wanted to address the water ring. I had asked for suggestions on Instagram and got several different options. A few people suggested mayonnaise so I looked that up. It said to apply mayo over the ring and let sit overnight. I applied the mayonnaise but was nervous that it might leave a grease stain so I removed it after an hour. And I’m glad I did because it did leave a grease stain!
Next, I tried the ironing suggestion. Which was to lay a cloth over the stain and press a hot iron over it. That did not work either, not even a little.
I was planning to sand the desk anyway so I stopped trying other methods and hoped that it would come off during sanding.
Best Furniture Stripper
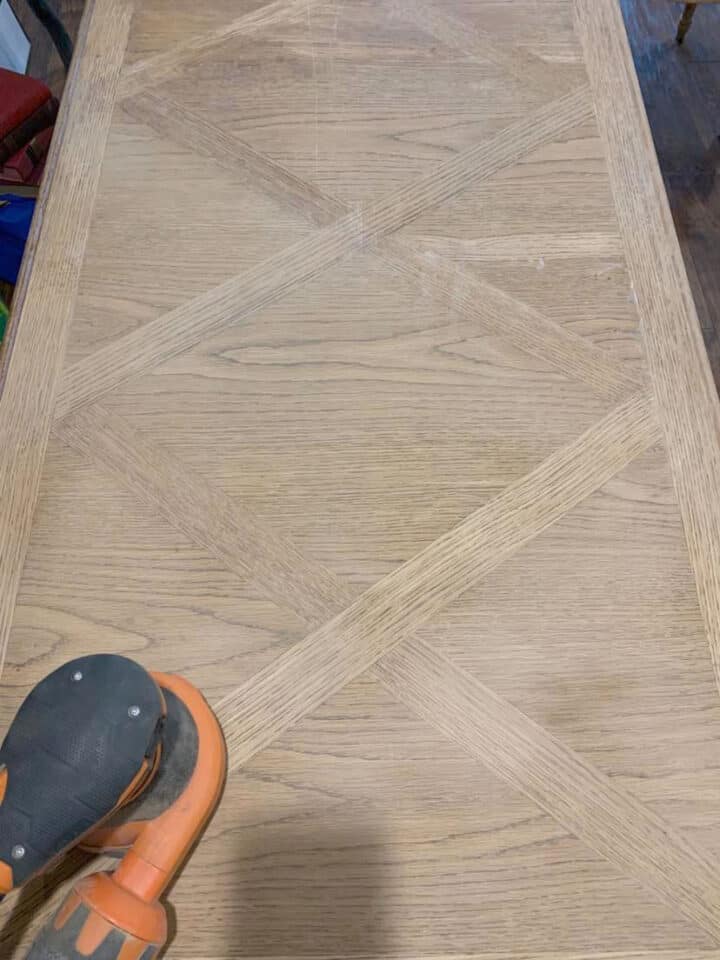
I’ve stripped many pieces of furniture using many different methods. When I wanted to remove paint from an antique wooden dresser I used Zip Strip. I’ve also used this citrus paint remover and liked that too. The thing with chemical strippers is they only can do so much. You’re still going to have to scrape and sand it regardless.
I also tried the oven cleaner method that was so popular on social media. That did not work for me. I tried it a few times and won’t be trying it again. Especially on a nice piece like this.
In my opinion, the best furniture stripper is sanding. It’s the most labor-intensive but it will give the best results. There’s really no way around it so that’s how I approached this desk makeover.
That said, sanding this desk was a beast! I did it right inside our family room (which I don’t recommend, total mess) due to the weather and how heavy this desk is to drag inside and outside when I had time to work on it. Plus with it being winter, not enough daytime light.
Remove Varnish From Wood

So sand I did. And then I sanded some more. It took me about two weeks in my free time to get this completely sanded. I used square palm sanders, round palm sanders, multi-max triangular sander, sanding sponges, and even a Dremel tool for the small parts.
The desk has tons of little groove areas, plus the curvy legs which really is what made this so much work. No power tool exists to easily get into those little crevices. At least none that I’ve ever found.
Once I had it totally stripped, I loved how it looked but I did want to add some sort of protectant to it considering the surface area will be used a lot. I knew it would likely change the color a bit but I wanted to keep it as natural as possible.
Sealing Wood Furniture
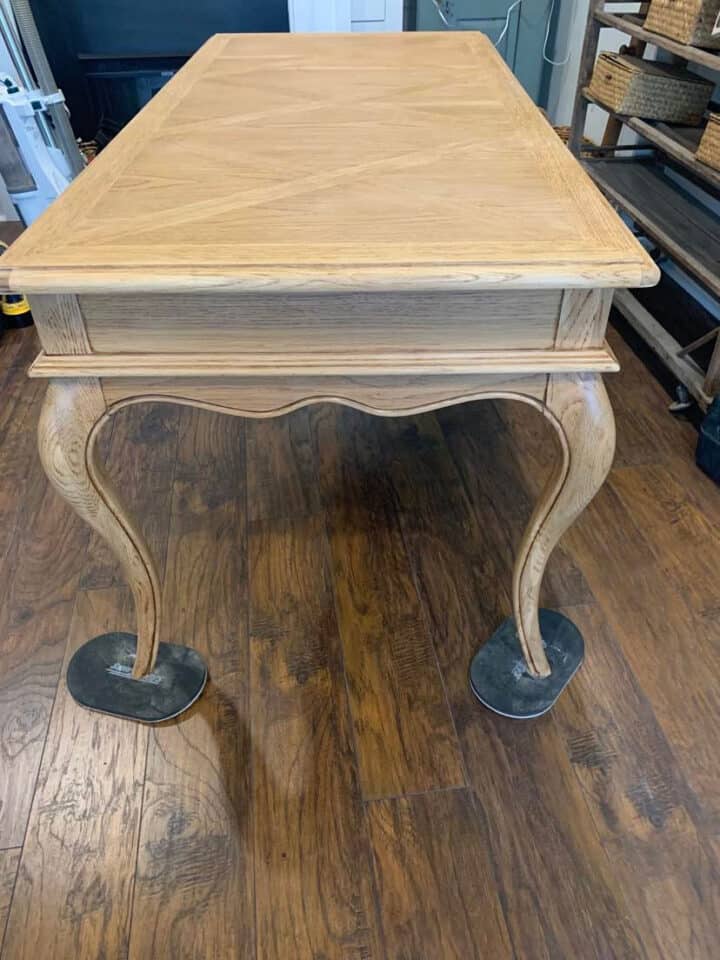
I decided to test two different options. First, my go-to Fusion Tough Coat I use on all my painted furniture. Second, Fusion gel stain in clear which I’d never tried before.
I know from experience now to sample small spots and wait a day to be sure it doesn’t turn orange. I tested in small areas knowing I’d have to sand at least one of them back off.
In the photos below you can see a side-by-side comparison of the two. I took a photo when I first applied them and another after they had dried.

The gel stain turned it too dark for my liking so I sanded that off and went with my tried and true tough coat in a clear matte finish.
But even though the Tough coat is clear and matte, it also darkened the finish a bit more than I thought it would. I struggled to get that applied perfectly even, which may be because the sanding wasn’t perfectly even all over. The paint sprayer would’ve been ideal for this but again, I wasn’t dragging this heavy desk in and out.
After coating the desk with the tough coat and sitting with it for a few days, I decided to lightly sand the top again. I used a sanding sponge and just did two light once-overs.
Next, I added another coat but extremely lightly, I practically dry-brushed it on and just kept working it in every so lightly with the brush. That seemed to do the trick and the top looked much more even.
While it did darken a little bit after the clear coat it’s still really pretty in a honey color and will be better protected now.
Updating Furniture Hardware
When I had the desk refinished and I was about to put the hardware back on I realized that it didn’t look good with the new finish. It looked a little bland, as you can see below.
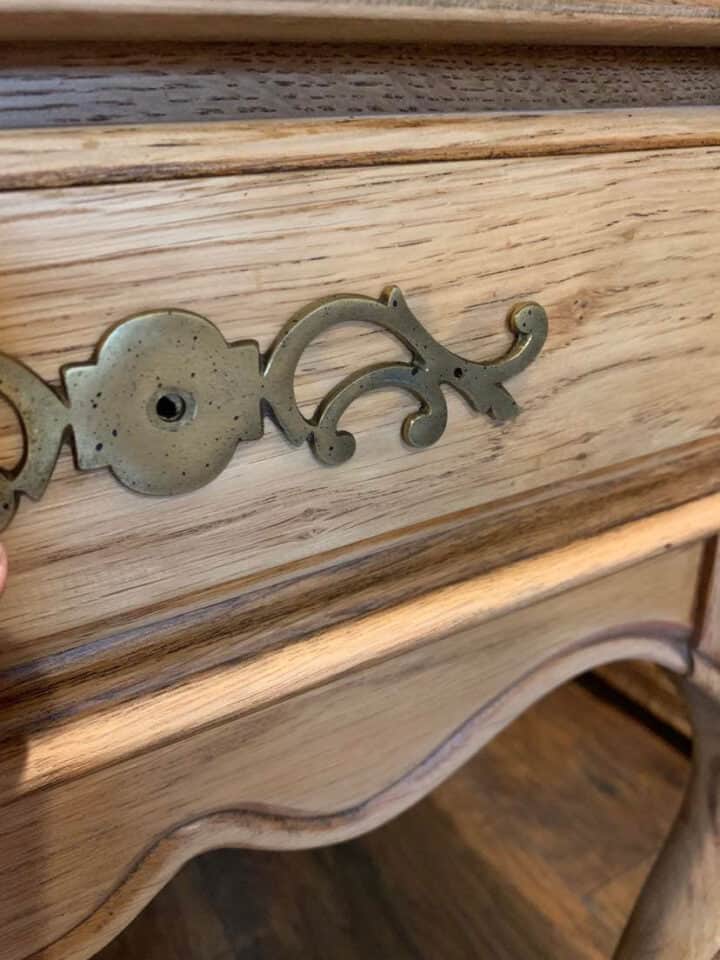
I had some black Rub n Buff leftover from another project so I applied that to the hardware. I did a light coating so you can still see a bit of the brass coming through.

The darker hardware gives better contrast than it did before. That was the last finishing touch for this desk makeover.
Here is the desk after.

Here’s a before and after, side-by-side shot of the desk makeover. So much better, right??
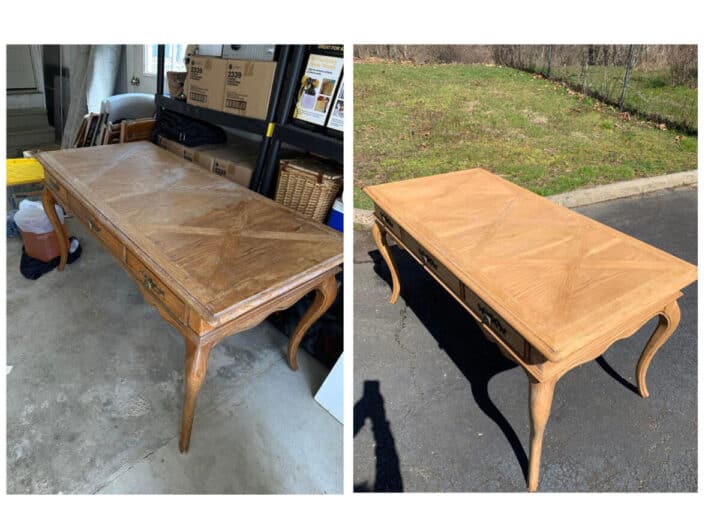
I really love the inlaid wood on the top and the curved legs. It’s a beautiful piece.
This will likely be going into my antique shop eventually. It’s a large desk and sadly I don’t think I can find space for it here. It has a large work area on top which will be great for anyone who has space for it!

Beautiful lines on that desk! Love it in its natural woodtone. Great job on refinishing it.
Great makeover, love that beautiful desk.
That looks gorgeous!
What sandpaper grits did you use? Looks grear.
Hi Dawn, I forget which number the grit was, but I used the most abrasive I had for most of it and finished with a fine grit when I had it stripped to smooth it out.
It really is lovely. Nice job.
Fantastic job, it looks beautiful just as you did it.
Great work, wonderful result! Thanks for sharing.
Beautiful job, and a lot of work.I have had great success neutralizing orange tones with a dry brush gray stain.