Upcycled Hutch Makeover
Upcycled Hutch Makeover: This outdated hutch got a new look with chalk paint. The shelves were stripped down to the natural wood for contrast using several different methods.
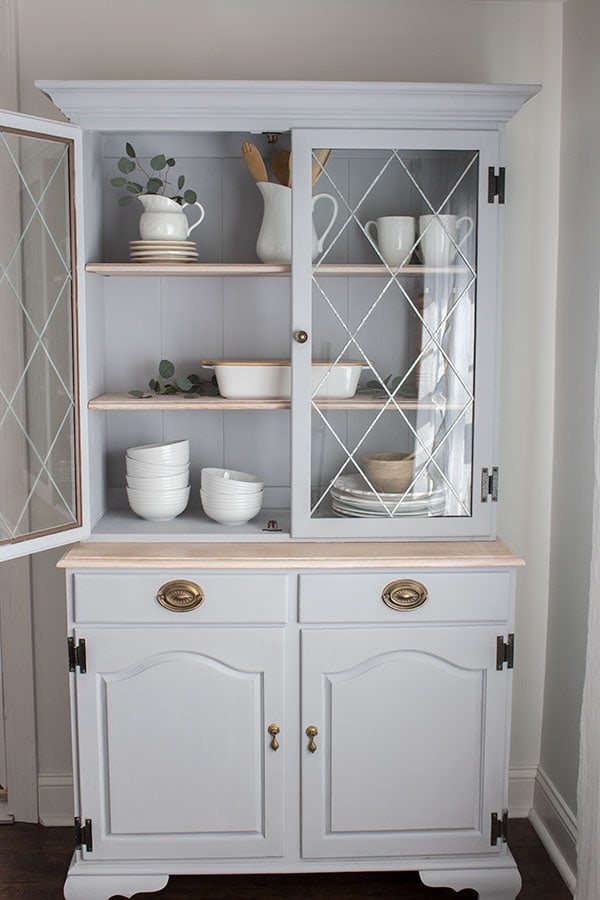
Facebook marketplace is my new go-to for furniture these days.
About two months ago I found a hutch on marketplace that caught my attention. I had been looking for one to use in my family room to replace my small sideboard. I figured a hutch would give me a little more storage space by taking advantage of vertical space. The spot where I wanted to put the hutch is a little awkward so the dimensions had to be pretty close to exact and this one was. And it was only $45!
Here is a picture of it before I did anything to it. I picked it up from the seller’s storage locker. It was in pretty bad condition when I got it. I was surprised when we got it home and began cleaning it that one of the drawers inside was stamped “Ethan Allen”. Not a bad score for $45!
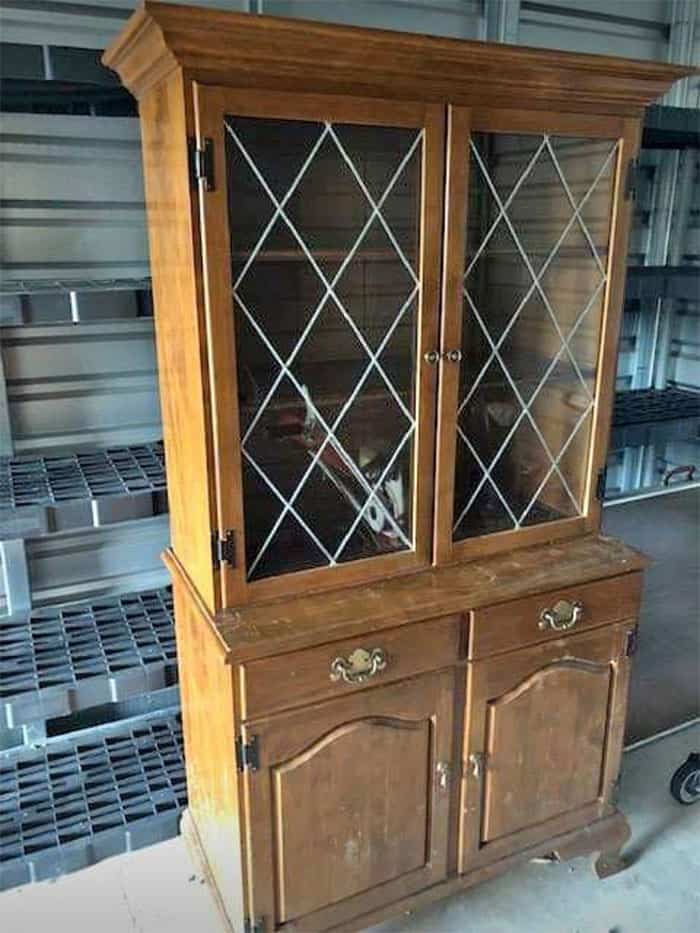
This hutch makeover took me far longer than I had anticipated but it was worth the effort.
My first thought was to strip the finish off of the entire hutch and make the whole piece unfinished wood. What I ended up doing was stripping only the shelves and painting the rest. I had never stripped a piece of furniture before so I tried several different methods to see what would work best. I was hoping to find a quick and easy way to do this, but I found there really isn’t a quick fix for stripping furniture.
Stripping Furniture for a Natural Wood Look*
First I tried something called a soda blaster that I borrowed from a friend. It’s just like a sandblaster but it uses baking soda instead, which won’t damage the piece you’re using it on. I’ve heard it’s often used on boats and cars.
While this method did work, it was a lot of work to set up, it only worked in spurts, and the baking soda needed to be refilled often. It attaches to an air compressor and requires tons of baking soda to get even small areas done. It also leaves a mess of baking soda all over the place.
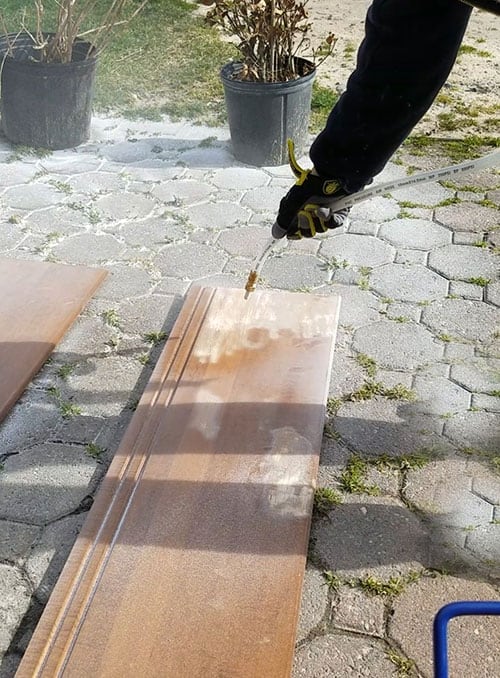
I quickly realized that this method was not preferred so I moved on to a chemical stripper called Zip Strip. This also worked but is a little time-consuming and labor intensive. I applied the chemical as per the directions and scraped it off with a spackle knife. I followed up with a palm sander. This did give me the finish I was looking for. I’ll do a more detailed post on this process when I share a dresser makeover I’m working on now.

After I sanded the top of this (and the shelves which I didn’t take pics of) I applied a light coat of this cerusing wax to give it a very light, white-washed finish.
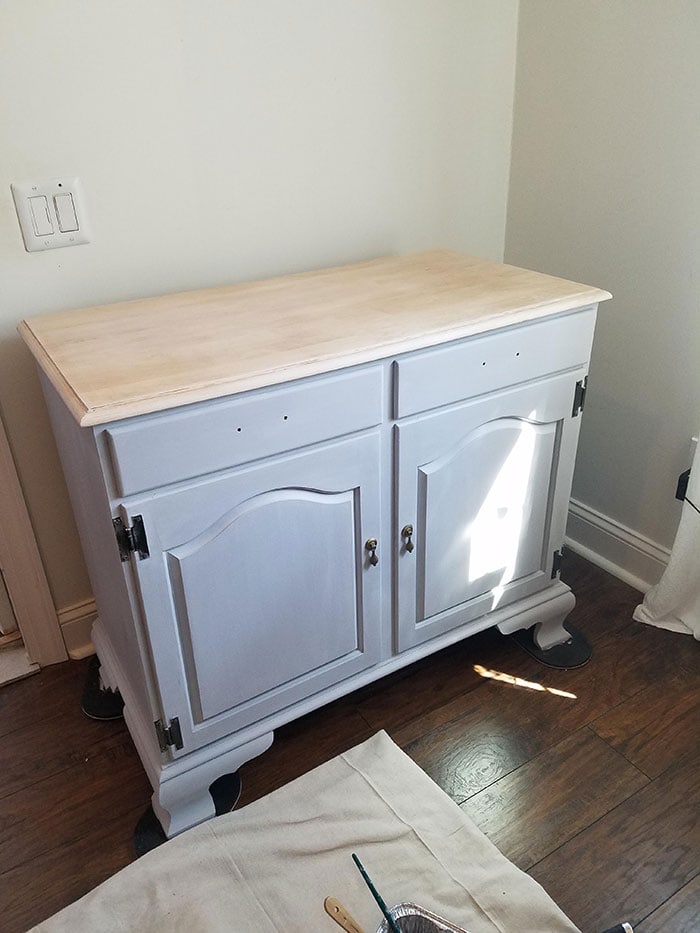
Painting the Hutch
After I finished up with the shelves, I painted the rest of the hutch with chalk paint in Paris Gray to match the table I have in my small dining nook. For more detailed information on how to use chalk paint check out my ladder back chair makeover. When that dried, I added a coat of the clear wax to protect the finish.
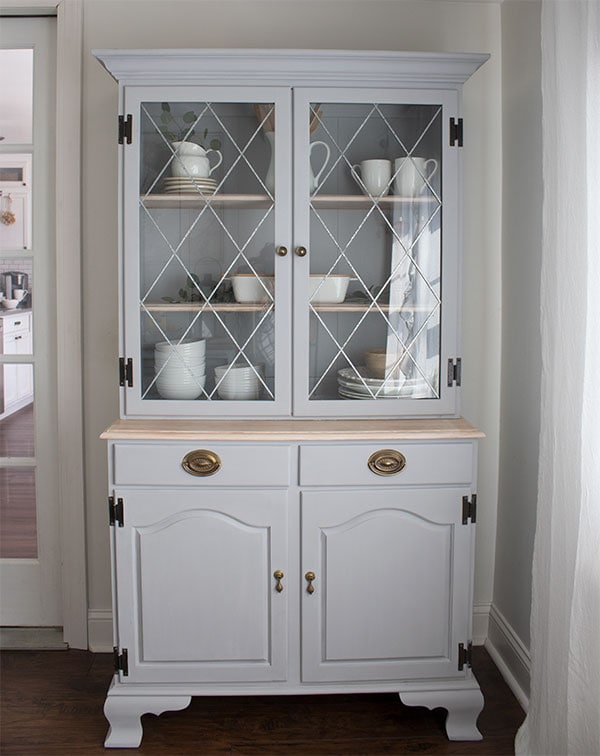
I didn’t like the existing drawer pulls this hutch came with so I switched those out with these bail pulls. The borings on the bail pulls were in the exact same spot as the existing holes from the old pulls so that was a quick and easy change.

When I found this hutch on marketplace I wasn’t really sure that I loved it, but now that it has a new look I’m happy I went for it.

It’s also fun to style with my white dishware.
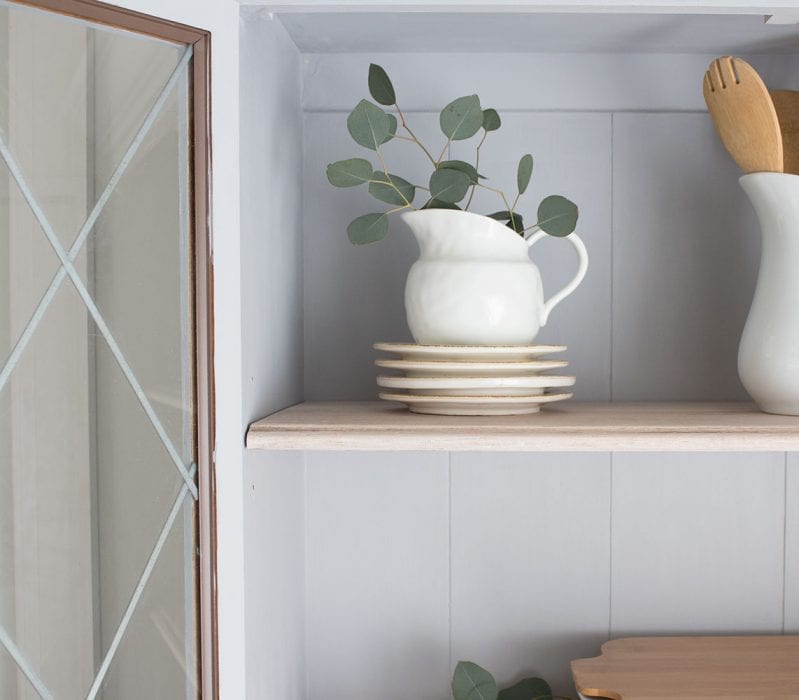
Though this hutch has modest dimensions, it offers a ton of storage space both above and below.
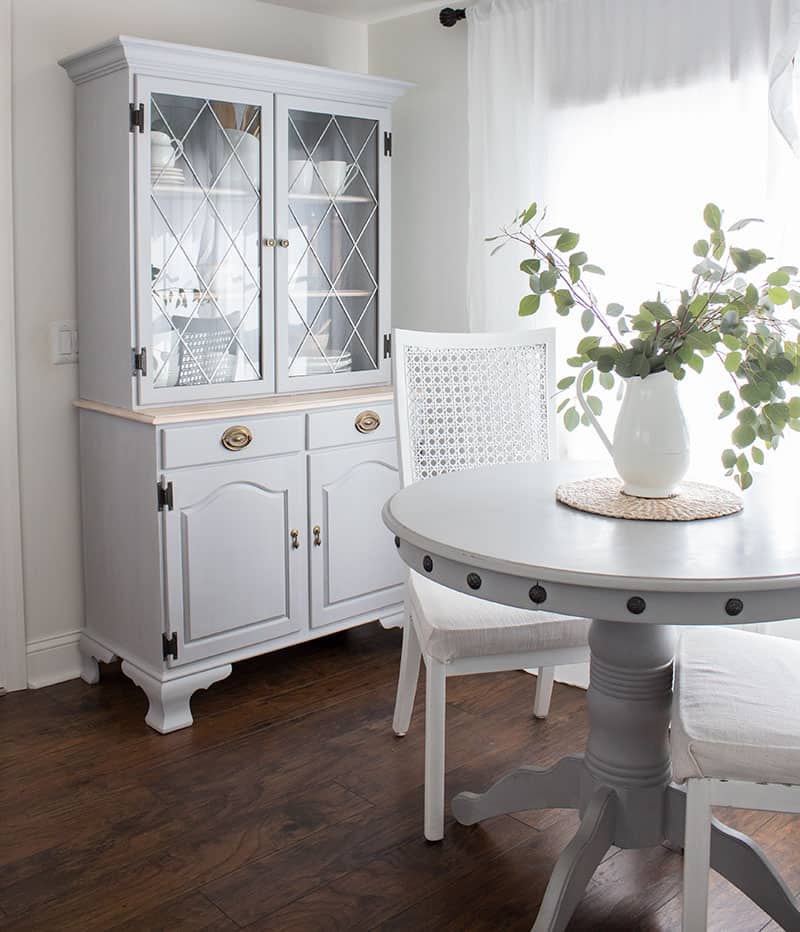
Even with the cost of the chalk paint, chemical stripper, and the new drawer pulls, the total cost still came in under $100. I most definitely couldn’t have bought a new hutch for anywhere near that price, especially one from Ethan Allen. There was another thrifted hutch I was looking at that was over $600 but I definitely couldn’t justify spending that much and I’m glad I didn’t!
If you like your furniture makeovers to look more weathered, check out this post on how to distress furniture. I shared several different techniques in that post so you can see which one works best for you!
Pin It:

*This post may contain affiliate links, you can read my full disclosure here.

So pretty, you did an excellent job!!!
Thank you, Catherine!
Hi can you Share the brand of Paris gray you used ? And possibly link it?
I love seeing old pieces updated with new ideas. It is exciting to see them come back to life in this décor with painting things. I am one that loves to redo old pieces. You did an amazing job with adding all the new hardware, too. I redid a cabinet white and did all white pieces inside. Something about white just makes it so clean looking. Loving the new look! Always a ton of work, but so worth it when you are done and able to enjoy. Nice job!
Thank you, Lynn. I always love the all-white look and that was my first thought for this hutch but I decided to try something different this time!
Amazing transformation from sad to happy hutch! Happy spring, Kippi #kippiathome
Love the smaller size (small homes unite!), and love the light color top with the gray paint. Beautiful pulls, too, Roxanne! Hope you will come and link-up at Homestyle Gathering tomorrow!
You got a great deal and it turned out beautiful! Good call changing out the early American drawer pulls, now it looks more Duncan Phyfe style. I love FB Market, so addictive!
Thank you, and yes it is addicting!
I just bought a hutch really similar to yours from Marketplace last week for $45.00 isn’t that strange. I was thinking painting mine a soft yellow and maybe wallpaper the inside BUT I really like yours so I am having to rethink it. You did a beautiful job it looks wonderful in your dining room just gorgeous
Thank you, Diana! Best of luck with yours!
Great makeover. I love paint and stain together on furniture. Colors are so good too.
Great find Roxanne. It looks so light and bright now. Well done.
This is such a beautiful furniture makeover. I especially love the soft color of the wood which compliments the painted portions.
That turned out gorgeous. Great job.
I love the transformation. And the colour choice was on point. 👌👌
Thank you!
I LOVE this makeover! And who even knew there was such a thing as a baking soda sprayer!? I’ve really been into the two-toned stain and paint look, and the light wood with the light gray is great 🙂
Thank you, Nicole!
There is an elegant softness to the old hutch now. The entire room where you have it on display is quite unique and lovely. Did you also redo the table?
Thank you, Diane. Yes, I painted the table in the same color as the hutch.
So very lovely, great job. We have a home full of family furniture . . . the real wood kind from days gone by. I would love to refinish some of these pieces for a freshened up look, but my husband wants things left as they are. He is not a painted furniture fan. Here is to hoping he gets called for an extended business trip, work furiously to refurbish a piece handed down from MY family and see if he even notices when he returns. Any bets on whether he notices . . . HINT – i use these opportunities to clear basement. He never notices. Wish me luck.
Hi!
What an amazing makeover!
What was the size/NumBer of the papersand that you used for the tOp?
Thanks in advance
Hmm, it’s been almost a year since I did this makeover, I don’t remember now!
What brand of the clear coat wax did you use? has it caused any yellowing? I am looking to change my grandma’s hutch with a light color. I have read that the clear coat finishes can cause yellowing and I will be using white.
I used the Annie Sloan clear wax on this but I also love Fusion Mineral Paint’s Tough Coat.
What brand of chalk paint did you use? I love the color.
It was the Annie Sloan brand.
Hi! I have the same hutch that is in perfect condition but I am thinking of REDOING it fir a mice to our beach house. I am terrified to attack a piece of furniTure that I saved and wanted do badly (and is in perfect CONDITION) . I love beachy painted furniture in prrtty colors and your pist and picture is making me think about it! If you have any advice with thIs specific piece of furniture I would be interested!
Hi Bonnie, I think the entire hutched stripped down to natural wood would really look amazing in a beach style setting without being too over the top coastal!
Prior post…. sorry for the SPELLING problems… my phone is acting up… all caps and changing letters… frustrating
Please share the paint brand
The paint is Annie Sloan chalk paint.
It looks great! I got the EXACT same hutch from marketplace a few months! I haven’t decided the details of what to paint it. It’s going to be light gray, but I’m going back and forth if I want to paint the back part behind the shelves in white. Also, the knobs can be brought back to life in light gold by using Barkeepers friend and/or the pink cleaner (puddy form) to clean them. I initially bought new knobs, but they didn’t fit into the existing holes and that gave me the idea to polish the old knobs.