How To Paint Kitchen Countertops!
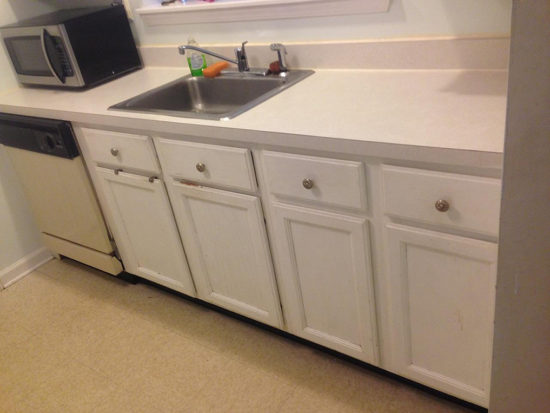
I’m finally making some progress on the kitchen makeover at my niece’s house! We still have a few projects left to do, but I wanted to share where we are at now. Several months ago we painted her appliances using a liquid stainless steel appliance kit. The results were so amazing, we decided to try their kitchen countertop paint kit as well. The company who makes it is called Giani Granite*. We chose the White Diamond kit because we both agreed we preferred the look of marble as opposed to granite. We had to modify the directions a bit to get that look because the kit is intended to replicate granite. As a reminder, here is a before of her kitchen I snapped with my phone. This is before we painted the appliances.
What you will Need for Counters:
Giani Granite Countertop Kit in White Diamond
Extra White Limestone Paint (5 or 6 extra cans)
Gray Paint
Paint pans and stirrers
How To Paint Kitchen Countertops:
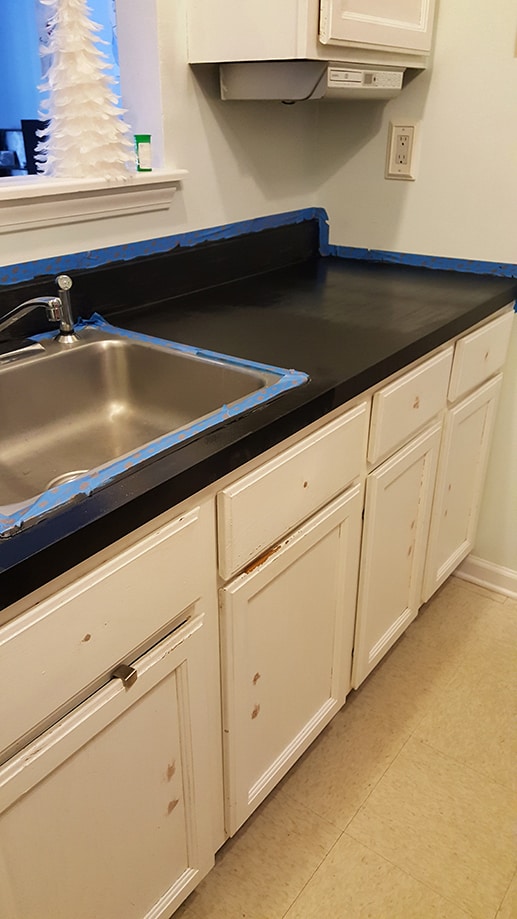
The first step is to prime the counters. The kit comes with a black primer and two little rollers. It is super easy to apply. We had also removed the old cabinet hardware and spackled it with wood filler, which is why you see the brown spots on the cabinet doors.
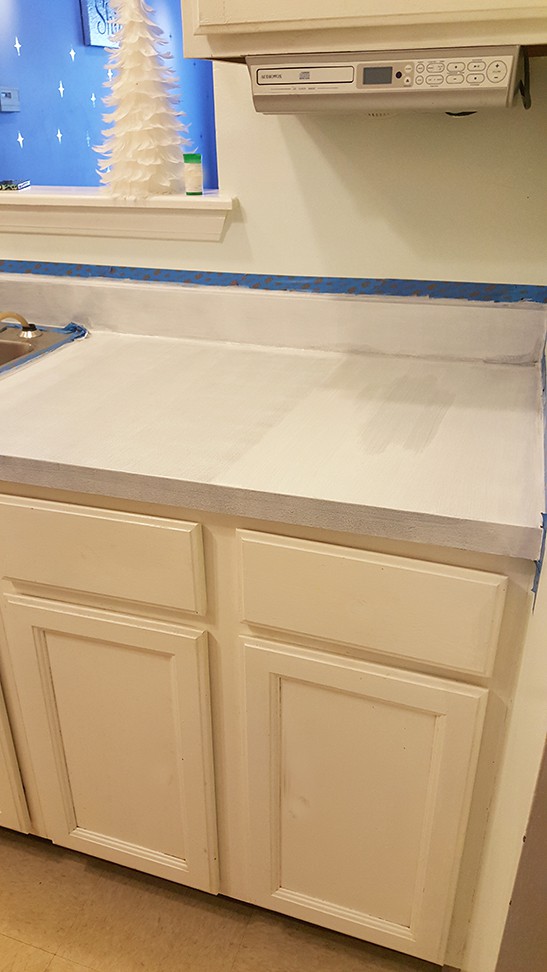
Once that was dry we used the white limestone paint next. This kit only comes with a small can of the white paint, so if you are going for the marble look, you will need extra of that. It took about 5 coats to cover up the primer. We wanted a super white finish for our background. This shot was after about two coats. (Notice the Christmas decor, like I said we started this kitchen makeover last year.)
Once we had our desired shade of white, it was time to paint on the veining. We used our own gray paint for this step, because the kit doesn’t include gray paint. The color we used is called Dark Pewter, it’s a Benjamin Moore color but my niece had it mixed at Home Depot in the Behr brand. We used a small artist’s type paintbrush to draw on the veins. We practiced on posterboard first to get the hang of it.
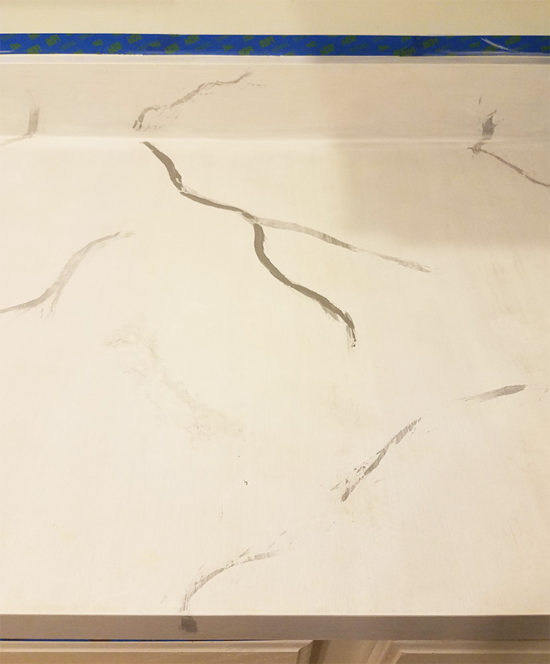
This part was fun and easy. We were careful not to get too carried away with the veining because we wanted a clean, simple look.
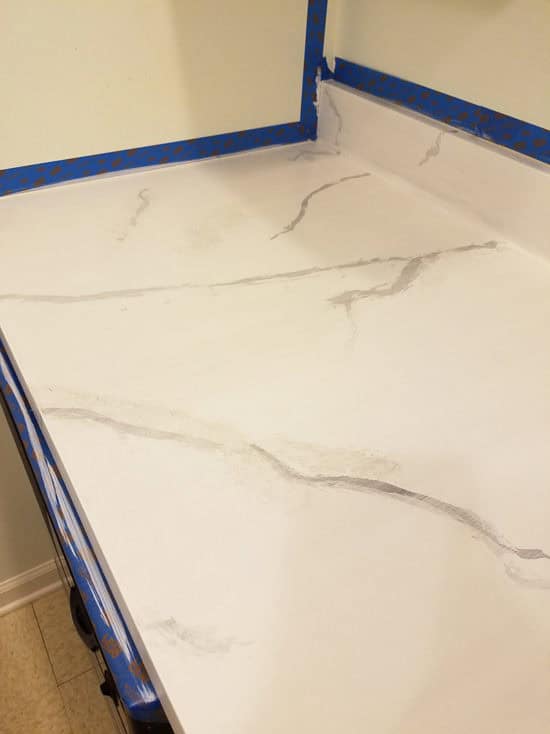
The kit comes with a pearl colored paint and a sea sponge. So for the next step, we sponged some of the pearl paint onto the counters to add depth and interest. When that was dried we sponged a little more of the white limestone paint as well.
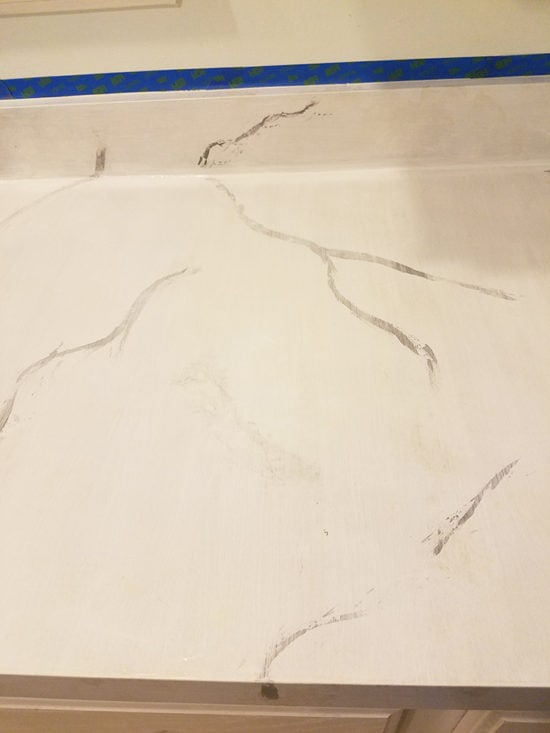
Once we were satisfied with the design we let it dry and then we applied the protective sealer that was included. It looked really good at this point so we called it a day. In the meantime, my niece had read some online tutorials for a DIY marble finish and decided she wanted to do another round of white paint and veining to give it a layered look. So we applied one more coat of white paint right over the sealer. Then we traced over some of our gray veining, but not all so some would be darker than others. After that, we lightly repeated our sponging technique. This time we also sponged on some more of the dark pewter gray paint that we had used for veining. It did give it a layered, more realistic look.
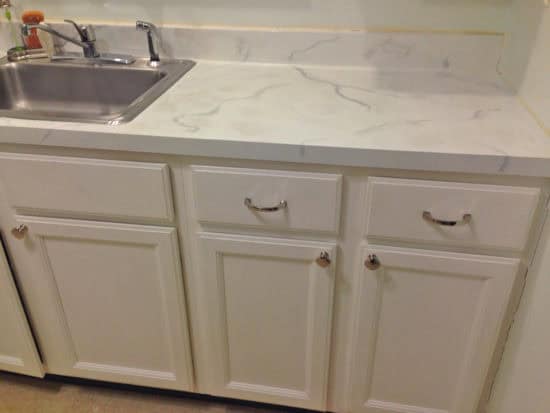
We could have left well enough alone and stopped there, but we decided to try out a glaze over top of the included sealer. My niece and I had read about another product (completely separate from the countertop kit) called Super Glaze. From what we read, it’s really messy to work with, but using it would result in a super high gloss glaze which we thought would make the counters look even more realistic.
What You will need For Glazing (Optional):
Superglaze kit** – 2
Disposable mixing bowl (we used bowls from the dollar store)
Plastic Spreaders
How to Apply the Glaze:
This part is not for the faint of heart. Whatever the super glaze gets on, it stays on so we took extra time to prep for this considering we had to do it right here in the kitchen. We read the directions several times before beginning. We covered everything in the kitchen with disposable drop cloths and painters tape before beginning, we even tented the sink area with plastic.
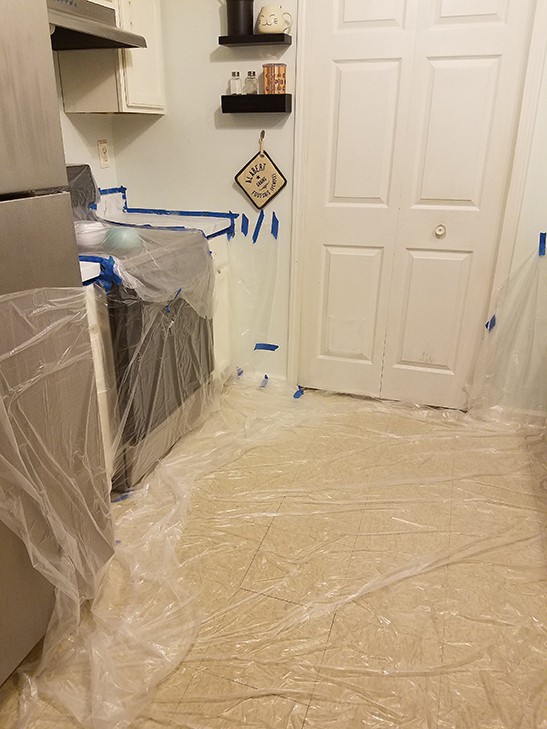
You need to measure part A and part B of the glaze before mixing. This is where the clear plastic cups come in. We drew lines on our cups with a sharpie to indicate 1/4 cup, 1/2 cup, and 1 cup. We used mixing bowls from the dollar store to mix the 2 parts together. You will definitely want to wear plastic gloves when using this stuff, it gets very sticky and is hard to wash off your hands. I found that out the hard way.
Once it was mixed as directed, we poured it directly onto the counters starting with the backsplash. We worked in sections and carefully spread the glaze all around. Some of it will run off the front of the counters, which is why it’s so important to prep carefully. Another thing we found out the hard way is that you need to keep spreading the glaze around until it starts to set! It could be two hours or longer. Not realizing this, we spread it until we were sure everything was evenly coated and then stopped there. It took a box and a half of the glaze to do the entire kitchen. Once it was fully set, we noticed it had separated in some spots, like little dents or dimples. Ugh!
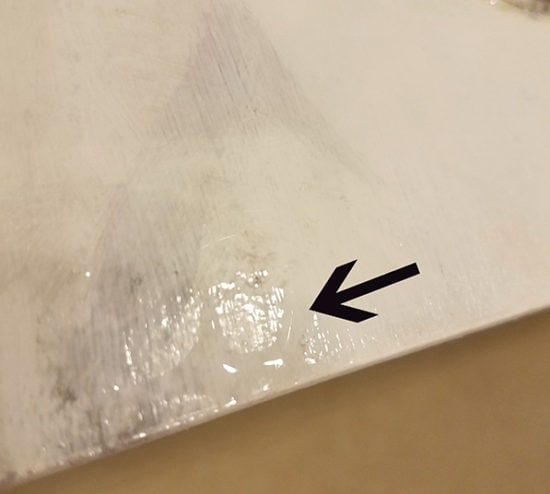
I was pretty horrified and wasn’t sure what to do to correct this. So we had to do round 2 to try and correct it. I started by lightly sanding down the trouble spots. Then we remixed what was left of our second box of glaze and patched these areas. This is how I discovered that as long as you keep spreading the glaze until it’s almost set, that you won’t have this issue. I wish I had known this to start with, it would’ve saved a big headache. If you do have this problem and have to redo it, make sure you use brand new spreaders so you get a smooth finish. Don’t ask me how I know that. Even with the issues, the glaze made a tremendous difference. It gives a really high gloss shine, almost like glass. It’s hard to see just how shiny it is in my photos. And honestly, because of our setbacks, it isn’t a perfect finish everywhere. If I had to do this project over again, I’m not sure if I would use the glaze again.
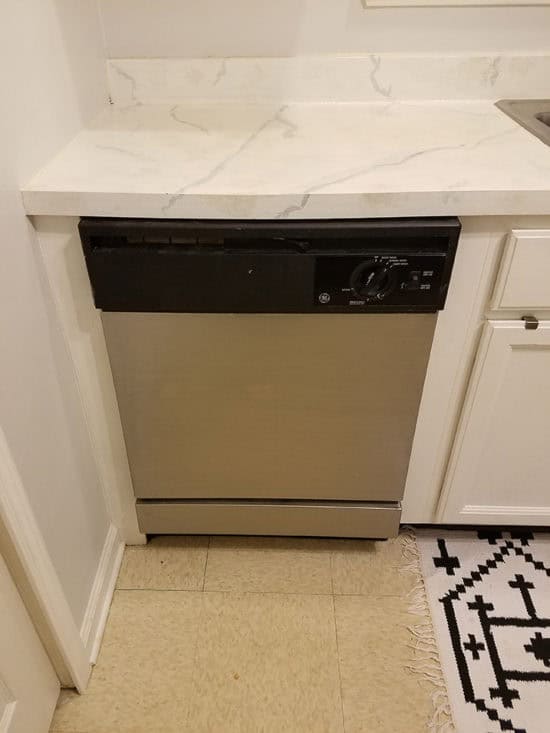
We also repainted the cabinets because they were looking dull next to the counters. We were going to use Super White by Benjamin Moore but when my niece went to have the paint mixed the guy suggested using the untinted base paint for a pure, bright white and I have to say it looks great! We also replaced the old cabinet hardware with new knobs and pulls courtesy of Amerock Hardware* and Wayfair. Aren’t these knobs and pulls pretty?
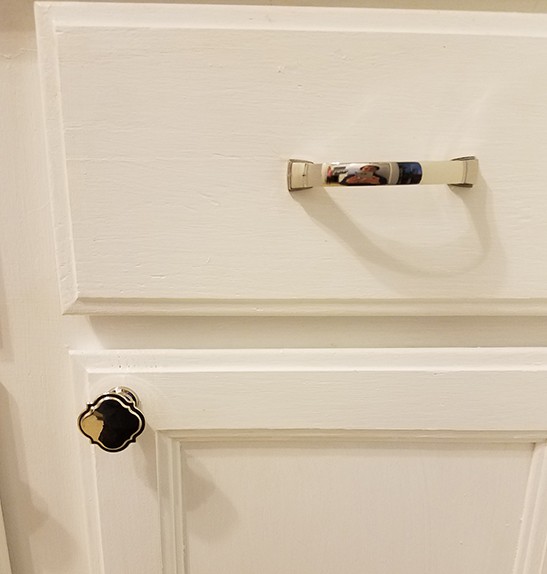
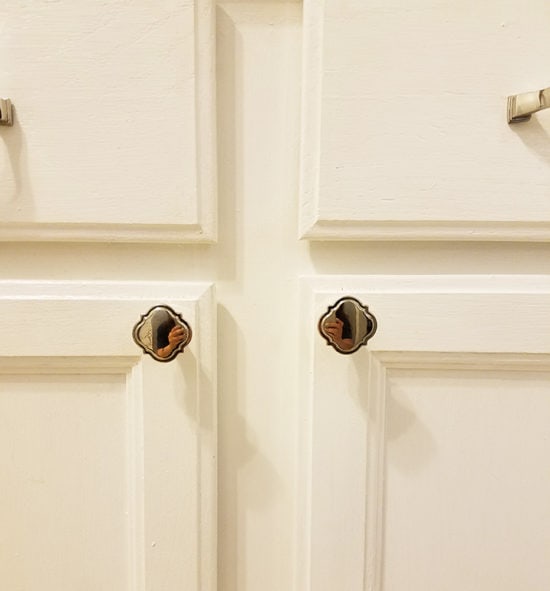
We just got around to repainting the walls last weekend. I took these photos the day we painted them, which is why the outlet covers are missing. The paint was still wet in these photos.

The wall color is called Rhinestone by Sherwin Williams (which is the same color I used in my daughter’s room) and I knew it would look good but I was shocked at just how good. It perfectly compliments and highlights the cabinets, appliances and counters.
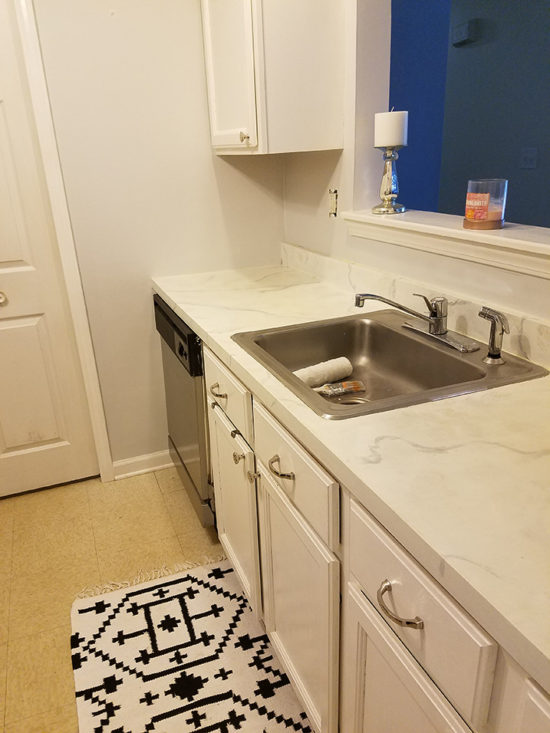
These counters took us quite a while to finish because of our issues with the glaze. As for the countertop kit itself, it was really easy to use and made a drastic improvement in the kitchen. I would highly recommend it! Here is another before and after (actually before and in-progress because we aren’t done yet) shot.

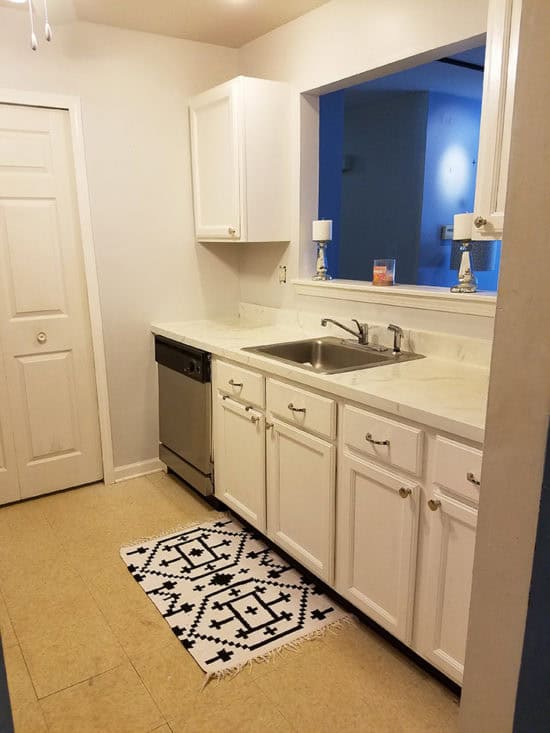
If you happen to prefer the look of granite counters, you can see how I helped my neighbor DIY granite counters in a similar way here!
On the other hand, if you are thinking about taking the plunge and investing in new counters for your kitchen you should read this post with everything you need to know before buying kitchen countertops.
Up next is painting the kitchen floors and installing the backsplash. We also need to repaint that door you see (which leads to a laundry room) to match the cabinet and trim color. I can’t wait to get my hands on those floors! (UPDATE: see how we painted the flooring here and how we installed the subway tile backsplash here!)
*Thanks so much to Giani Granite for sponsoring this post.
*Thanks to Amerock Hardware and Wayfair for the hardware.
**May contain affiliate links, you can read my full disclosure here.

Those counter tops turned out amazing. What a great idea to freshen up older counter tops. Very nice.
Thanks Marilynn, they will look even better once the rest of the kitchen is complete!
The new paint and the counters are looking fabulous! I can’t WAIT to see what you do with those floors. Great, great make-over!
Thanks Kim! I can’t wait to get started on the floors, I’m looking forward to that project the most!
Hello! How have these cOuNters held up?
Would you say you need a cooler white vs a warmer whiTe cabinet paint with the marble look countertops? I am in the process of painting my kitchen white. And want to use Ben MOore simply white, but am not sure now that ive seen This Pretty kitchen!
Hi Kristy, the counters have held up really well! Yes, I would go with a slightly cooler white on the counters. Good luck with your kitchen!
This post could not have come at a better time. I was thinking about repainting my old, dated cabinets and now I saw your post. Thank you so much for the tips!!!
Tina, I’m so glad, you will love it!
This looks professional! You did such an awesome job on everything! I think this may be a bit out of my league, lol!
We need to do this but it has ALWAYS intimidated me. You made it sound much easier than I thought. Thanks for the tutorial!
Love the counter tops! I would like to paint mine black. Do you think this black primer would work for that? Is it a very strong smell??
Love this! Can you do this to bathroom marble countertops? And tile floors?
You can paint floors, but I would recommend using a good sealer over them to keep from scratching. As for the marble counters, I’m not sure on that one, I would ask the manufacturer of the painting kit on that one.
If you rip a piece of a corrugated box and peel back the smooth part of the cardboard leaving some rough “corrugated” edges, you can drag them across a small area to create more realistic veining. Otherwise, I really like everything else you shared.