How To Install Subway Tile

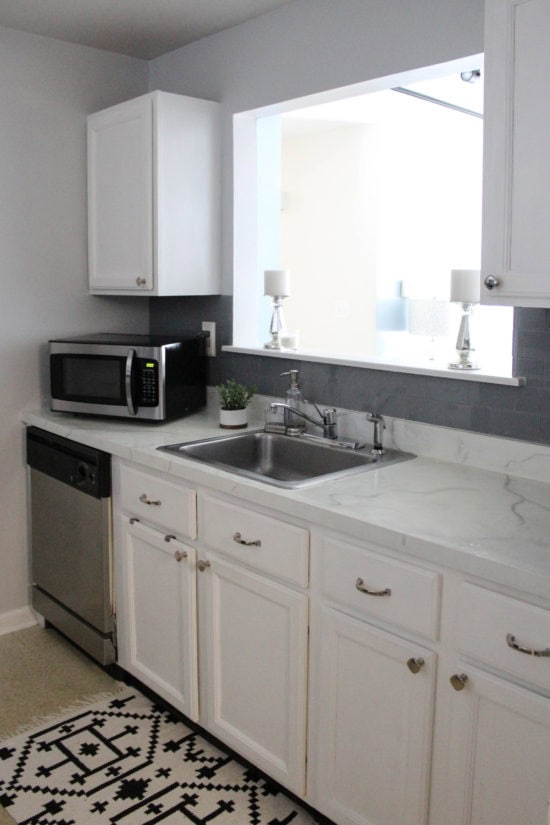
I know it’s been awhile since I’ve shared any progress on my niece’s kitchen makeover. I’m trying to enjoy summer while it lasts and that has slowed down projects over here, but I do have a progress update for you today. We have installed the backsplash tile and I couldn’t be happier with it. I have one more project to complete in here but in the meantime, I wanted to show you how to install subway tile.
Materials Needed:
Tape Measure
Straight Edge (aka Rafter Square)
Caulk
Quarter round molding
Marker or colored pencil
For this backsplash we used peel and stick glass subway tile from Aspect tiles (DIY Decor Store), though the process is the same whether you are using glass tiles or ceramic tile. If you are using tile that is not the peel and stick kind, you will pretty much install it the same way except you will have to add mastic to the walls before pressing the tiles on and you will grout after the mastic is set. The peel and stick save time, money and mess.
How To Install:
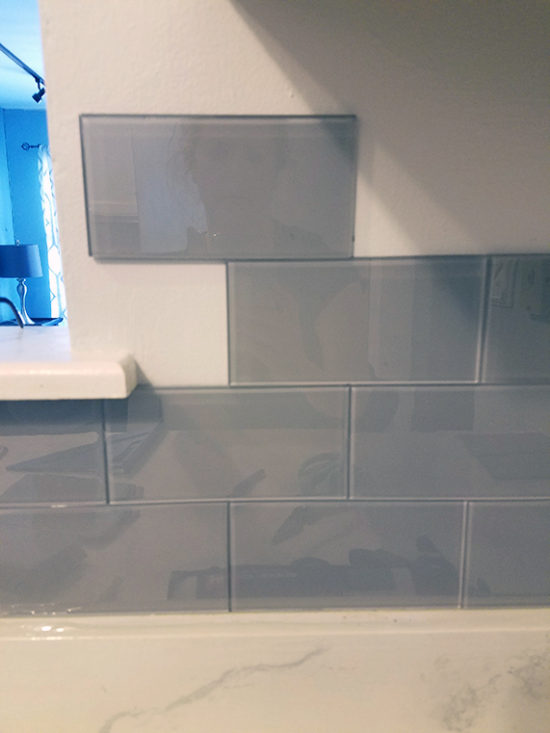
To begin, we decided to start from the bottom and work our way up. I believe the way professional tile installers do it, is to start in the center and work their way out. We decided if we worked from the bottom up, the cut parts would be less visible under the cabinets. We used the laser level to be sure everything was straight.

We staggered each tile as shown, working from the center out so cuts would be on the ends.
Although you don’t need any mastic with the peel and stick tile, it is recommended to use a little construction adhesive on the back of each tile, which we did. To make our cuts we used a wet saw. My niece lives in a condo so we set up shop right on the grassy area near the parking lot. My friend Diana (who knows how to use a wet saw, and is really good with it!) came over to help us. So us three girls spent the afternoon cutting tiles in the middle of the development. We got a few funny looks from people passing by. Here is my niece using a wet saw for the first time. Isn’t she cute?
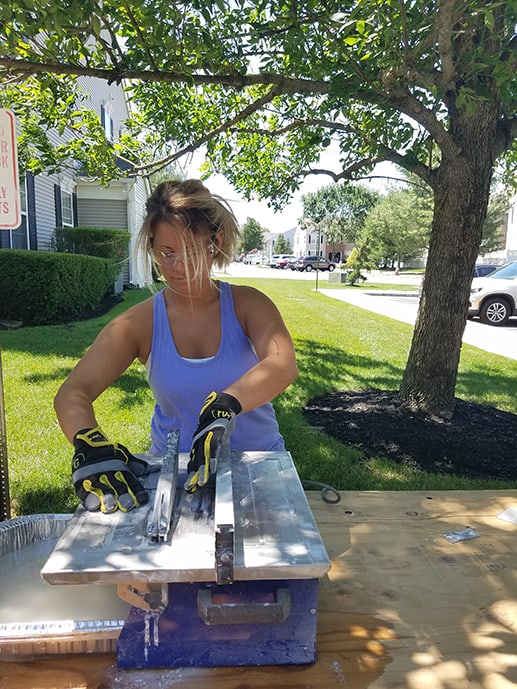
How to Cut Tile
First, figure out the dimensions you need to cut off of the tile. For straight cuts it’s really easy – just mark your tile with a marker and a straight edge, adjust the wet saw guide and make your cut. Wear safety glasses and gloves when using the saw. For non-straight cuts such as L shaped cuts around outlets, mark your tile where it needs to be cut. When using the saw for these, you have to cut free hand without the guide. Make the first cut and then remove the tile, rotate it and make the next cut.
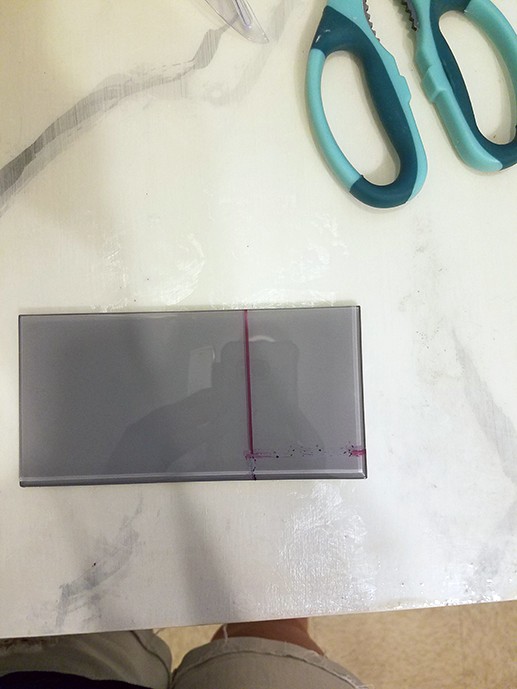
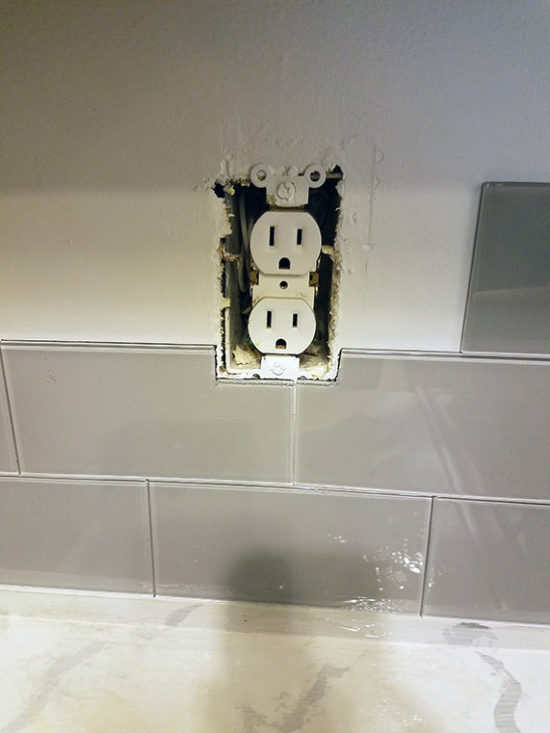
Here are two tiles Diana cut to go around an outlet.

Look how perfectly they fit! Diana did most of these cuts because she’s so good at it.
On the stove wall, we worked the same way – from the bottom up.

With the three of us working on this we were able to install the tile in only a few hours, and we had fun doing so! We plan to add quarter round molding around the edges since we didn’t need to use any grout, but that is optional.
I have one more project to tackle in this space before it’s officially finished and that’s going to be a floor makeover. I’m planning to paint them and this is the project I’ve wanted to do the most of all in this space so I saved it for last. As a reminder here is what we started with and where we are now.
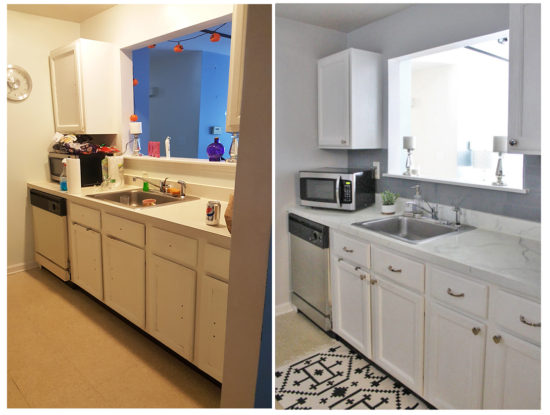
You can see how we painted the appliances here and how we painted the countertops here and how we painted the flooring here.
Thank you to DIY Decor Store for supplying the tile for this project.
*This post contains affiliate links, you can read my full disclosure here.
You amaze me and your do-it-yourself attitude! Looks great with the painted counter tops!
Thank you Cindy!
Love it so much!
I’m so glad!! Your dining room is next!
It’s simply amazing. I just love your tutorial. Thanks for sharing.