How To Make A DIY Rag Garland In 3 Easy Steps

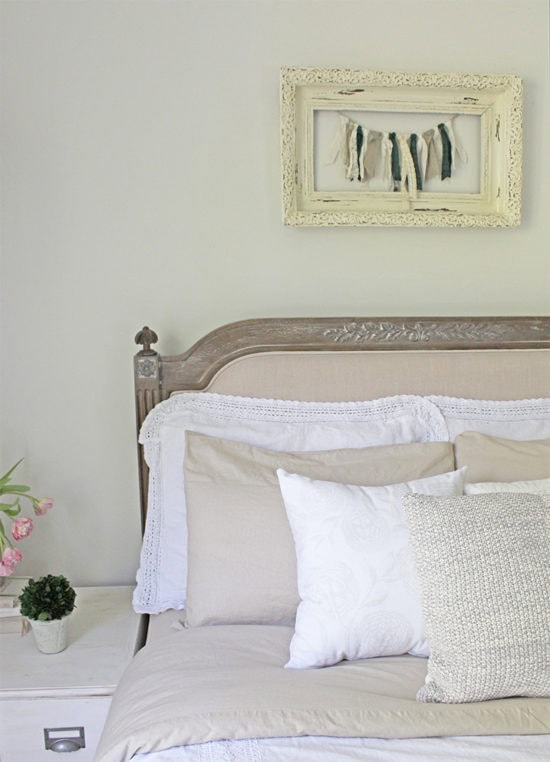
Happy Memorial Day! A few weeks ago I shared my daughter’s bedroom makeover. There were a few DIY projects I completed in that six weeks that I just didn’t have time to share during. One is the DIY rag garland over her bed. As I mentioned in that post, the wall decor I picked for over the bed was on backorder and didn’t arrive in time. I had to improvise at the last minute. I ended up pulling a frame off my bathroom wall to use here temporarily.
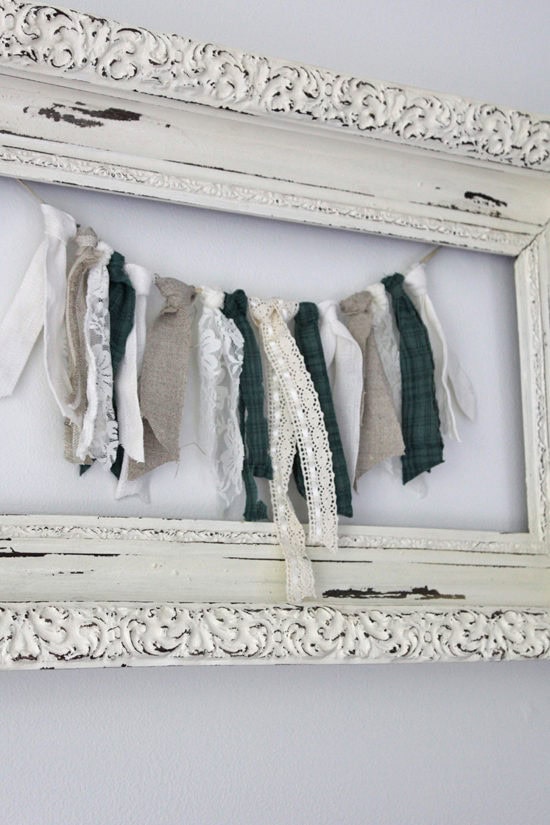
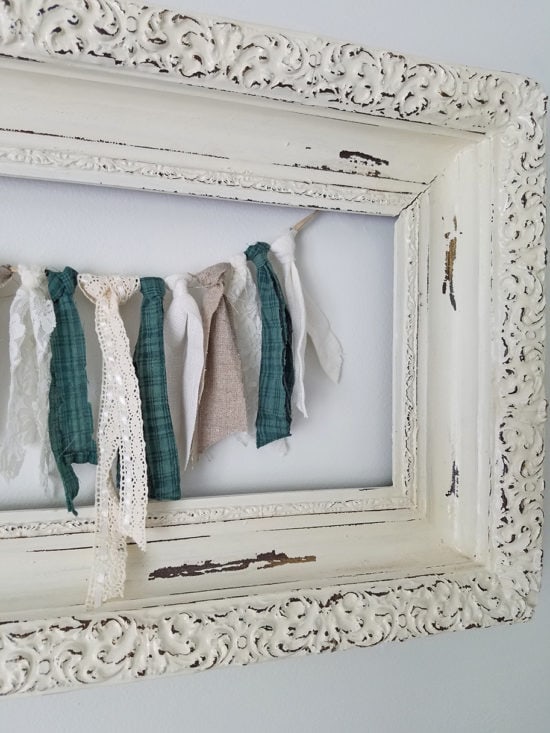
It’s a beautiful frame, but it looked a little empty on its own. If you regularly read my blog you know I love little banners and garlands. For this space I decided to try a fabric garland. I have a basket of scrap fabrics and ribbon that was just what I needed for this project. By making the rag garland banner, I was able to incorporate the colors of the room including a little green to echo the sliding barn door as well as more texture, which this bedroom is full of.
All that you need to make this is a few scraps of fabric and/or ribbons and a string. Twine would work, but I had this stretchy suede string* so that is what I used. First, lay out your string across the table and determine how long you want your fabric pieces to be. Once you determine that number, double it. I wanted mine to hang 6″ from the string, so I cut them each to a length of 12″. I didn’t measure the width, I kept that somewhat random.

Next you tie each strip of fabric onto the string forming a knot. You can see below exactly how I tied mine (forgive the weird lighting, I did this project one night when I was in a panic that my bedroom makeover wouldn’t be finished in time). 1. Fold your fabric in half, place it under the string and fold the bottom half up over the string, to the right. 2. Bring the two bottom pieces through the loop and pull until it forms a knot. It looks simple, but it actually took me a few tries to get the hang of this.
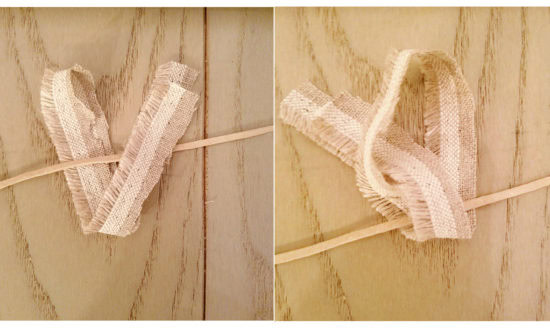
This is how it will look. This is the back of the knot, once you have all of your fabric pieces on your string, just flip the entire banner over. I recommend not making the knot so tight that you can’t slide it around on your string. Once you have all of the fabric pieces on, you may want to adjust the placement of your fabric pieces a bit.

You can also trim the ends of the fabric if desired once you have them all in place. I trimmed mine so that it was longest in the center, and gradually got shorter toward the outside.

Although I didn’t have my chosen wall decor in time for the deadline of this room makeover, I think this worked out pretty well.
Especially because I was able to add a little bit of green to go along with the sliding barn door we built for the space.
A rag garland would also be good for holiday decor because it’s easy and inexpensive to make. Just incorporate holiday colors into the mix.
*This post may contain affiliate links, you can read my full disclosure here.
I love garlands like this because they add such a nice touch of color and texture. Plus they’re just fun to make and display 🙂
Thought you might like to know that the knots that you tied are called Larks Head knots. Or, if you pulled the ends through from the front, instead of the back, they are call reverse Larks Head knots! I prefer the reverse Rlh knot when working with fabrics, doesn’t look like a man’s tie. I love what you did! I macrame and I’m trying to learn new things. Thanks for sharing!
My 9.5 year old granddaughter is finally getting a big girl bedroom. My daughter just bought them their first home. She is wanting sage, Creme, aqua, sky blue, and a teal color scheme. I have the perfect antique frames and the knowledge and the know how to make her a beautiful headboard piece of art!