DIY Spring Banner with the Cricut Explore Air 2
If you are wondering what in the world a Cricut Explore Air 2* is, or how exactly it works, let me explain. Cricut is the brand that makes this handy little machine that is pretty cool for DIY’ers and creative types. Think of it sort of like a printer, but it does SO much more. It’s a customizable printer and a laser cutter. You can make your own designs in the Cricut design space or explore the hundreds (maybe thousands) of ready-made designs, which you could also potentially customize.
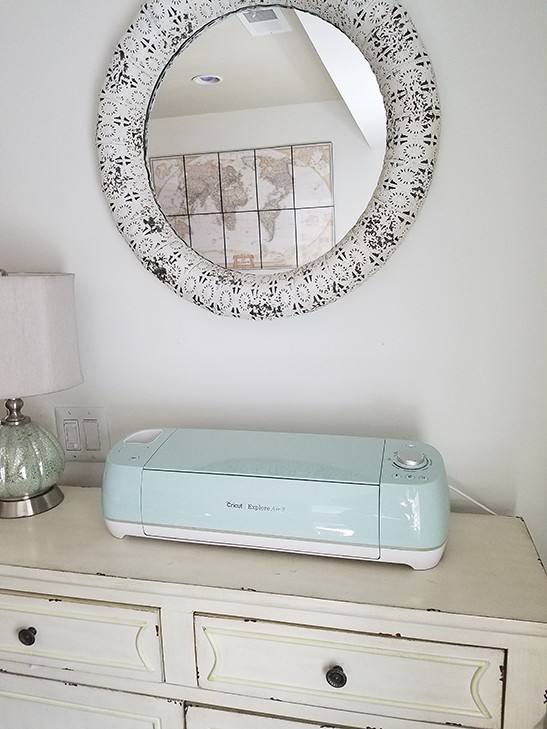
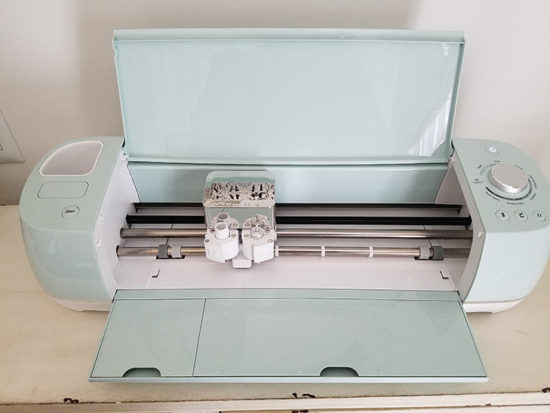
I was fortunate enough to receive one of these machines from Cricut. Isn’t the color pretty? In fact, it blends right in with my decor. I had never used one of these machines before this project, so I began by watching a few how-to and getting started videos. The machine opens and inside is where you can insert pens for writing. The bottom portion opens up for storage, which is really convenient for storing the Cricut accessories.
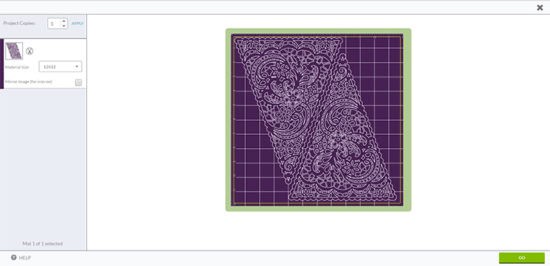
To begin, you can make your own designs in the Cricut design space. The Cricut design space is a dashboard with several options. One option is creating your own designs within the dashboard (think of it sort of like Photoshop). Or you can explore the hundreds (maybe thousands) of ready-made designs, which you could also customize to your liking. After a little research, I was ready to get started. I chose a premade banner desgin in the Cricut design space for my first project.
This one didn’t require any writing on it, just cutting, so I didn’t insert any pens into the latch. Once I had my chosen design open in the dashboard, I loaded my paper into the machine and hit the go button.
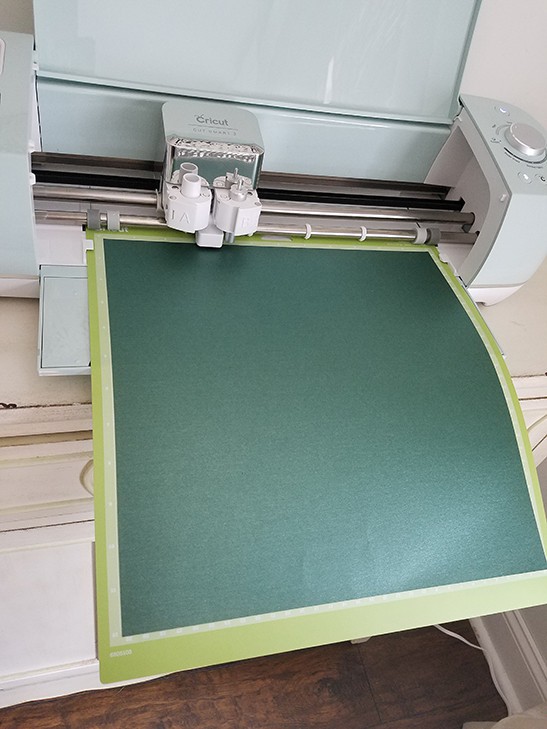
It is amazing how this little machine makes all of these precise cuts. I was really pretty fascinated by it to be honest. On the first green paper that I loaded above, I had the dial on the wrong setting so I screwed that one up. It still cut, but not deep enough, so I had to toss that one. You can use a variety of materials in the Cricut machine. You simply switch the dial to whichever material you are using for that project.
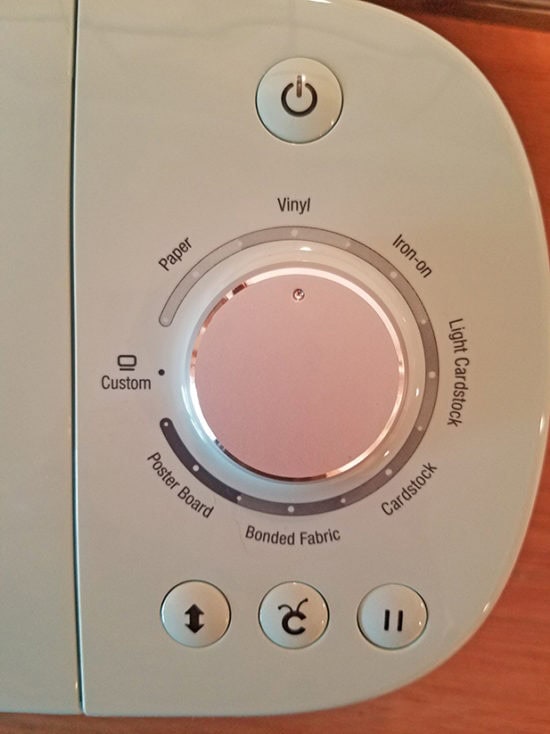
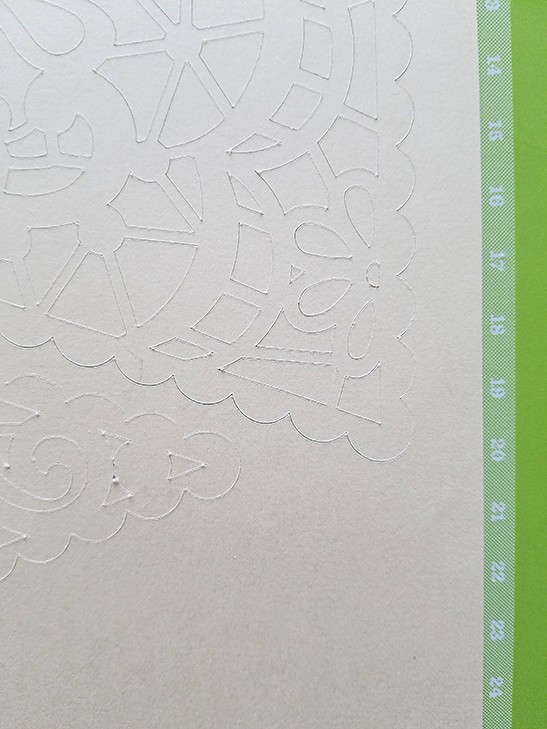
Once I had my dial on the correct setting, the results were amazing. I can’t believe a machine can make these intricate cuts.
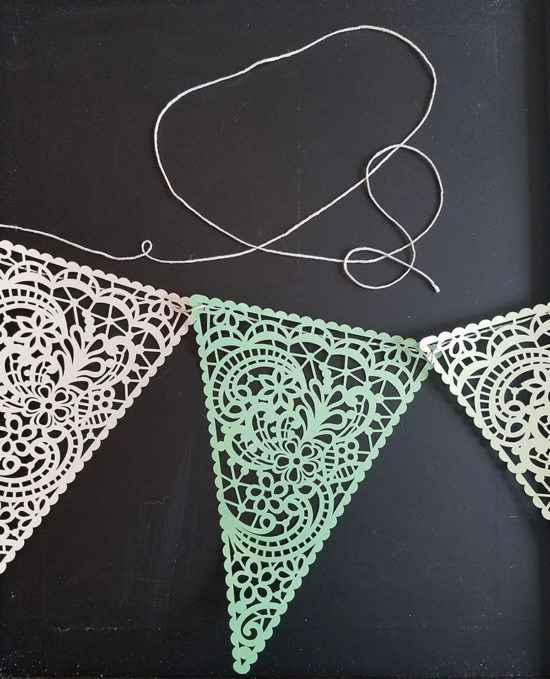
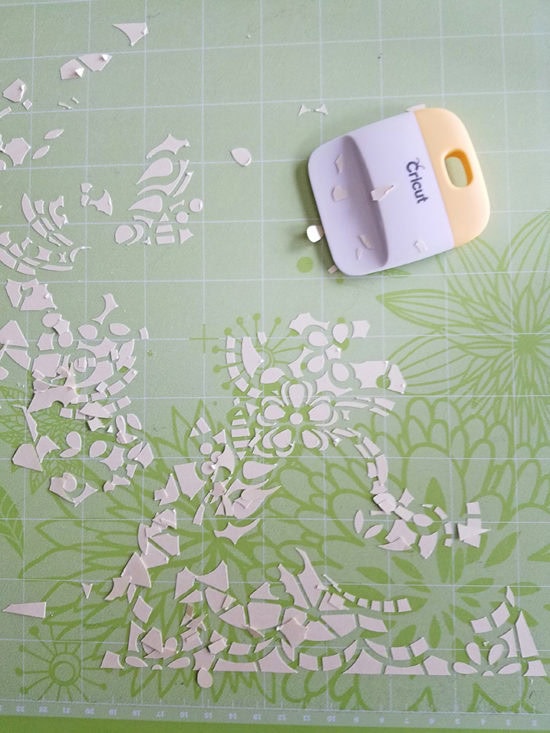
Once the banner was done, I just peeled the paper from the mat and all the little bits stuck to the mat, super convenient and easy! To dispose of those bits, I used the scraper tool and scraped them right into the trash can.
It did take quite awhile for the machine to cut these. It made two banners per sheet of paper and I’d say it was about 10 or 15 minutes for each sheet. Totally worth the wait of course!
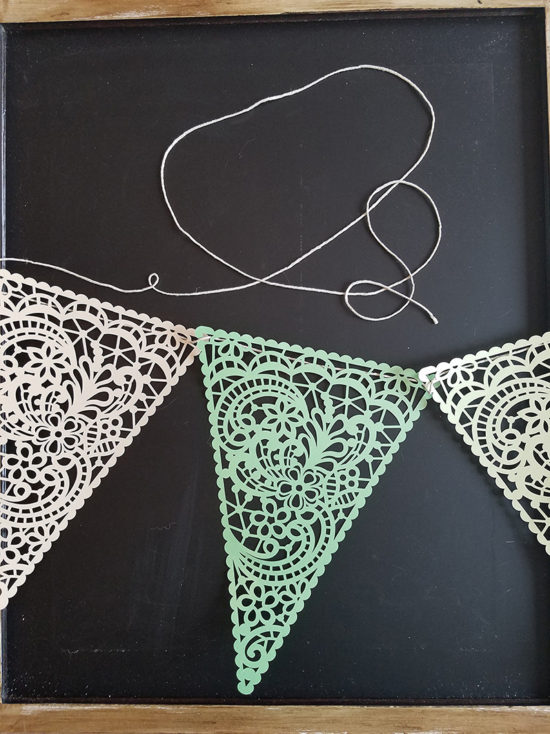
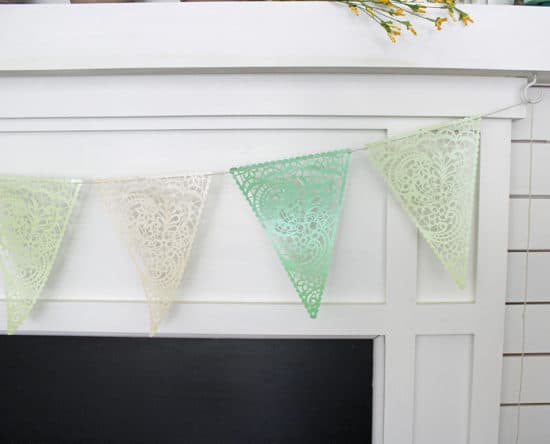
I used soft colors for my banner so I can hang it on my mantle for spring, I’m still working on the finishing touches. I’ll be sharing that next week (along with a group of my blogging friends) so be sure to stop back for lots of Spring decorating inspiration.
In the meantime, I’ve already started on my next Cricut project. The Cricut Explore Air 2 would also be an amazing tool for making wedding favors and party decorations. I went to a wedding recently and I noticed the place cards and a few other decorations that the wedding planner put together were likely made with one this these machines. The creative possibilities are really endless, I’m kind of hooked on it now! You can find out more at Cricut.com.
This is a sponsored conversation written by me on behalf of Cricut. The opinions and text are all mine. This post contains affiliate links, you can read my full disclosure here. Comments submitted may be displayed or featured on other websites owned by Cricut.
That’s amazing.