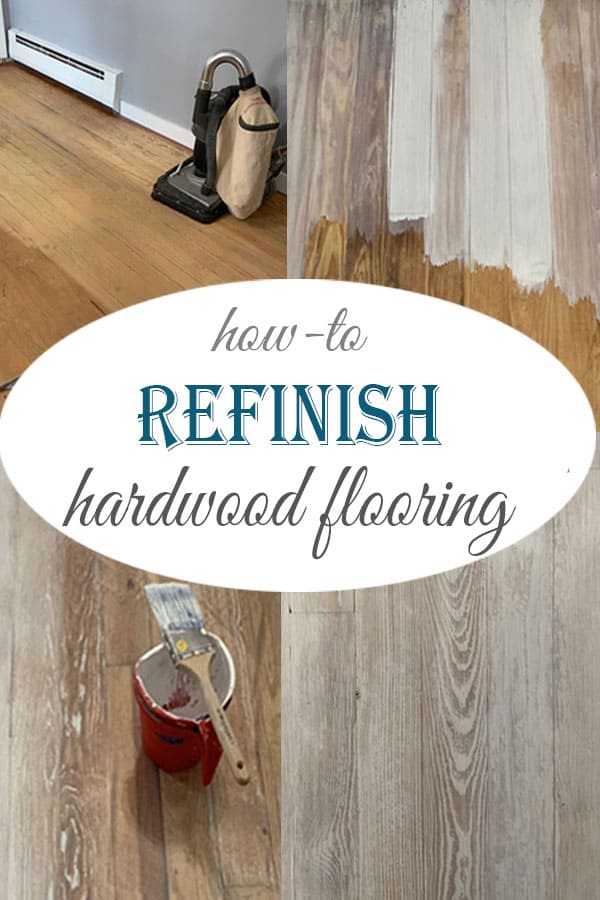
Wood Floor Refinishing and Whitewashing
WOOD FLOOR REFINISHING IS A DOABLE DIY PROJECT THAT CAN SAVE YOU THOUSANDS. WE STAINED OUR FLOORS TO GIVE THEM A WHITEWASHED OR PICKLED LOOK WITH GREAT RESULTS!
You guys, this post is a long one, so get comfortable!
Refinishing and whitewashing hardwood floors can transform a dated space into a bright, stylish room. In this post, I’ll walk you through my first hand experience tackling this DIY project. I’ll share the tips, challenges, and lessons learned to help you achieve beautiful results in your own home.
First, a little back story. A friend of ours bought her first house about a year or so ago, and it was definitely in need of some serious cosmetic upgrades. You may remember, I helped her paint the bricks on her back porch earlier this year. Before that, my husband and I helped her get started on updates in her living room.
You won’t believe what it looked like when she moved in. Look at this.
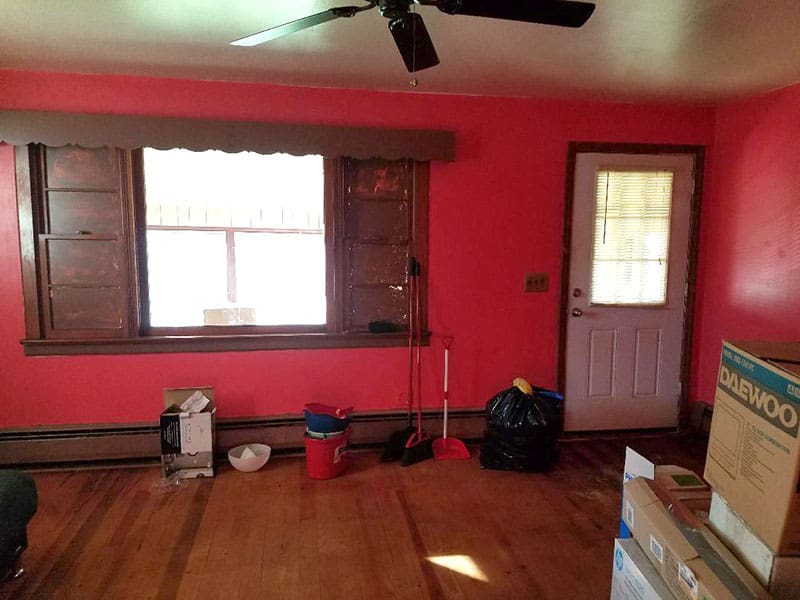
I don’t know what was worse, the bright red walls or the windows painted over in brown paint to match the trim. Even the baseboard heater was painted brown.
So we helped her paint the walls and remove the paint from the windows. My husband added some baseboard moldings where they were missing, and I gave her a chandelier that he installed for her as well.
We had discussed refinishing her floors at that time, but never got around to it until now. My husband wasn’t on board for this project, so I was on my own. Which only makes me more determined to do it. 😉
Assessing the floor’s condition
First, you’ll need to determine the floor’s thickness to be sure there is enough for sanding. Engineered hardwood floors have only a thin layer of wood, so they typically cannot be sanded and refinished. You’ll want a minimum of 1/8 inch of wood in order to refinish.
To determine the thickness, slide a business card between he floorboards to see how far down it goes. This article goes into detail on determining whether your floors can be refinished.
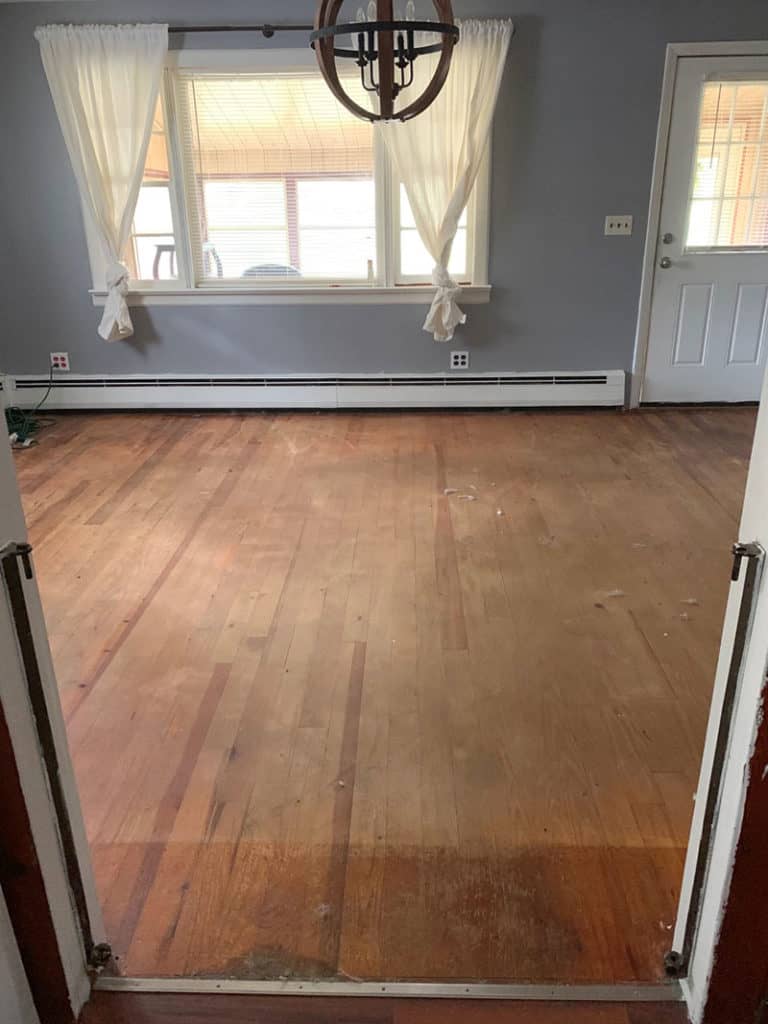
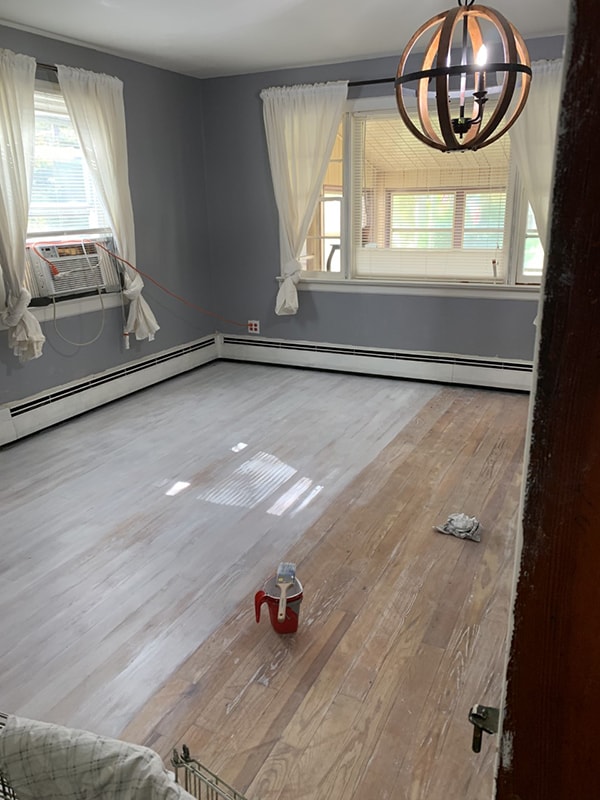
Here is what the floors looked like before I began.

They were very uneven, especially where there had apparently once been an area rug. And they looked a little dirty, even though my friend cleans them weekly. Here’s another angle where you can see the progress we made in the room prior to doing the floors.
This was my first time attempting wood floor refinishing, so there was a bit of trial and error. I share these parts with you so hopefully, you can learn from them before tackling it yourself.
Tools Needed for Wood Floor Refinishing
- Square Buff Sander (rented from Home Depot)
- Palm Sander
- Wood Floor Stain (we used pickling stain in white)
- Wood Conditioner (optional)
- Paint Brush and/or Paint Roller
- Clean Rags for wiping excess stain
- Polyurethane Sealer
- Porch and Patio Floor Paint in White
Sanding Wood Floors
I had scheduled this project in advance with my friend because she works a lot of hours and needed to clear her schedule. Unfortunately, when the day rolled around, I was more than a little under the weather. But I persevered and got myself over there.
Buff Sander vs Drum Sander for wood floor refinishing?
We went to the Home Depot and rented the floor sander. We rented a square buff sander as opposed to a drum sander. The drum sander is more powerful and difficult to use.
The square buff sander is easier to use and, though gentler, was all we needed for these floors. If your floors are in extremely poor condition and need several layers removed, I would suggest the drum sander.
Two more benefits to the buff sander over the drum are that it gets up close to the edges of the walls and is slightly less expensive to rent.
The biggest problem with the floor sander was getting it into her house. It weighed well over 100 lbs. We got it up her front steps by each holding one of the handles, counting to 3, and lifting at the same time.
It really was sheer determination to get it inside. Once we did, we were laughing and high-fiving that we did it ourselves.
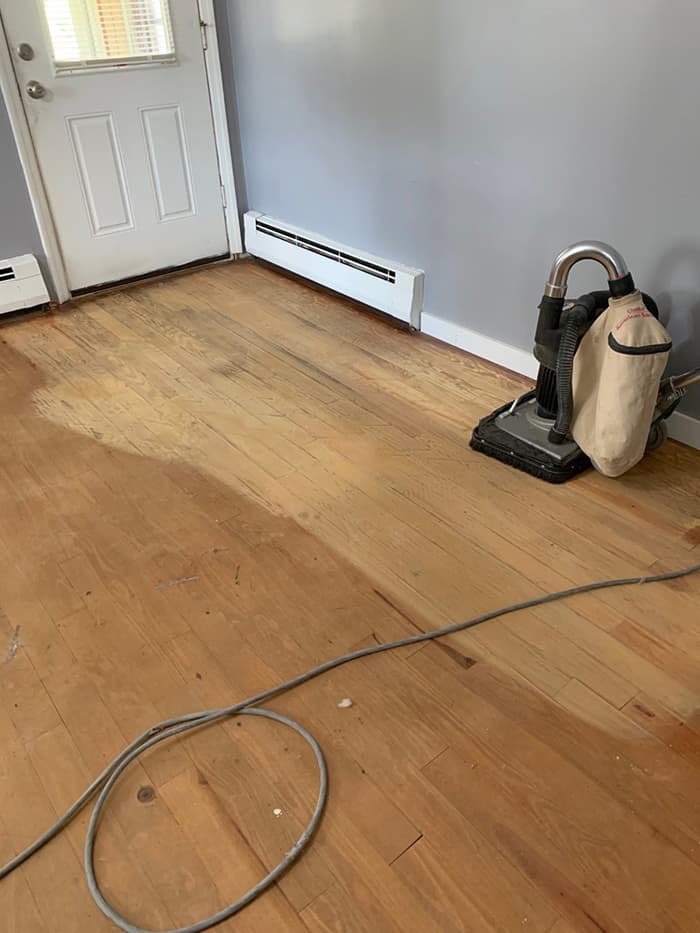
The machine was easy to use once we got a feel for it. What shocked me was how little dust it generated. The bag on the sander did a great job of keeping it contained. We were planning to put a plastic drop cloth over the doorway, but we didn’t even need to.
Though the sander we rented did get up close to the wall, there was still an area it couldn’t reach. I used a palm sander around the perimeter of the room where the buff sander didn’t reach.
Not fun.
Should I use a wood conditioner before staining wood flooring?
I should mention here that before staining, some people recommend using a wood conditioner on the floors. We skipped that step because, from what I understand,d wood conditioner gets down into the pores of the wood, sealing them for a more uniform finish. I didn’t want the porous areas closed because I wanted my stain to get in there for a cerused look.
The wood conditioner is designed to help give your wood floors a more even finish overall, so I’m not sure if I was right in skipping that. You can read more on wood conditioners and how they work here.
I have also since shared this article on wood stain colors and techniques that would be a helpful resource.
Staining Wood Floors With Pickling Stain
On day 2, I went back over for the staining. I would suggest doing this before returning the wood sander so you can remove your samples from the floor first. Alternatively, you can use your palm sander to remove the samples.
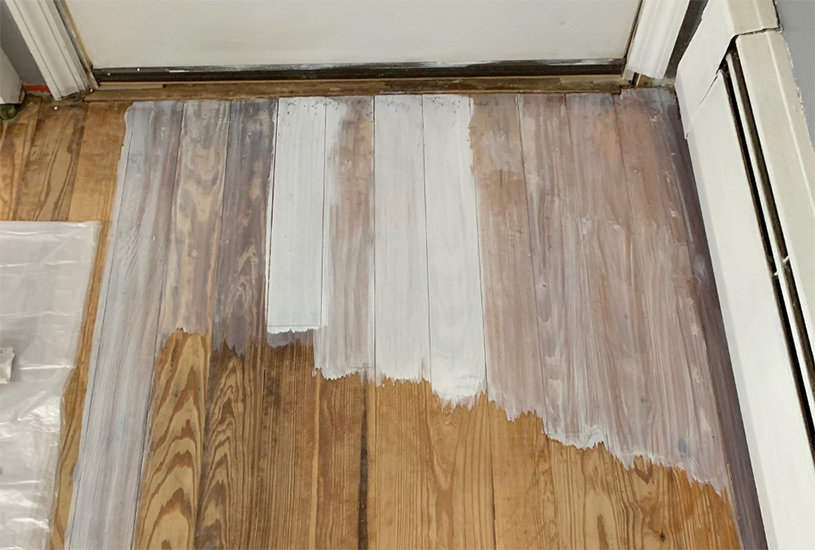
My ultimate goal was to achieve a pickled finish on her floors. I picked up a can of pickling stain in white. We started experimenting with the finish in one corner of the room. We both noticed that we really liked the look of the stain when we left it on and didn’t wipe it off.

Unsure of whether it was a good idea as far as drying time to leave the stain on without wiping, I called the hardware store where we bought it and asked their opinion. They said it was absolutely fine. I asked around a bit more and got mostly the same response. An internet search said it would take longer to dry this way. How long we weren’t sure of.
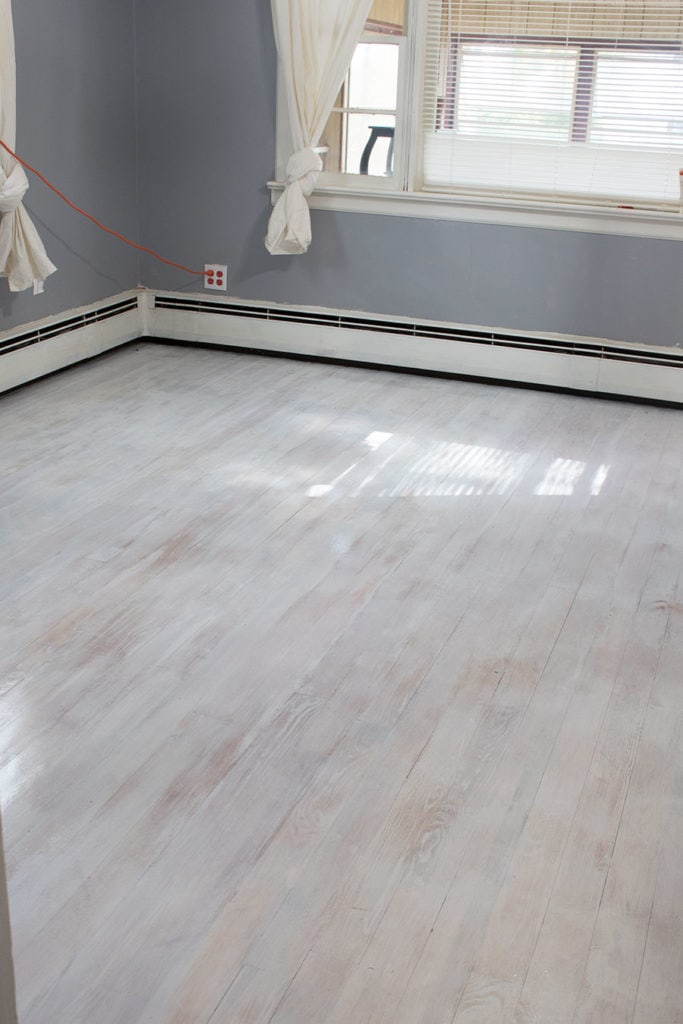
But my friend agreed to proceed with this finish. We stained the whole room by hand. Here is how they looked when we were done. I was happy with the results. I liked that they had a whitewashed look, but that you could still see some of the wood showing through.
When I went back over the next day, the floors were still very tacky. My friend was a little stressed with regards to not knowing how long this might take to fully cure.
With her furniture piled in the hallway and bedroom, it was a growing concern.
To further add to the dilemma, I was leaving for vacation 2 days later and wouldn’t be returning for another five or 6 days after that. My friend was not comfortable with leaving her house like this for that long, so she opted that we remove the stain and put her house back together.
This pained me to do (both literally and physically) because I loved how it had turned out. However, the hardcore DIY life really isn’t for everybody. My husband and I are used to living with our house upside down. Moldings, flooring, and furniture are often all over the place here during renovations. Not everyone has the patience for that.
How To Whitewash Floors With Paint
When I returned from vacation, I went back over to finish these floors once and for all.
After the first round of wood floor refinishing , I wasn’t going to attempt the stain again, so I decided to try a whitewash finish with paint instead.
This time, I used Behr’s Porch and Patio floor paint in Ultra Pure White. To achieve that sort of pickled finish again, I added some water to the paint mix. The recommended amount is 1 part latex primer-sealer to 3 parts water. I didn’t measure out the water as I added it; I just eyeballed it.
Using the dry brush method, I painted it onto the floors.
With dry brushing, you will brush the paint on very lightly and keep going until there is absolutely nothing left on the brush. I applied it heavier in some spots than others to cover up some of the floor’s imperfections and to give an overall weathered look. If you want it to be more even, wipe the brush off onto cardboard before applying it to the floors.
Sealing Painted Wood Floors
Once you finish staining or painting your floors, you will want to seal them for protection.
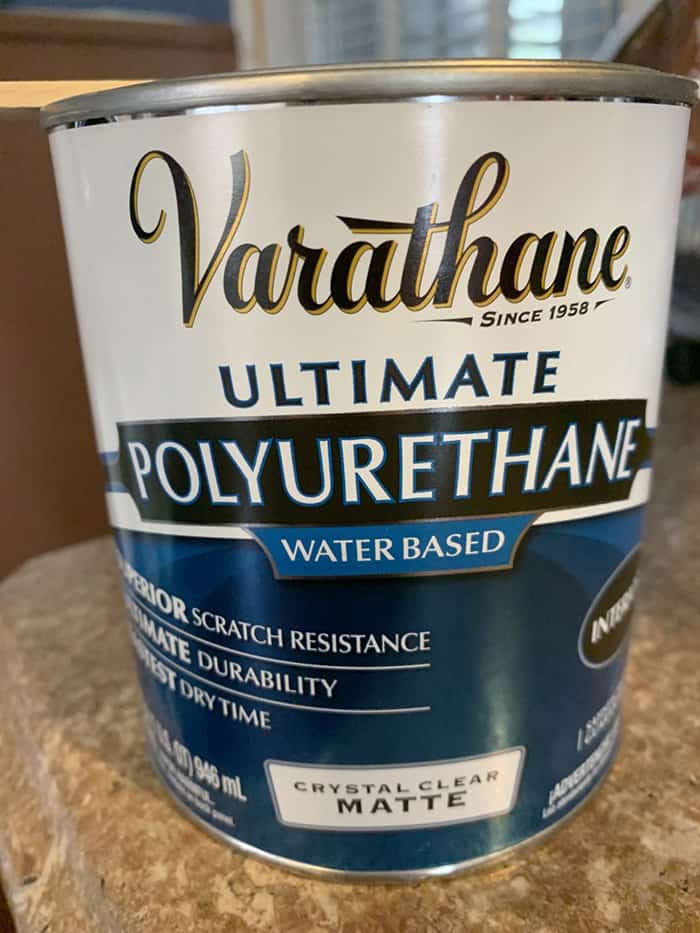
I used a clear polyurethane in a matte finish. From what I understand, it doesn’t matter if you use polyurethane or polyacrylic, but what you need to be aware of is whether or not it’s water-based. The water-based sealers are much less likely to yellow over time than the oil-based. The water-based sealers dry faster as well.
I expected this polyurethane to smell terrible, but it had a surprisingly low odor. It dries quickly and leaves a perfectly clear finish. I was really happy with this product.
To apply my polyurethane, I used the SMART Roller from Wagner Spray Tech. It has a built-in reservoir that holds up to 22 ounces of paint, eliminating the need to continuously stop and reload the roller.

To be honest, I had tried one of these rollers years ago from another brand, and I wasn’t that impressed. So I was a bit skeptical that this one would be better.
I’m happy to report that this SMART roller was so much better in every way. To assemble it, you attach the roller by holding down the clips and snapping it in. (It took me a few minutes to figure that out.)
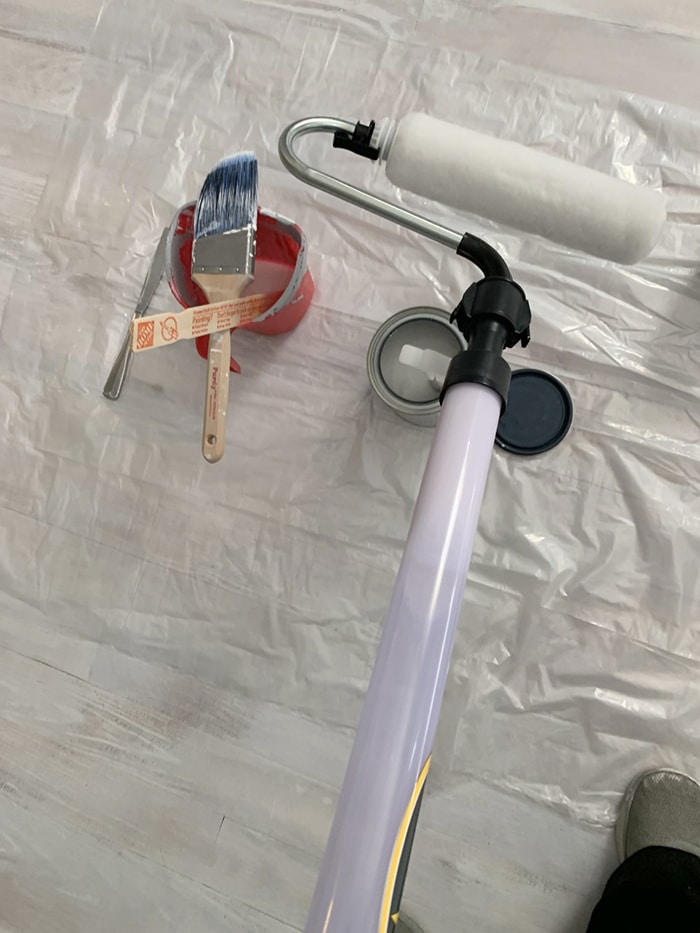
It comes with a nozzle that clips onto the side of your paint can. My can was a mini can, so it was too short to clip onto. However, I was still able to use it. You put the nozzle right into the paint roller and pull back the handle to load up the paint.
To disperse the paint, you squeeze the lever near the handle. It’s crazy how much quicker this went without having to run back to a paint tray and reload every few minutes. Definitely, a welcome relief after hand-painting these floors. Twice. In fact, I didn’t need a paint tray at all.
This tool is not only great for wood floor refinishing but would be useful for painting walls and ceilings.

I applied two coats of the sealer, letting it dry for about 2-3 hours in between as stated on the can. My friend did a third coat after that.
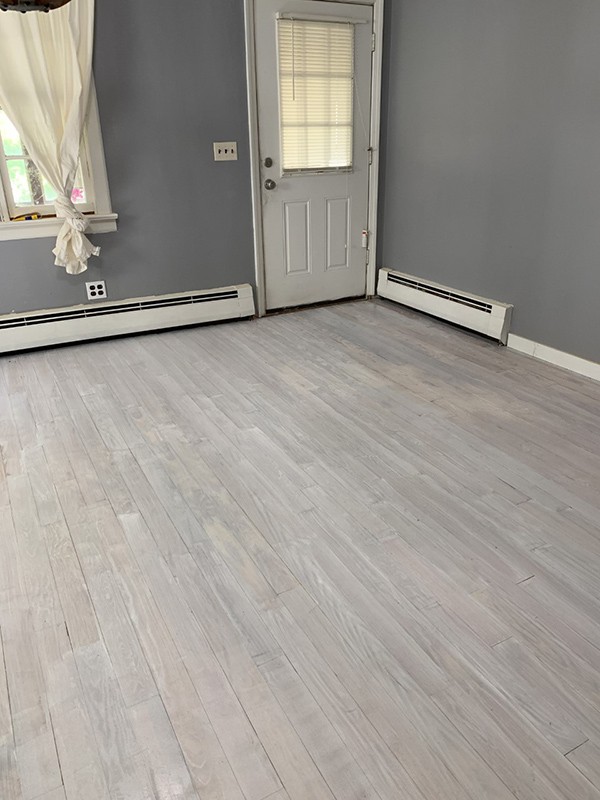
And finally, here is what the finished floors look like now.
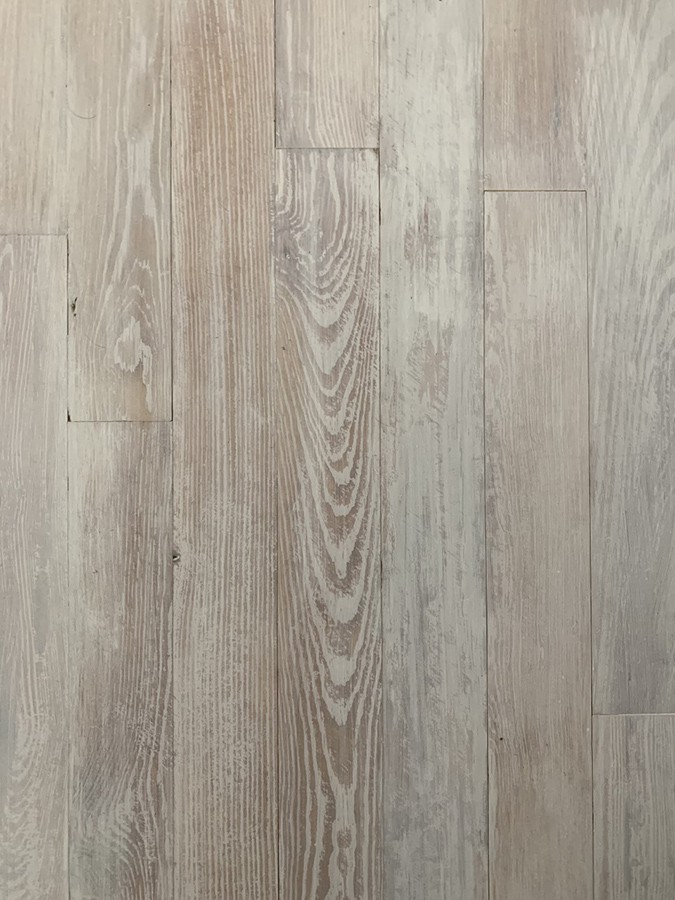
In the end, it was worth all the effort because they look amazing.
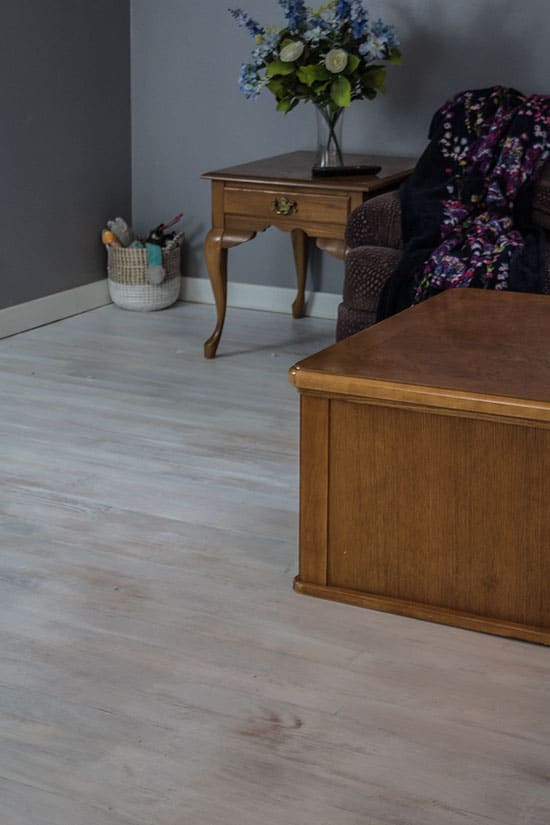
The fuller rooms’ photos honestly don’t do them justice at all.
The close-up photo is a more accurate depiction of what they look like.

We still need to do a few more things in this room. My friend is going to order a slipcover for the sofa, we plan to add some art to the walls, and possibly paint the front door a fun color.
Wood Floor Refinishing Checklist
We know this was a lot of information to take in, but it’s really not that hard to do! I put together a printable checklist to help you navigate this project easily. It’s free for subscribers, and you can access the checklist here.
Have you tried refinishing your hardwood floors? Share your experiences or questions in the comments below. I’d love to hear how your project turned out!
FAQ oN WOOD FLOOR REFINISHING AND WHITEWASHING
For More Flooring Ideas, Check Out These Posts:
- Installing Vinyl Plank Flooring
- Floor Stickers in the Bathroom
- How to Paint Linoleum Floors
- Inexpensive Flooring that Looks Like Real Hardwood
PLEASE PIN:
This post on wood floor refinishing was in partnership with Wagner Spray Tech, and may contain affiliate links. All opinions are my own, you can read my full disclosure here.

The floors look beautiful You are a great friend to help her. I know she is very Proud of thOse floors. Blessings, Mary
Thank you, Mary!
Woww!! Just WOW!! Looks so terrific = and what a GREAT friend you are! I really appreciate all the information – I am considering this project by myself – and I will revisit several times.
Thanks!
Tracey
wow that looks amazing. the whole room looks 100% better. love the floors.
Thank you.
Beautiful!
Thank you!
Did you sand again after APplying poly?
You have been busy Your floors turned out great! I love pickeled floors.
Thank you, Maria!
That first pickling finish on the wood flooring is gorgeous! and the second go-round is just lovely, too! What a good friend you are! Seriously. Pinned!
Thank you, Julie!
The floor looks great! how has it held up over time? i want to do this but I’m afraid of how it will last on high traffic areas.
I want to do this with knotty pine paneling. Whats The best way to sand walls?
Hi! WOW!!! These floors are GORGEOUS!! And you & your husband are very nice friends to have!! Can I ask- did you mix the porch paint, primer/sealer & water to do the white wash? If so, could you please tell me which primer/sealer you used & the recipe using all 3 things! I hope this makes sense!! Also, you couldn’t use the Wagner roller to do the whitewash because you have to use the dry brush method right?! Thank you so much!!