Tips for Installing Crown Molding in Layers
Only 2 weeks left to go on the One Room Challenge! This week we are talking about crown molding. Since I first discovered Metrie.com I’ve basically been stalking their Instagram account for inspiration. So I am beyond excited to be partnering with them on the crown molding for my daughter’s bedroom makeover!
I believe the two most important elements in a room are the walls and the floors. If you can add architectural detail to a space, you absolutely should. That is what separates a nice space from a beautiful space. Providing architectural detail, and interior finishings is what Metrie* does. Because I can think of 101 ways to use Metrie products in my home, I really had to think hard on what would work best for this particular room. I considered picture frame molding or a feature wall. While I was debating, I noticed a room on Metrie’s Instagram account which had layered crown molding that was really beautiful. With the other elements I have going on in my daughter’s bedroom, I decided this would provide just the right architectural detail for this space.
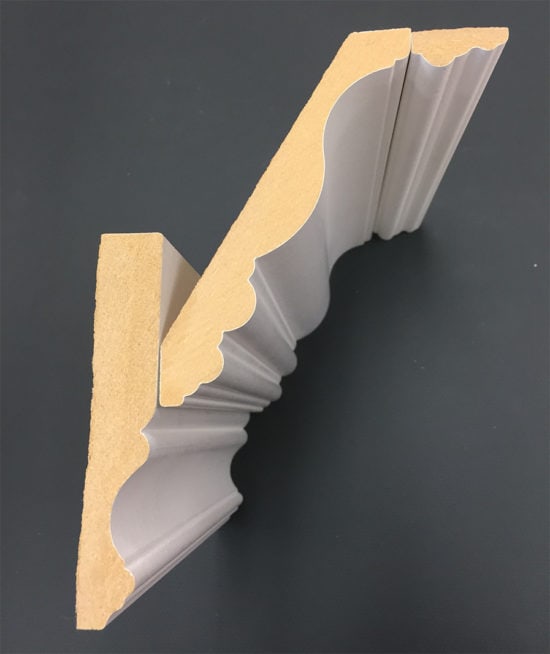
When the crown molding arrived I was assembling the pieces in my living room just to get an idea of how exactly they were to be installed. I had a good idea of how they were to fit together, but having never done a layered crown molding myself I sent Metrie an email to be sure I had it right. My contact person promptly sent me back this photo that so perfectly depicts the layout that I asked if I could use it in this post. I labeled it and sent it to my contractor to show him exactly what I needed done.
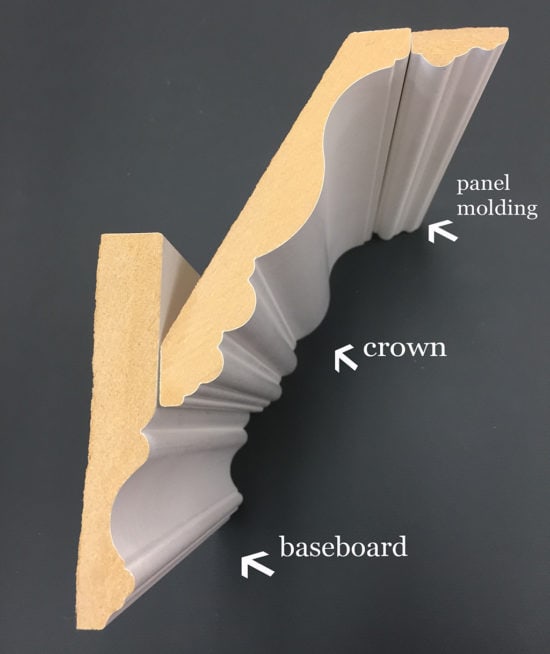
As much as I love to DIY, I know my limitations and installing crown molding is definitely one of them. Fortunately our contractor is a family member who always graciously agrees to help. He is who we call when we need an expert, he did all of the custom work in our kitchen and family room. For the crown molding he started with the baseboard, which goes on the wall upside down so the bottom is the finished edge.
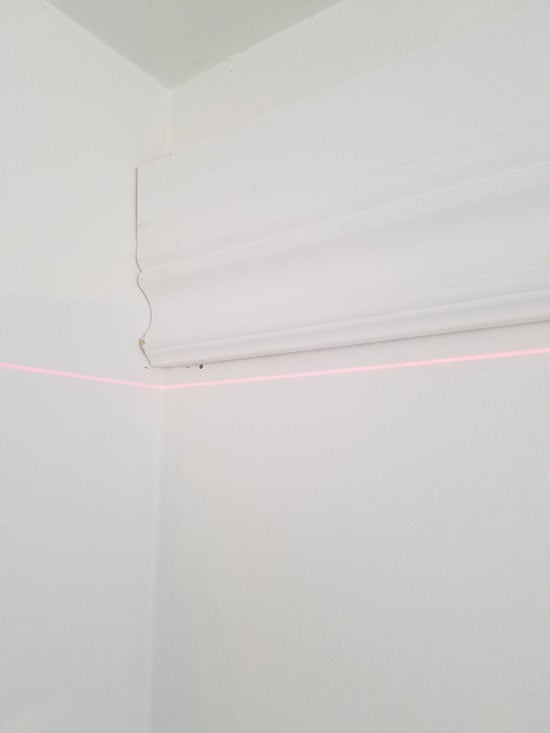
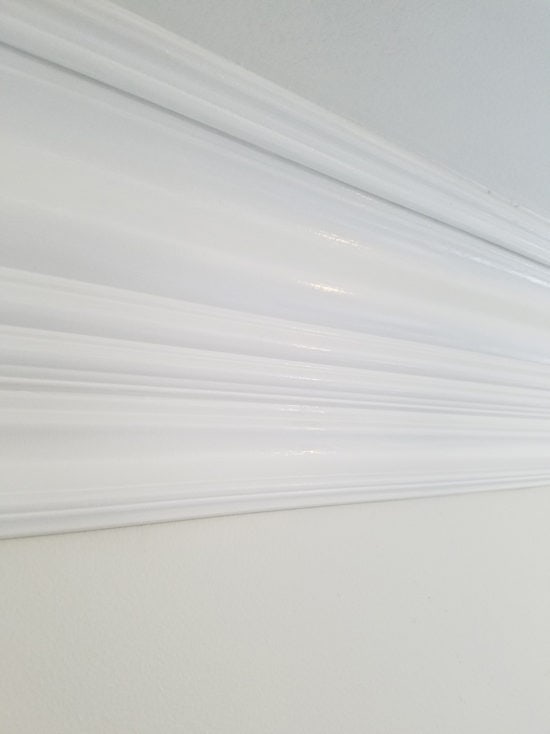
After that section was up, he began installing the crown molding next. You can see from the next picture that this requires some skill.
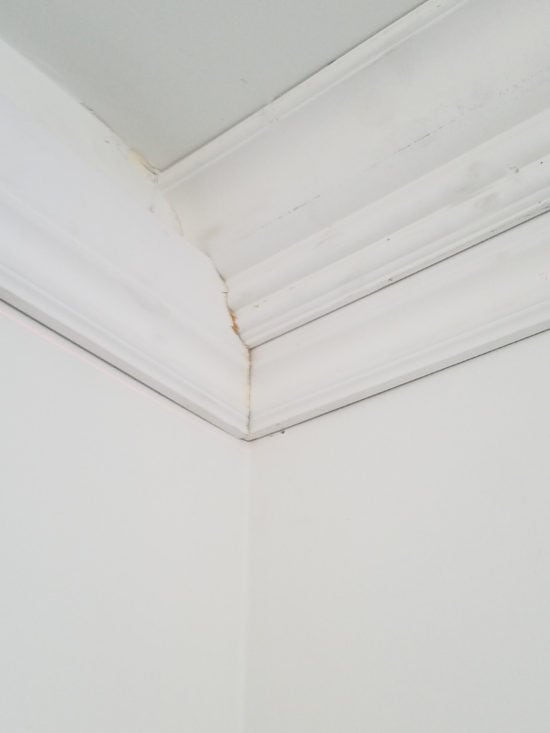
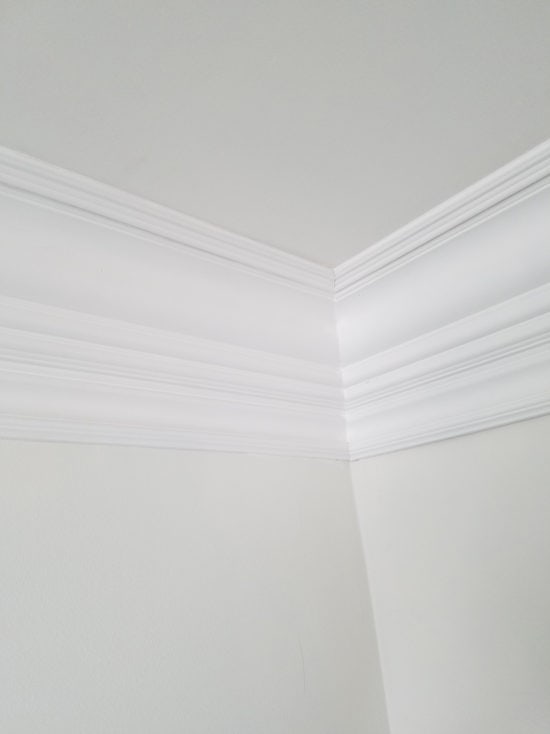
The third layer is called panel molding and that was installed along the ceiling. The designer at Metrie helped me put this layout together after I explained I wanted a layered look but I didn’t want the molding to come too far down the wall. The reason I didn’t want that is because I wanted to be able to hang my curtain rod as high as possible and I also need clearance for the sliding barn door track that is going in. Adding this piece to the ceiling was the perfect solution.
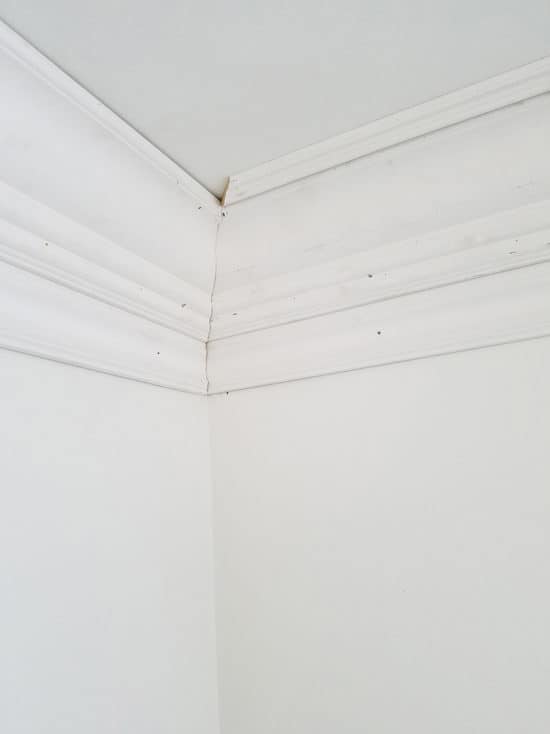
Once my contractor finished the installation, I spent another day spackling the nail holes, my husband caulked the corners and edges and then I gave it a nice shiny coat of white paint.
It truly looks stunning!

It looks so amazing that it’s kind of shame for this to be hidden upstairs in a bedroom. I was kicking myself that I didn’t choose to do my living room for the challenge, but that will just have to wait until the next ORC! I have lots of ideas for adding architectural detail in that room.
I asked my contractor for some of his best tips for installing crown molding to share with you.
Tips for Installing Crown Molding:
-Use a mitre saw
-Use a jigsaw to cutout “meat” of mitre
-Use a grinder and a router to fine tune the mitre cuts
-If the walls and ceiling are off use trim screws to tighten the gap
What I Used:
The following are the product links to the exact moldings that I used to create this look.

*A big thank you to Metrie.com (a company that I love) for providing the moldings for this space. All opinions are 100% my own, you can read my full disclosure here. Metrie is an official sponsor of the One Room Challenge. If you missed weeks 1-3 of my One Room Challenge bedroom makeover, you can catch up below.
Week 1 – ORC Bedroom Makeover Before
Week 2 – Bedroom Makeover Progress
Week 3 – Bedroom Makeover – Wall Art
Week 5- Installing Vinyl Flooring
Week 6- Bedroom Makeover Reveal!
The crown molding is gorgeous! I love the layered look. Thanks for the tips.
Thanks Tricia, I’m so happy with it!
I love the layered look! I want to add crown molding to the master bedroom and this is giving me lots of ideas! Thanks for sharing those tips and good luck with the next 2 weeks!
That’s looks awesome. Love the layered look. I can’t wait to see the finished room.
The crown molding looks beautiful! Wish I could do that in my entire house. We don’t even have one space with crown molding. Can’t wait to see how this room turns out!
wow!! what a way to beef up the crown! The laser really helped I am sure and so jealous your have a contractor in the family! Looking forward to seeing your bedroom in 2 weeks!
This is perfect, I am doing my room above the garage want to add some crown moulding. Looks great
Thank Maria
Holy cow, this looks amazing! I LOVE the layered look!
I honestly had no idea you could layer crown with baseboard pieces – such a neat idea, excited to see it all together 🙂
This is so pretty!! I love the layered look!
Oh! Nice tips! Your molding looks great! Can’t wait to see more! Susie from The Chelsea Project