DIY Kilim Rug
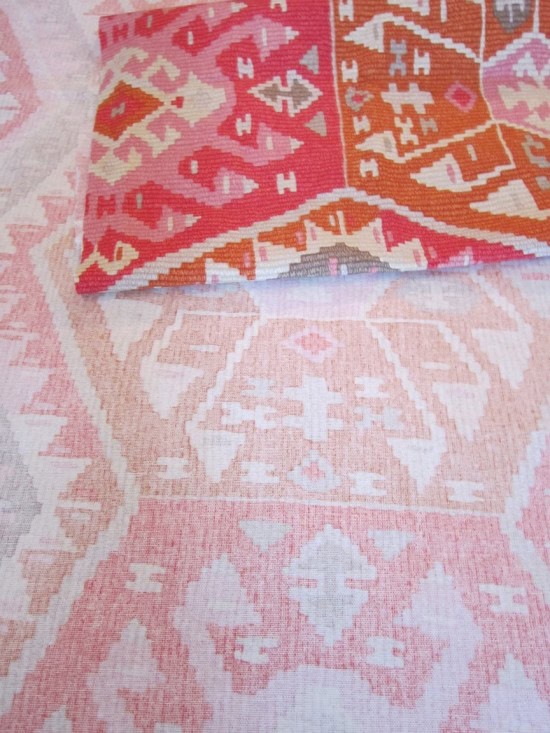
When I shared my tiny half bath makeover, I mentioned I really wanted a Kilim area rug in there. Because the room is so small, it was impossible to find one that would fit. After thinking about it, I decided to DIY one. I found this fabric on Etsy that looked as if it could be rug material with the little line details in the pattern. It was brightly colored, which is what I was looking for so I ordered 1 yard of it.
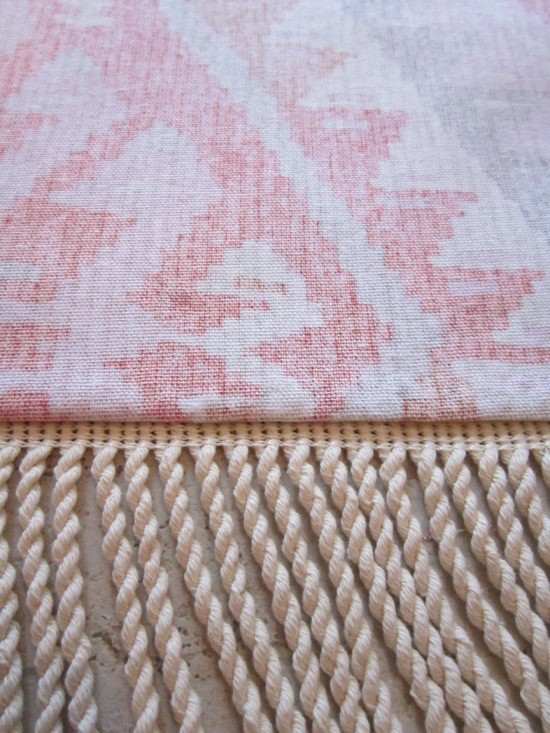
When I received it, I realized it was too brightly colored for my taste. However, I did really like the reverse side of the fabric because it’s much more muted. So I flipped it over and used that as the main side.
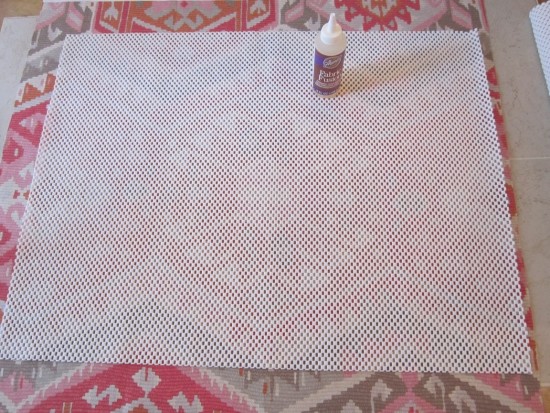
To be honest, this tutorial is actually my second attempt at making the rug. I’ll explain that later. I first ironed the fabric, and then I cut a piece slightly larger than I wanted it to be when finished, leaving room around the sides to fold over the backing. For my rug backing, I used rubber shelf lining that I picked up at Home Depot. I placed the fabric with the side I didn’t want showing facing up. Then I cut the backing to the size I wanted the rug to be and laid that out on top of the fabric.
Next I used my new favorite DIY tool, fabric fusion. I drew a line of the glue accross one entire edge of the backing. Then I folded the fabric over and pressed into place until it stuck.
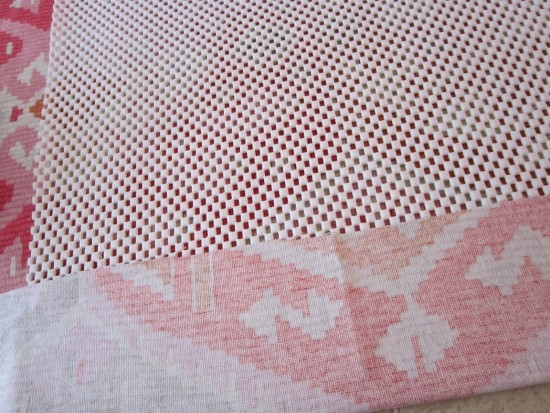
I did that around all four sides. Once that was dried, I added fringe trim that I bought at Hobby Lobby. I glued that on the two shorter edges.
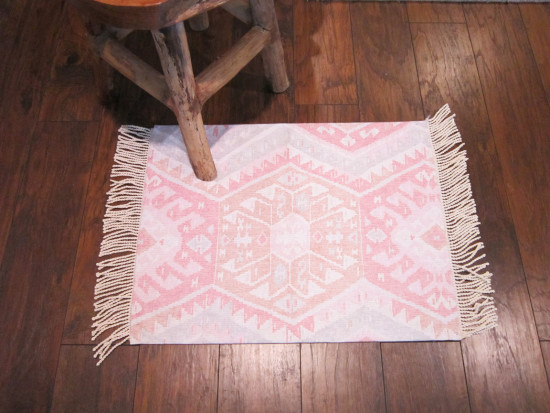
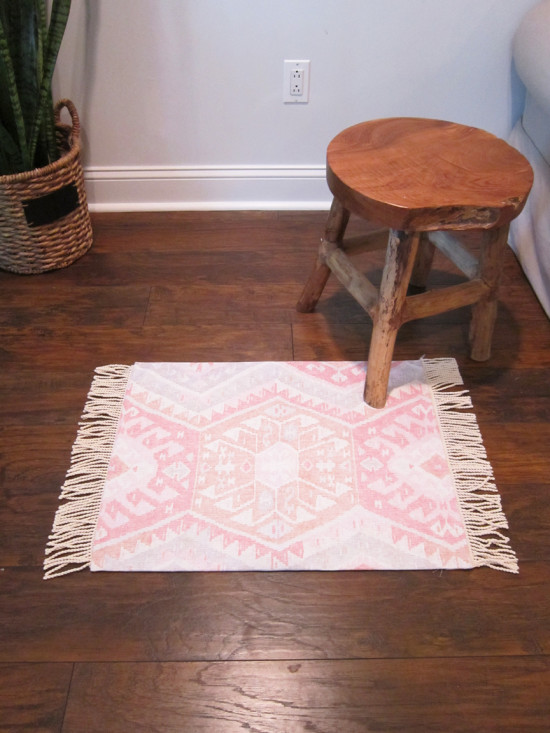
On my first attempt at making this rug, I actually used a really inexpensive bath mat and folded the fabric around that. It looked OK, until I was about to add the fringe trim. It just didn’t look right so I decided to do it this way, which was my initial thought anyway. So if you noticed that my pattern is a little off center on my finished rug, that is why. I centered the first rug, and didn’t have enough fabric leftover on round 2 to center it again. I’m OK with a little imperfection, it adds character, right? Here is my finished DIY Kilim Rug.
And here it is in my small bathroom. This rug was so much easier and less time consuming than the DIY Sisal rug I made my friend! Though I would say they were both worth the effort!
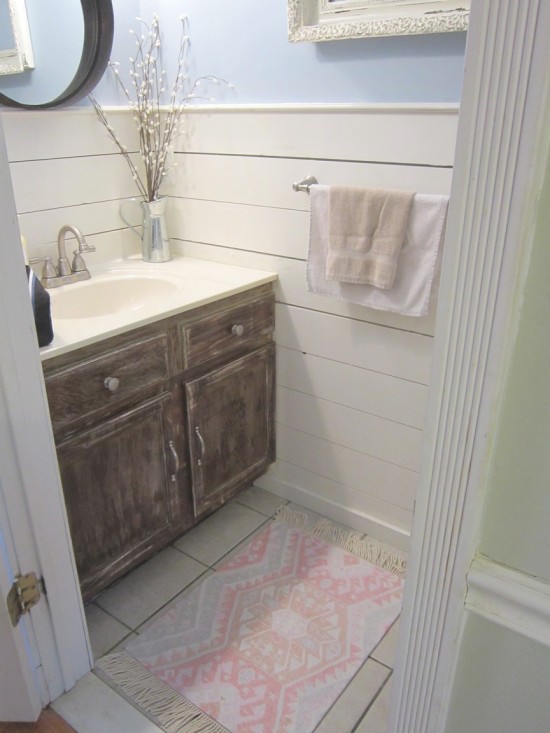
You can see how I painted this vanity to look like barnwood here.
This post contains an affiliate link.
This is so great!! I LOVE IT! I like the muted side as well and I love the added fringe to the side! I may have to give this a try when I end up doing my bathroom remodels!
This is so cute. I love that there is no sewing involved. Clever.
That turned out SO well, and even after being told it isn’t centered, I can’t tell. Looks great in the bathroom.
You made this?! I am so impressed. I love the fabric. I love the bathroom you put it in too. Gorgeous space!
Wow, I love this!! What a great idea to DIY a rug! So pretty!
This turned out really pretty, I love that you added fringe to the edges.
Roxanne, I love it! I have seen DIY rugs on Pinterest and haven’t tried it yet. So glad to have read your post. I see that it really isnt’ as difficult as I thought. Pinned!
Roxanne it looks fantastic – you did such a great job I love that rug x
Very nice! How does it wash with Fabric Fusion. Does it all stay together?
Thanks Terri! I hand wash it, especially because of the fringe.
Very Nice. I love this one.
Last year I needed a bath mat really quick (I have a dog), lol, so I made one similar, but used an old towel.
Very nice
What do you call the material you used? It looks like it’s weaved… not just straight fabric.
I bought the fabric on Etsy, it was not weaved it just appears that way!