Tile Stickers – Bathroom Update
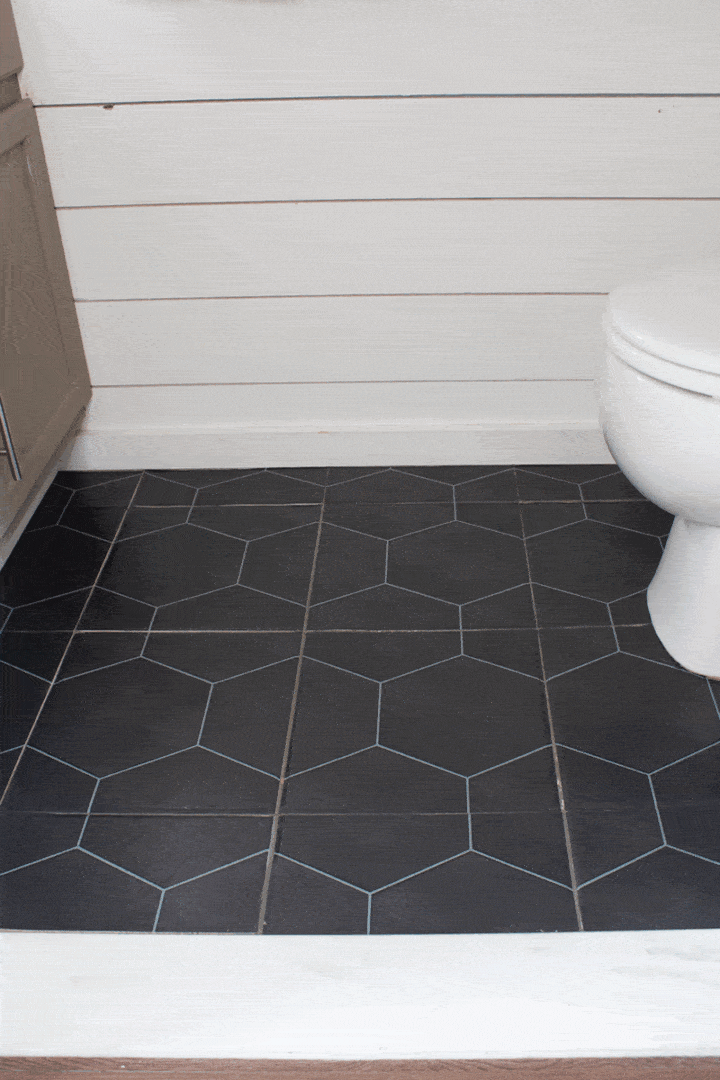
You guys may remember when I updated my tile floors with decorative floor stickers. That was four years ago already and I was feeling like it was time for a change.
Before I get to that, I want to talk about is how the tile stickers have held up for four years.
How Do The Tile Stickers Hold Up?
Overall, I’m really happy with them. You can see in the photo below one spot where it began to peel up a bit. I’m wondering if because the tile underneath is slightly raised in the middle and slopes down on the corners. It may be due to my floor not being totally level.
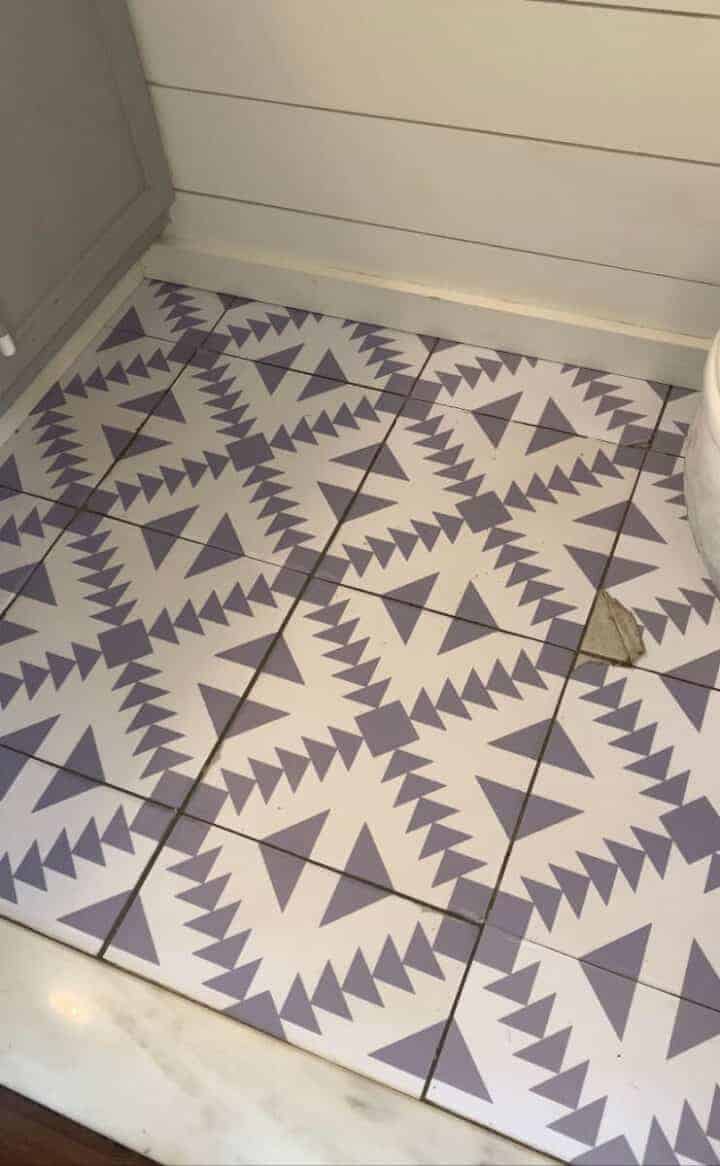
During the last four years, that happened around three times, twice in that same spot. Because these are so easy to use, it wasn’t a big deal. I saved the extra stickers I initially bought and was able to change that out in 2 minutes.
Another big advantage to using these is that when you get tired of the look, it’s SO easy to change. The gray and white pattern was trending four years ago, but I’m over it now.
I’ve been imagining black floors in this bathroom. When I was in Texas a couple of years ago we stayed in a house that had black bathroom floors . They were beautiful and I’ve been thinking about them ever since!
Customizing The Floor STickers
I went back to the shop where I purchased my original tile stickers and took a look. They had this honeycomb pattern in white but they are able to customize colors. If you don’t see the color you want, just drop them a message.
I emailed the shop owner who was able to customize them a bit more for me. We emailed back and forth and she gave me different size options and even grout options for the pattern.

The larger pattern shown first was more what I had in mind. I also wanted them to be a softer black as opposed to jet black and she was able to adjust that for me as well. You can see the difference in the bottom mockups, they are more faded.
Replacing the FLoor stickers
The old stickers were easy enough to pull up. I had to use a tiny bit of muscle but it wasn’t a struggle. They all came up in one piece with no ripping. I was afraid it was going to be more difficult than it was.
With the new pattern, I laid it out in the center first to get the format correct.
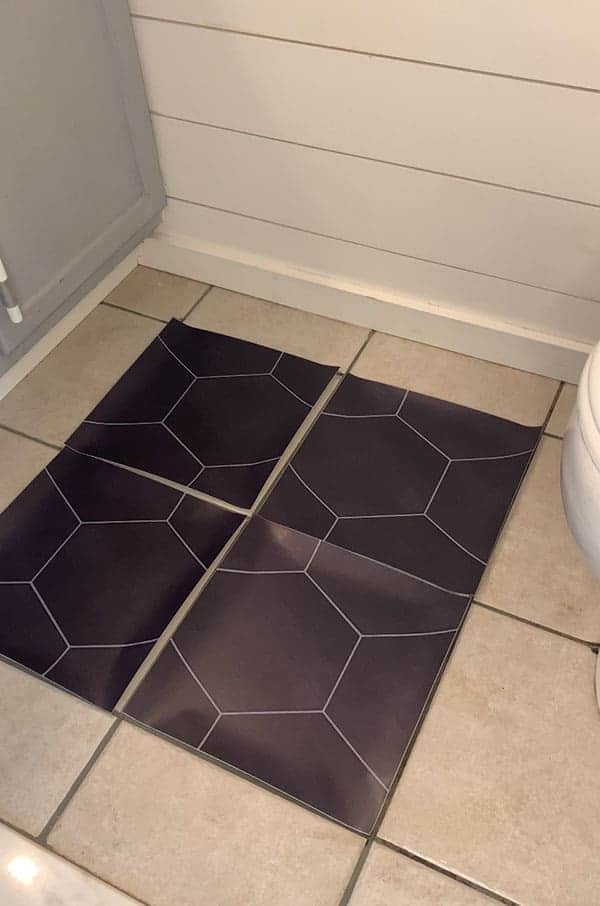
You can read the step-by-step process of installing these floor stickers in my last post. I did it the same way this time and I’ve added a short video to the end of this post to give you a better idea of how easy this is.

Essentially, you just peel back about an inch of the backing, line up the tile and smooth it down as you pull off the rest of the backing.
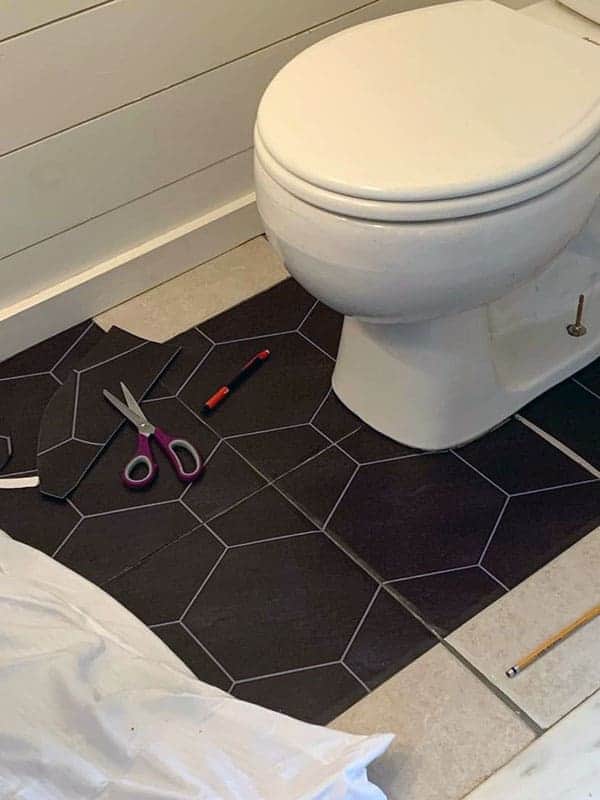
Around any obstacles, such as a toilet, I literally just used a pencil to trace where I needed to cut the sticker.
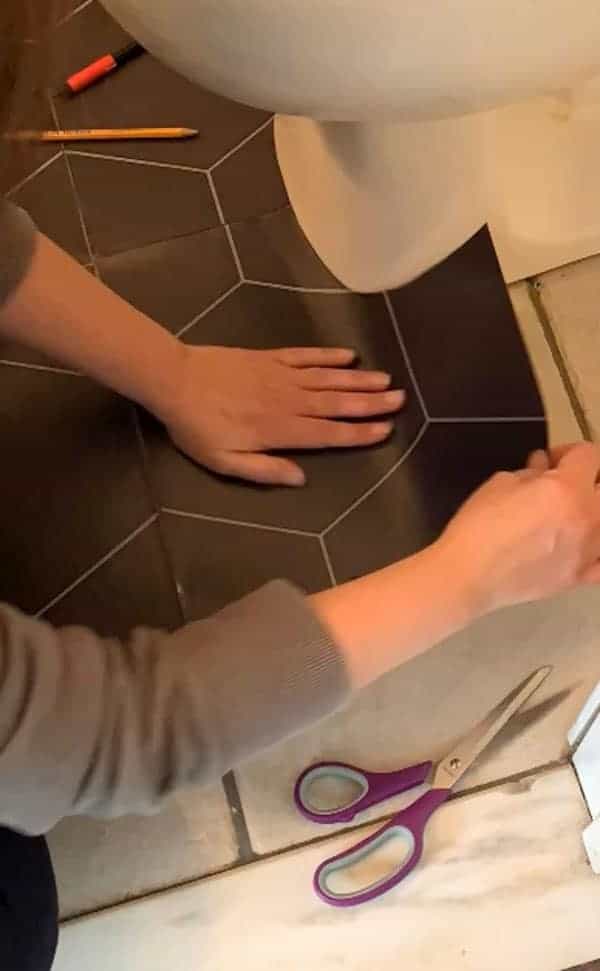
The only tools I used this time around were a pencil and scissors.
The tile stickers come in different size options. My floor tiles are 12″ X 12″ so that is the size of my stickers. You can use these on backsplashes or anywhere else you have tile you’d like to change.
In the photo below you can see the grooves of the original tile underneath. I think that only adds to the realistic look.
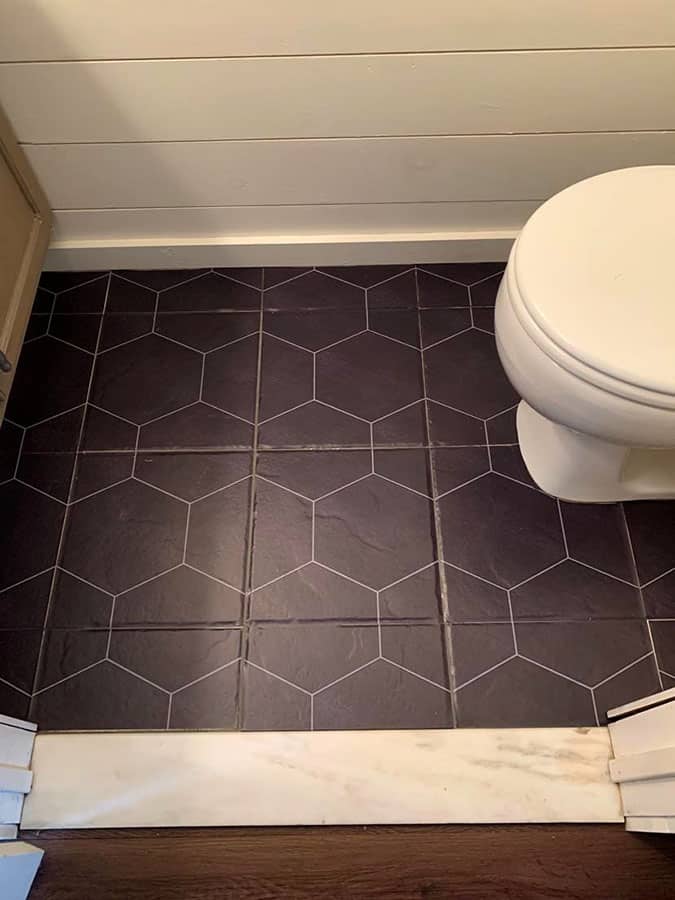
Some of these photos are from my cell phone so they aren’t the best. It’s also a windowless bathroom which makes it really hard to photograph well. The photo below is an accurate representation of the true color.

I used tile stickers in my niece’s foyer when we redecorated her living room. Her foyer was linoleum underneath and the decals worked great on that also. Her feedback was the same as mine. “Yes, they occasionally peel up in the corners but for how long they’ve been on I’d say it’s good”.
The only negative feedback I have is cleaning them. I clean this floor by hand. That’s not a big deal because this room is so tiny but in a large area that might be a deal-breaker. I found that when I used a mop, it would sometimes pull up the corners of the sticker. Again, that could be because my original floor tiles slope down on the edges as opposed to being completely flat.
Pros and Cons of TIle Stickers
- Pros:
- Super easy to install
- Can change the look when bored
- Less expensive than replacing tiles or floors
- Can be customized
- Cons:
- Using a mop may cause edges to peel up

I’m so happy with the new look with the black tile stickers. Also new is the wallpaper you see but I’m only half done with that so far. When I finish the other side of the room I’ll share more on that.
Here’s a quick video of how to install tile stickers to give you a better visual.
Have any of you tried floor stickers? I’d love to hear your feedback.

Floor looks amazing
Such a pretty re-do. Good job.
I remember the tile stickers you did from 4 years ago! I still love the old stickers and the new ones. I have the same boring tile in my bathroom, kitchen and foyer. Would love to try it! I will keep your instructions! Thank you.
I love the transformation! Sounds like your tiles are textured, is that correct? I was worried about using these over a texture I know, as it’s not generally recommended. What’s the brand name of the stickers? Thanks!
Hi Tanya, I think the fact that my floor tiles were textured made the stickers look more realistic! The stickers are linked in the post.
I’ve been wondering if these type of stickers could be covered with epoxy or polyurethane to keep them intact and so that you can mop them.