The Antique-Style Kitchen Island I Couldn’t Find… So I Had It Built
See how we designed an antique-style kitchen island using 100-year-old barn wood that brings warmth and character to our cottage kitchen.
You guys, after many months, we finally have a kitchen island! This piece really helped tie everything together and gave the space that warm, collected feel I love in a classic country kitchen.
During renovations, I opted not to have an island installed that matched our cabinets. My vision was always for a free-standing, antique-style kitchen island instead. This turned into a problem because I could not find one anywhere.
Everything was either too big, too small, too expensive, or not the right style. I was starting to think it would take years to find just the right piece. I was limited on what I could find locally, so I took my search online. Although there were some contenders, nothing was just right.
Then one day last October, I happened upon a Facebook marketplace listing that caught my eye. It turns out it was posted by a man in Massachusetts who builds custom furniture out of 100-year old barnwood.
Using reclaimed barnwood was the perfect way to get an authentic antique-style island.
That caught my attention. If I could have him build one out of antique barn wood, I could get the exact dimensions I needed as well as the style I envisioned.
The vision – antique style kitchen island
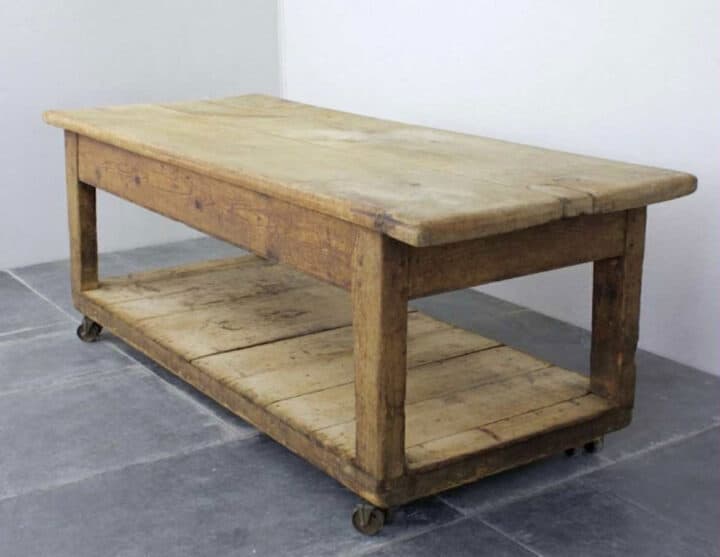
I knew exactly what I wanted and even had a photo saved of an inspirational piece. This photo (above) showed an antique French draper’s table, and it was exactly what I envisioned from the start. The perfectly weathered wood on this piece is to die for!
That warm wood tone was a main factor in why I wanted an antique island. Our kitchen is new, light, and bright, which is wonderful. However, I needed to add some history and character. An island is a huge focal point, so that needed to be the piece where I incorporated lots of character.
The second reason I loved this style is the bottom shelf. I wanted to be able to have some storage underneath, but not necessarily hidden storage.
I contacted the furniture maker to see if he could recreate this exactly and asked for a quote.
Why I didn’t buy an antique
After speaking with the furniture maker on the phone, he sent us a quote along with many photos of furniture he had built for other people. My husband and I both felt like this was our best option. His quote was less than buying something antique and even included delivery from Massachusetts.
This was ideal because I could custom-design the exact size and style to fit our kitchen.
The only risk in doing this was that I wasn’t sure of the exact color of barnwood I would be getting. That was actually a big risk, but I figured as long as it’s wood, I could sand, restain, or paint the island if necessary later.
For that reason, I asked very specifically that he not stain, seal, or paint the island at all. He was surprised that we would want it unsealed. He tried to talk me into having it sealed to protect it, but I insisted. Sealing it would be easy enough for me later on.
the custom build process

The furniture maker didn’t really contact us much during the build, which worried me a little. I checked in with him several times, and he was responsive, but I didn’t receive any photos until the day before delivery. He assured me again that it would be an exact replica of the photo I had sent him.
Why Barnwood Was the Perfect Choice
Choosing to build this island from old barnwood was exactly the right decision for us. Technically, because the wood is so old, it truly is antique. The fact that I was able to customize the exact style and size to what I envisioned was ideal.
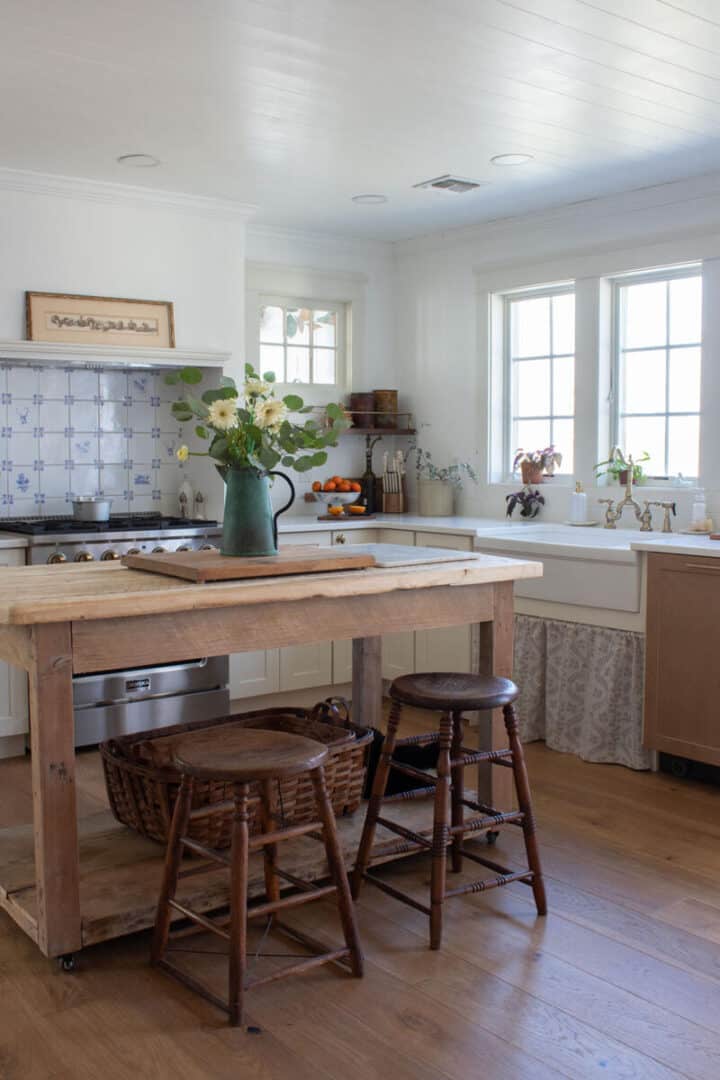
Once it was delivered, I was mostly happy with the outcome. The top was sanded down to a lighter wood than I had imagined. The bottom legs and sides of the island he painted with a whitewash that I did not like. He was trying to match the top better, but it didn’t look right.
I ended up sanding that off, but if you look closely at the photos, you can see I never finished the interior legs. I’ll get to that eventually. After sanding it, I liked the color of the wood much better. Underneath the whitewash was the warm wood tone I was hoping for.
However, now the top looks lighter (which is why he did it). Rather than try to stain the top to match, I’m holding off for a while to see if it’ll darken up naturally with use. I’m sure it will, I just don’t know how long that will take.
I’m also thinking of trying to find something that would give it a natural stain that would match the bottom closer. But for now, I’m going to leave it as is.
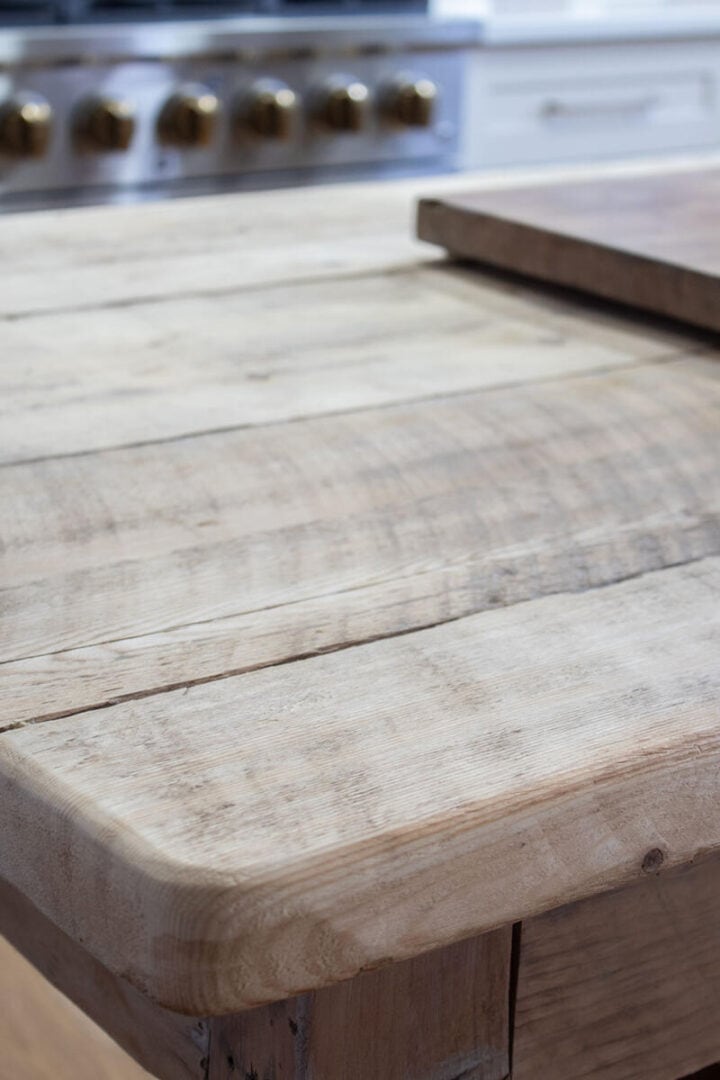
Additionally, the top of the island was extremely rough. I almost felt he rushed the sanding on that. I knew he had other pieces to deliver with mine, and was behind schedule, so I feel that may have gotten rushed.
Fortunately, I am experienced enough with furniture refinishing that I fixed that myself. I went over it with a very coarse sanding sponge followed by a fine sander to smooth it out. It’s still not entirely smooth, but we no longer run the risk of splinters if we touch it.
All that said, he did an amazing job recreating the photo, and I am very happy with the results. He said his wife loved it so much that now he has to build another one for her.
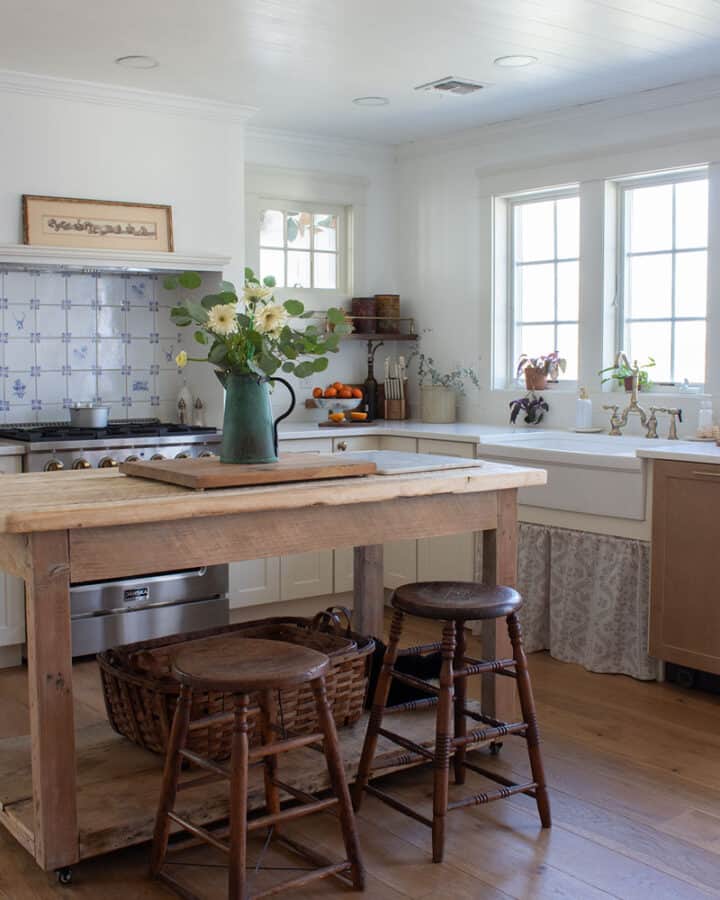
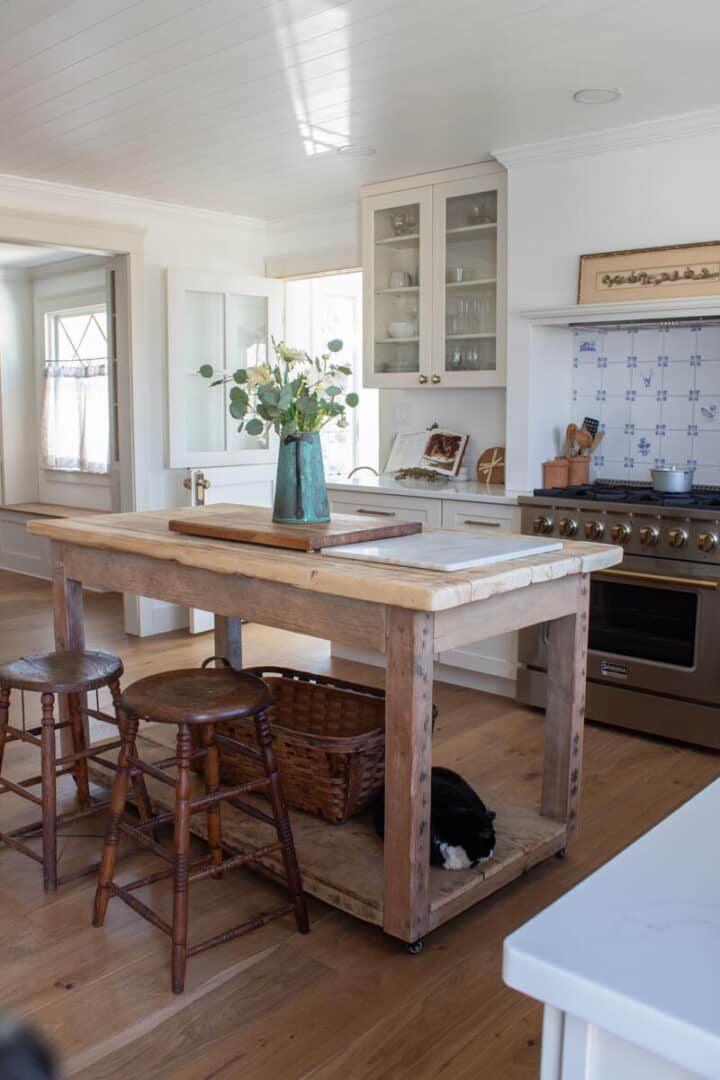
The Finished antique style Kitchen Island (Reveal)
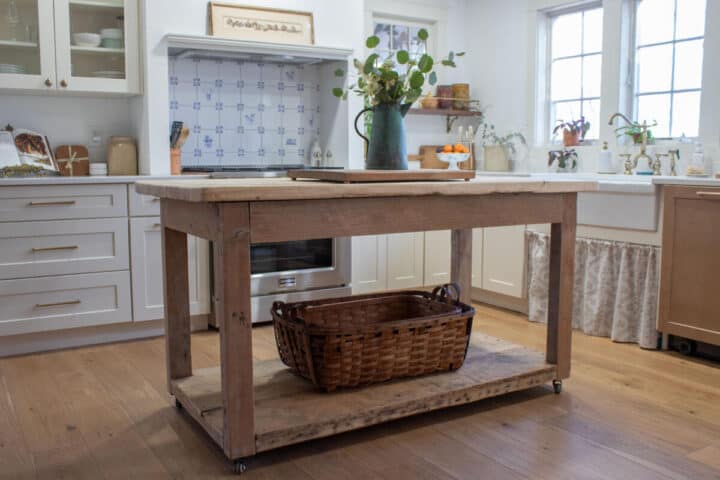
The island is a perfect fit and the exact style I envisioned. The two barstools shown in some photos are there temporarily until I find two that match better, at least in height.
We also added wheels to the island, just like in my inspiration photo, so I’d have the flexibility to position it either way. The kitchen is spacious enough that I could have run it parallel to the sink, and I did try both options. In the end, this layout simply works better for how we use the space every day.
How I Styled My Vintage Kitchen Island
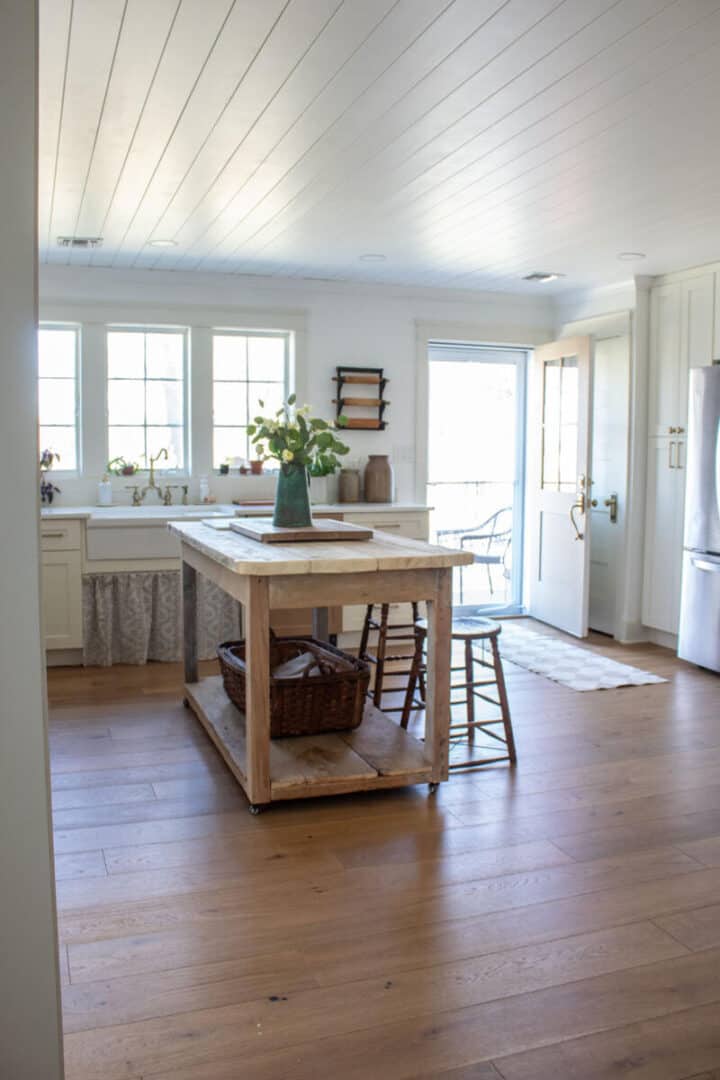
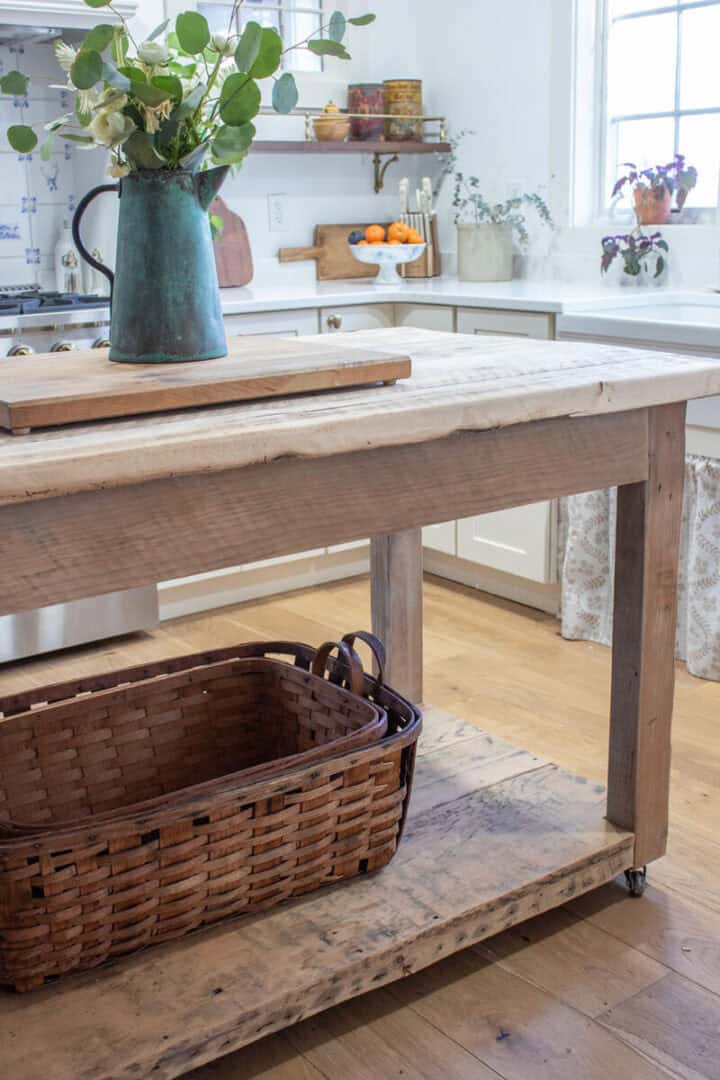
I had a couple of large baskets that I placed on the bottom of the island for an extra layer of warmth and texture. They actually look a little small in comparison, so I’ll look for one that’s a little bigger. This way, anything I store under there will be slightly hidden.
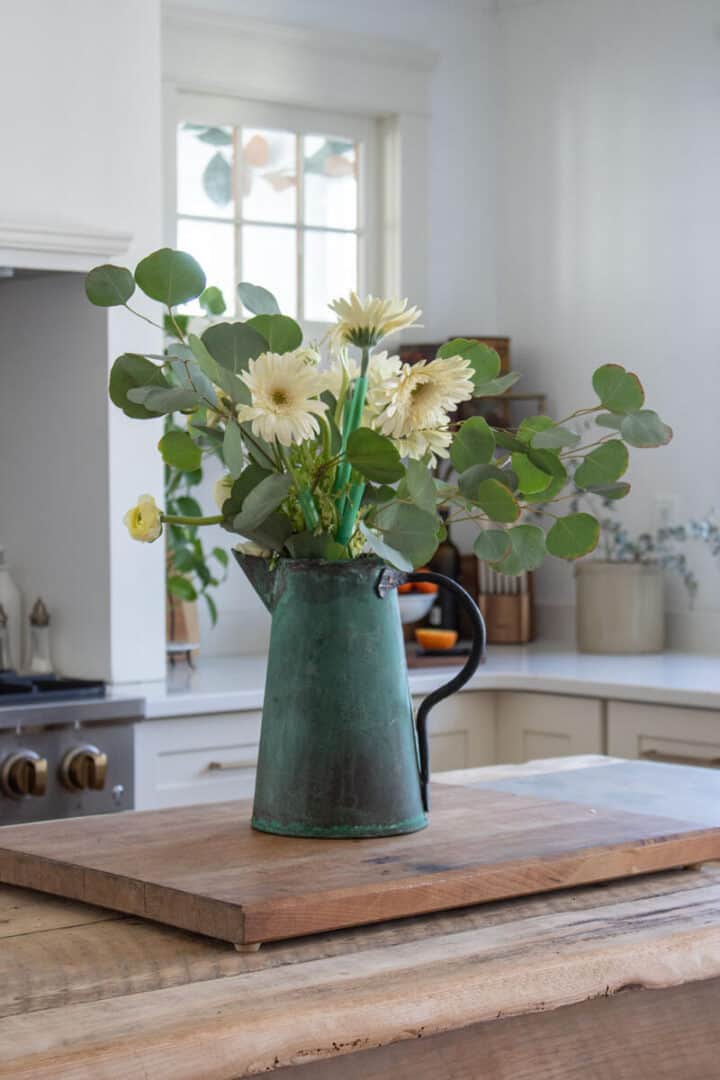
The top of the island is a fun spot to have seasonal floral arrangements or to try out everyday centerpiece ideas. It’s also nice to have a spot to drop things as we come in the door.
You might notice there aren’t any pendant lights above the island, and that was completely intentional. I’m planning to hang some kind of pot rack there instead, which feels much more in line with the vintage cottage look I’m going for. That project is coming up soon.
It’s nice to finally be settled in this home and working on more of the interior details and styling!
Tips If You Want a Similar Look
If you are looking for a specific piece of furniture for your home and are facing the same issues as I was, consider having it built. It ended up costing us less money than buying a large piece of antique furniture.
What I’d recommend:
- Consider custom if antiques aren’t practical
- Look for reclaimed wood
- Keep the design simple for a timeless feel
- Mix with other vintage elements so it blends naturally
Of course, do your research on the furniture maker as well.
I wish I could have all my furniture custom-built!