Painting Brick The Easy Way
Last year a friend of mine bought her first home. My husband and I started helping her with some projects over there last summer. We started with her living room, but never fully finished that. We got sidetracked for a while, but recently she mentioned she really wanted to get her back porch updated. I’ve been working with her the last few weeks, getting this space in order and I wanted to show you today how painting brick not only makes an incredible difference but also the easiest way I’ve found to do it.
We met Kim through my daughter who worked with her at a local veterinarians office. My daughter started as a volunteer there when she was only 14, and by 15 she was working there part-time after school. My daughter continued to work there throughout high school and undergrad school, so the vet staff is practically extended family to us now.
Before:
Up until buying this house, Kim was living in a dilapidated rental with a landlord who refused to make any repairs. It really was awful, so everyone that knows Kim was thrilled to see her make this purchase!
Kim works six days a week between the vet and her dog grooming business. The main reason she purchased this house was to make this back porch her grooming room. I think she was more excited to work on this room than her living room. This is what the room looked like when she bought the house.
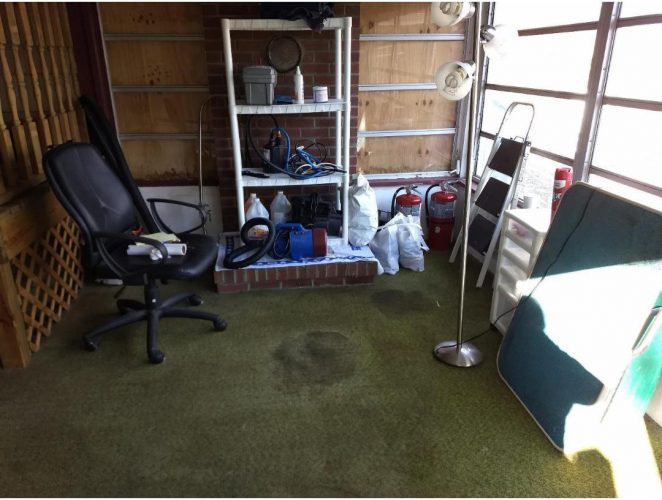
I don’t have a full room shot sadly, but here’s a peek from the other side. Everything inside this house (and outside too) was painted red and yellow with brown accents. Yikes! Honestly, I was having a hard time envisioning this makeover.

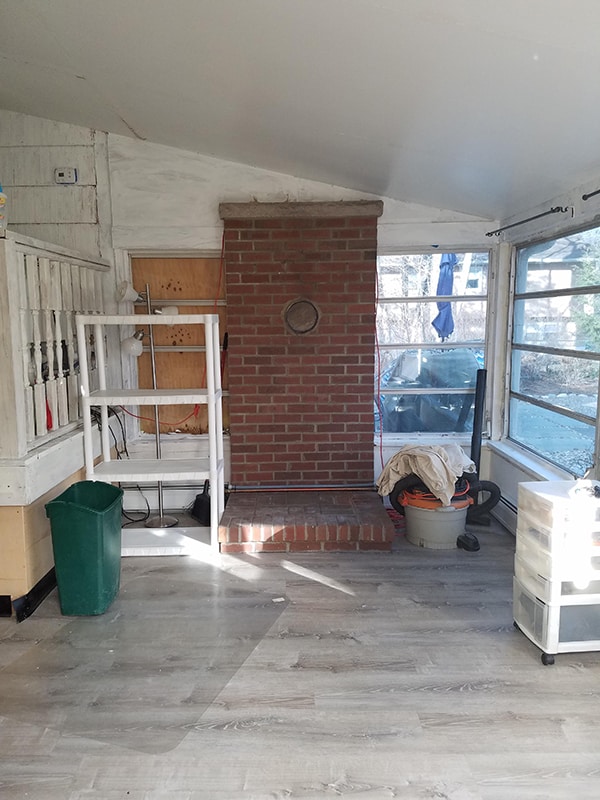
And here is the area after Kim cleaned it up, replaced the flooring and primed the walls.
What You Will Need*:
Primer
Paint Color of Choice
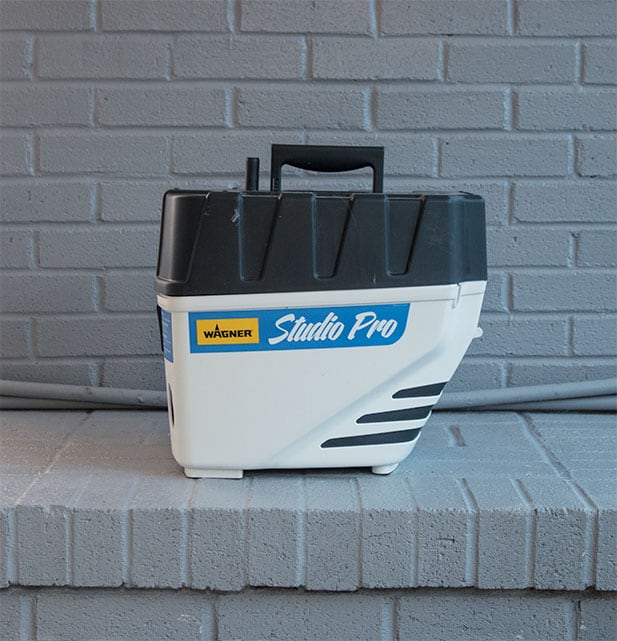
Paint Sprayer (I used a Wagner Studio Pro)
Cardboard for barrier
The first thing Kim did was to replace the flooring. After that, I came up with a painting plan and she got started priming the room, but it was taking forever especially considering one of the walls is actually siding. This is when I stepped in to help her out. First, we painted basically everything in the room aside from the fireplace and siding. For those, I knew using my paint sprayer would make the job much easier. I also wanted to make the fireplace a focal point, it’s the first thing you see when entering from outside.
Painting Brick-How To:
My plan was for most of this space to be painted white, with some well-placed gray accents for interest. The fireplace was going to be in the gray category, but I wanted to prime it first to be sure the shade of gray we chose would come out true to color. You can see I used cardboard to barricade the area around the brick to protect it. I probably went a little overboard on that, but I wanted to be especially careful considering this isn’t my house.
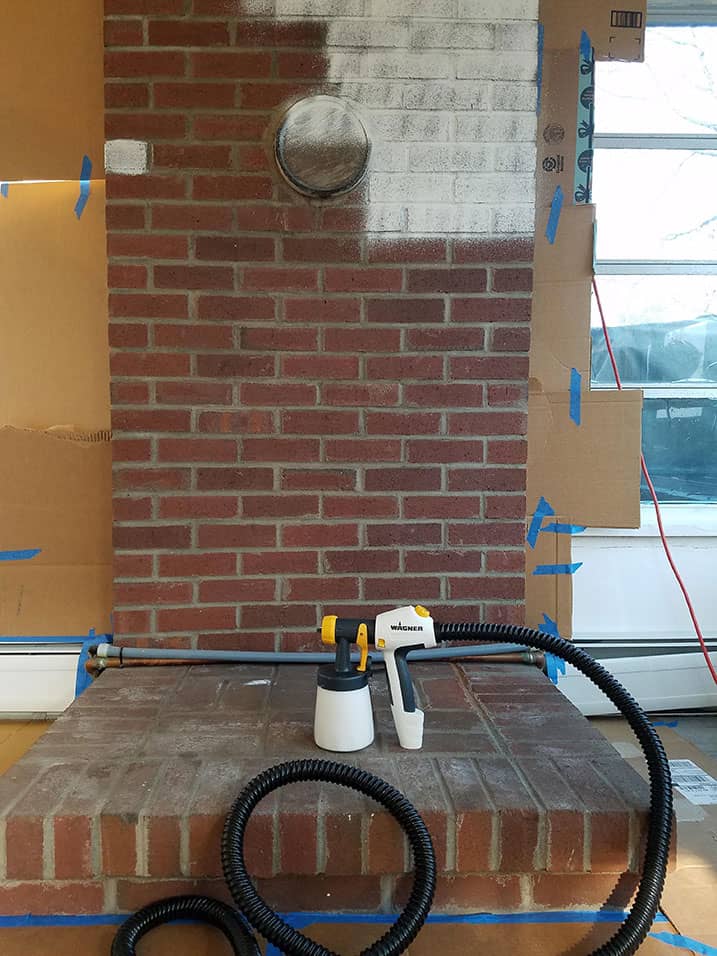
I used the Wagner Studio Pro Sprayer on this one. (Update: I’ve since switched to this paint sprayer instead!)
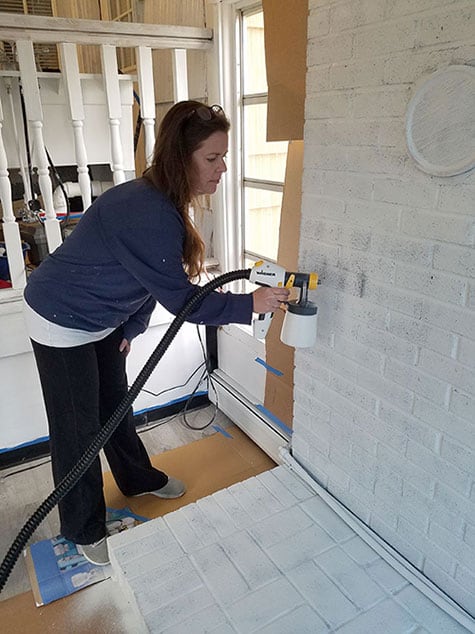
Here you can see it all primed and ready for the gray paint. Also notice on the cardboard barricade, how little overspray there is. You can control how much or how little paint comes out of the sprayer making it very easy to control.

I did one coat of primer and two coats of the gray with the sprayer, which took me only about 2 hours total, this includes setting up the sprayer and cleaning it out after using the primer before switching to the gray. If I had painted that all by hand it would have taken a full day.
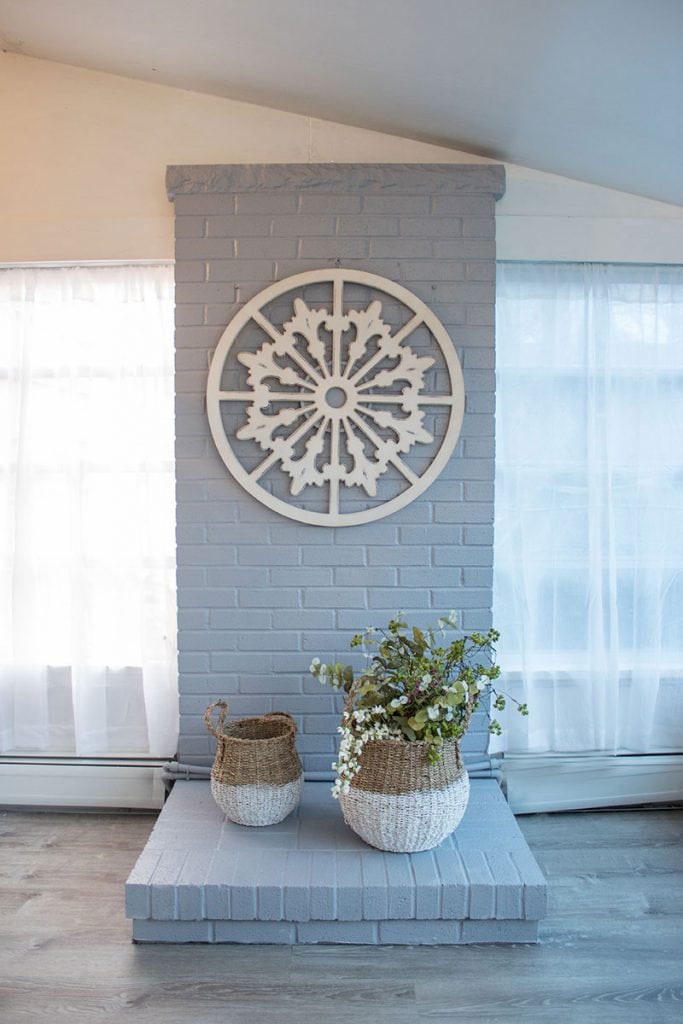
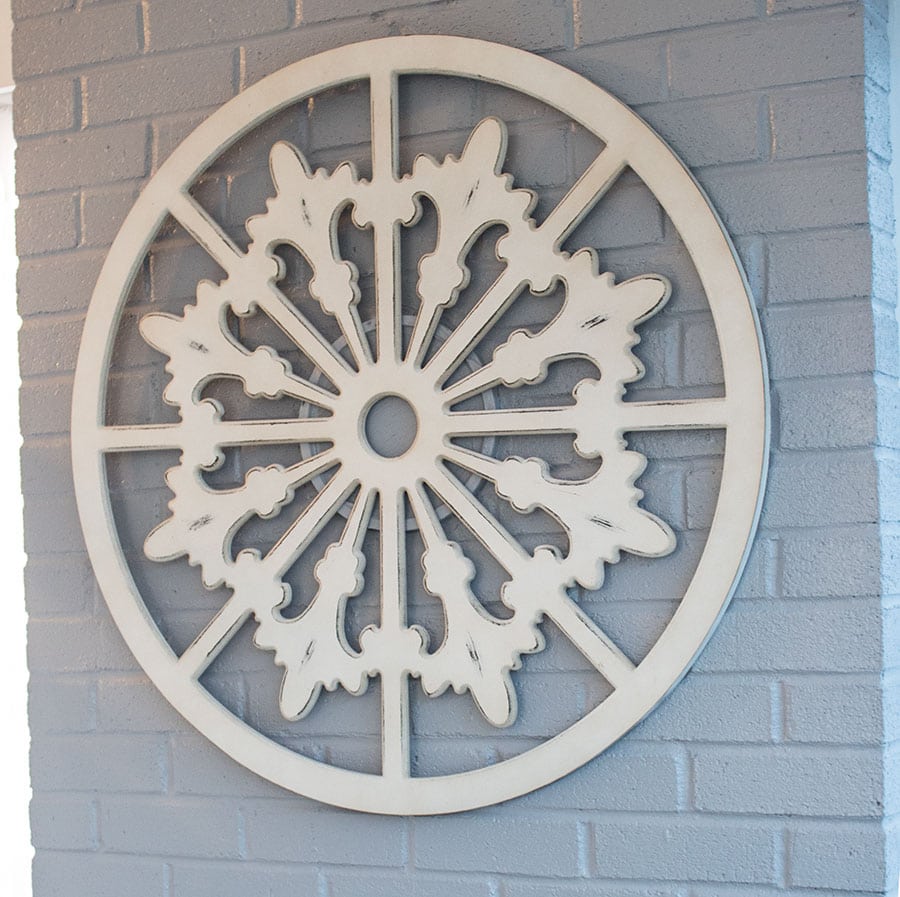
For the final step, I went back over the bricks with a paintbrush to fill in the voids that were still showing due to the texture of the brick. You can see the difference below, the arrow shows one of the bricks after the final coat with the brush. That last step gave me the finish I was after.

The gray paint we used is Marquee from Behr, called Power Gray.

The decorative piece on the fireplace hides the existing flue. This piece was actually a mirror I ordered for myself from Ashley Home Store. Unfortunately, it arrived broken. As I was about to throw it away, my husband suggested taking it apart and using the facing as a decorative piece. I was totally impressed with this idea and immediately thought of Kim’s fireplace.
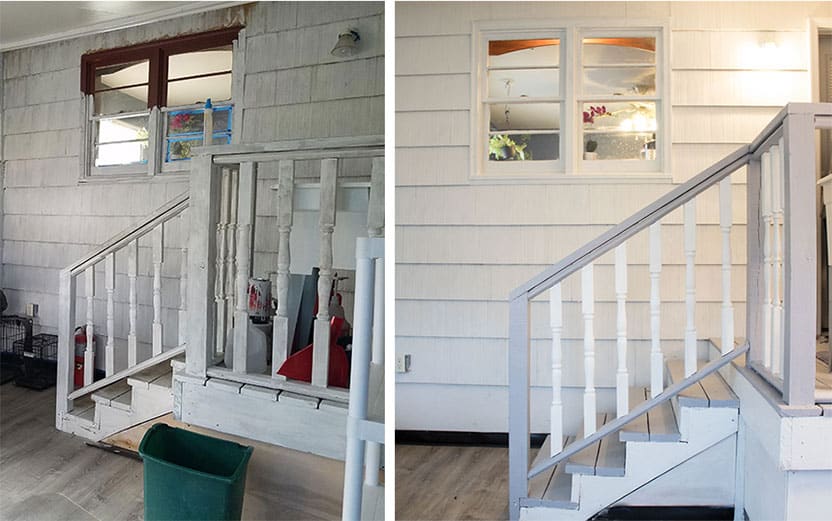
In addition to painting brick with the sprayer, I found it was excellent for the siding as well. The left picture below shows the siding after Kim spent more than a day painting it with a brush. I did the second coat (shown on the right) with my paint sprayer and it took me less than 30 minutes!
Want to know the best part of this makeover? About a week after we finished it, Kim told me she finds herself so much more relaxed while grooming her dogs in here, it’s a space she enjoys spending time in now!
That is why I love interior design, it really does affect your mood whether people are conscious of it or not.

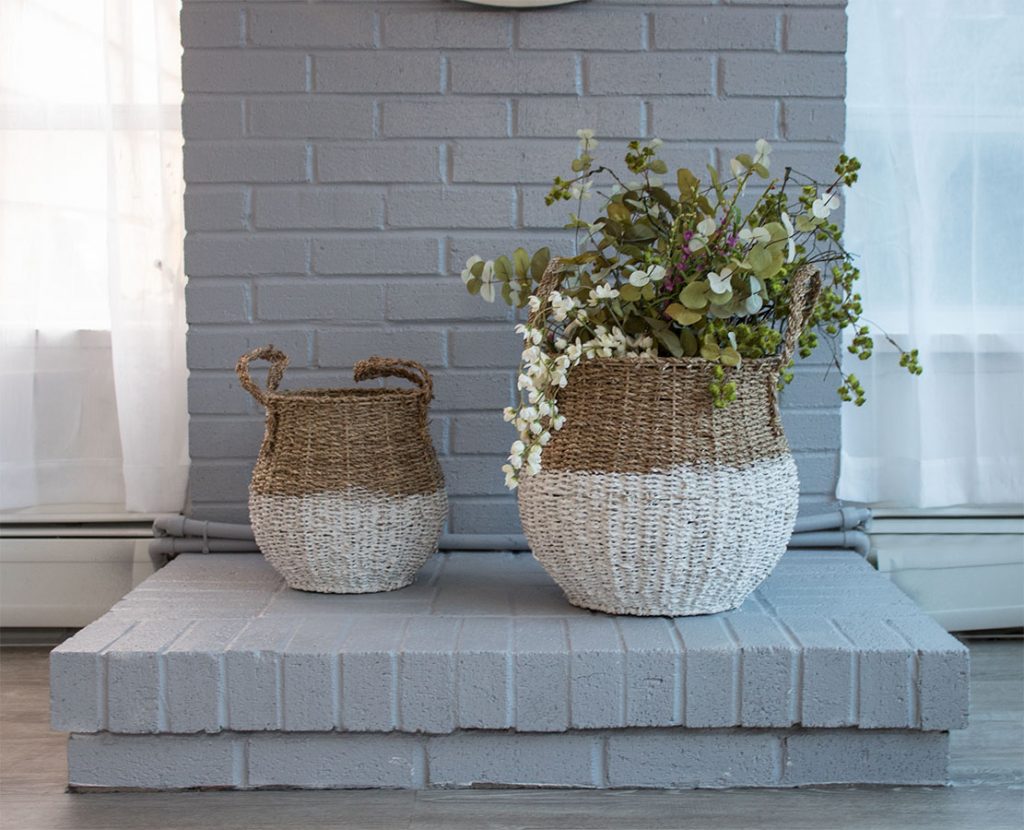
If you’re interested in the baskets on the fireplace, you can find those here. Don’t forget to check out the Wagner’s sale on this sprayer right now, it’s a great deal. It’s one of those things that after you get one you don’t know how you got by without it.
Do you love a good before and after paint transformation? Check out some of our others below!
- Painted Concrete Porch Floors
- Before and After Painted Shed
- Painted Dresser Upcycle
- Create A Shiplap Wall WITH PAINT!
*This post on painting brick was in partnership with Wagner and may contain affiliate links, all opinions are my own. You can read my full disclosure here.

It really does look so much relaxing now with that soft grey color.
Beautiful application and stunning new look!
Great post, Roxanne. Super interesting to read and learn about how you covered the bricks. I was trying to figure out how this was a fireplace. LOL! I should have realized, as I have lived with a wood-burning stove in the past, this is a wood-burning stove hearth, right? I LOVE that mirror facing you used. Smart hubby! 😉 Pinning!
Thanks, Julie, you are exactly right. It was a wood burning stove, but it failed inspection when my friend was buying the house so she opted to remove it.
Well, that makes sense! Thanks for sharing at Homestyle Gathering! Hope to see you tomorrow!
Looks amazing I love painted brick.
Maria
It turned out so beautiful roxanne! I am sure kim is thrilled to have this new space looking so pretty.
Hi Roxanne! I’ve had many people tell me how much they like their Wagner paint sprayers!! We just bought a house here in Texas (to close in mid-Feb. and taking possession on Feb 28., yeah!!!) and I think having one would be wonderful for when I do feel like repainting the walls and my old furniture. There is a fireplace and its all vanilla right now… and I do like grey. 😉
Happy decorating and your friend’s home turned out great!
Hugs,
Barb 🙂
Wow! What a difference some paint makes. That is amazing. It is so nice of you to help your friend. I like painting and usually offer to help. I would love to see her grooming room all set up when it is all set up. So exciting for her!
Came out great! I have the Wagner Flexio Sprayer and use it for furniture. Makes it so much faster.
Such a good job. Looks amazing.
.
Thank you!