How To Paint A Shed – before and after
HOW TO PAINT A SHED THE EASY WAY – WITH BEFORE AND AFTER PHOTOS!
Just when I thought I could no longer be surprised by the transformative powers of paint, I was proved wrong!
My painted shed is another testament to what can be done with a gallon of paint! I had been thinking of painting our shed for a year or two, but I have two beautiful vines growing up one side of it that were so large that it made it impossible.
Last fall, my husband cut them way back (when I wasn’t home to stop him), so I figured now was the only time I’d be able to get in there with the paint before everything started growing.
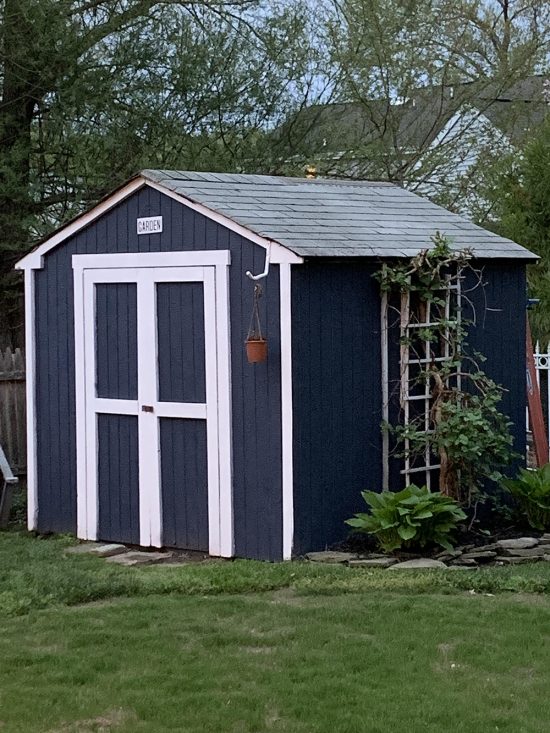
How to paint a shed: the before
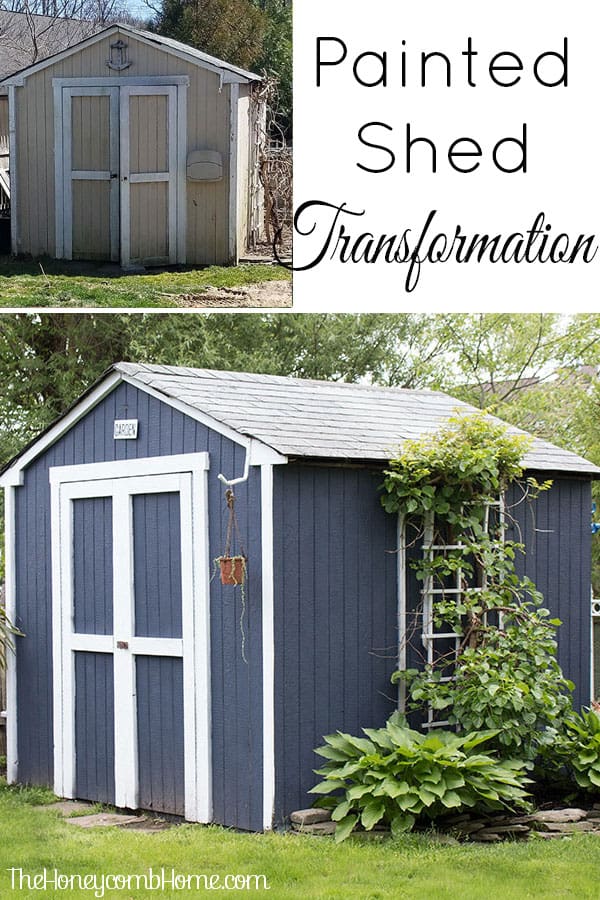
The picture below is a bit embarrassing, but this was taken right at the end of winter, so everything looked dull. This is what the shed looked like before I decided to finally paint it.
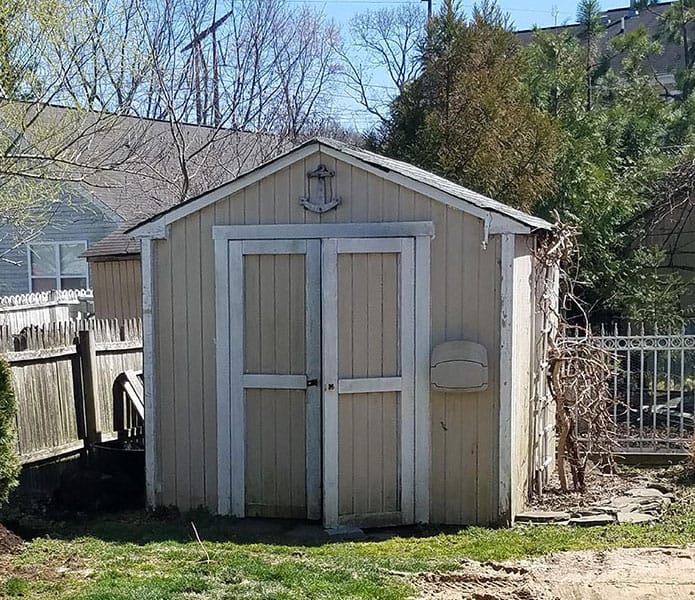
This may only be a storage shed, but it’s a big structure in a small yard, so I wanted to make it more of a focal point.
surface preparation of the shed before painting
First, I gave our old shed a good cleaning, but it was so filthy you could barely tell. I used a pressure washer, but the stains didn’t fully come clean.
Another round with the power washer and a good outdoor cleaner would’ve done it, but I just wanted a clean surface free from loose dirt and debris. That is all I needed since I was planning to paint it darker anyway. The darker color would easily cover the old paint and stains.
Another thing to keep in mind when planning to paint your outdoor shed is the weather conditions. If it rains before the paint is fully dry, that would be a disaster, so check the drying times on your paint as well.
Additionally, high humidity or very cold temperatures can affect your paint as well as the drying time. This is important so that all your hard work will pay off and you’ll have a long-lasting paint job.
A dry day with low humidity is essential.
Choosing outdoor paint for a shed
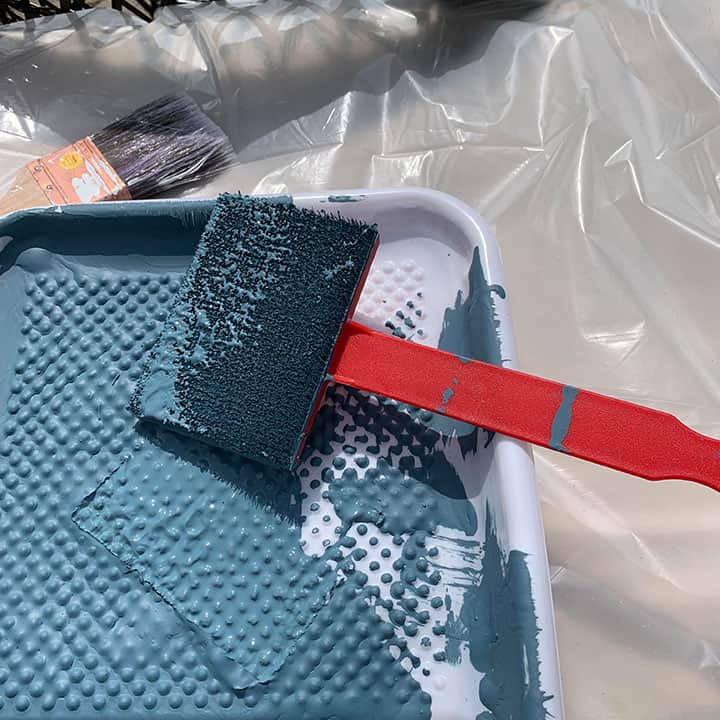
The only thing that’s really exciting about painting a shed is the choice of color. I picked a color that looked to be a good blue/gray from Behr ( I think it was called Colonial Blue) and started by cutting in around the trim areas. Using blue would make a nice backdrop for the green vines that will grow up the sides.
Of course, you’ll want to use a good quality exterior paint for the best results. I would recommend the best paint you can afford. Quality does matter.
How much paint you’ll need will be determined by the size of your shed. I purchased two gallons and used about one and a half cans of paint. You can calculate the square footage of your shed to find out exactly.
cutting in with paint
First, I used a paintbrush to cut in around the edges of the shed.
The problem with this project was painting behind the trellis attached to the side of the shed. There was no way I was going to remove that because I didn’t want to disturb the climbing hydrangea vines.
My only option was to paint behind it. I found a flat edger with a handle in my hardware store, which actually made this pretty easy. Other than getting poked with a branch here and there, lol.
The Easiest Way to Paint a Shed
Our shed is a wood shed, which means it has texture and grooves. The easiest way to paint a shed like this is to use a paint sprayer. It also makes it quicker.
After I cut in and painted behind the trellis, I set up my paint sprayer to paint the rest. I began by using my Wagner Studio Pro Sprayer on it. However, halfway through the project, I decided to buy the Flexio 575 sprayer, which I love!
This would give me the best coverage in a short amount of time

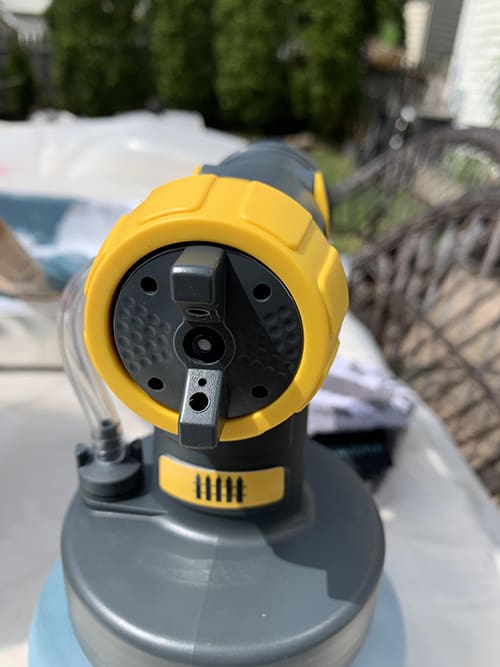
I love the control nozzle on this paint sprayer because it lets me easily adjust the amount of spray that comes out. I always set it on low by rolling the dial to the minus setting to begin.
It’s better to start slow rather than end up with too much overspray or drips. If needed, I can increase it from there.
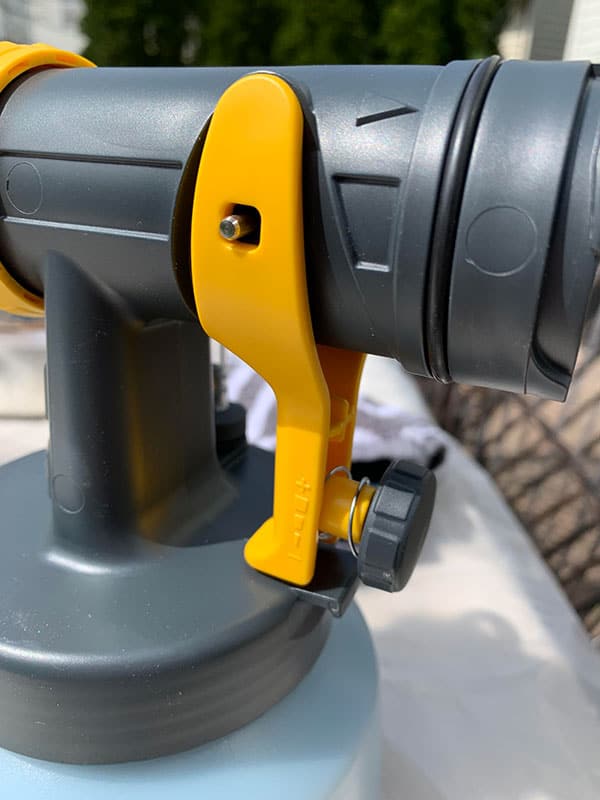
You can also control whether you want the spray to come out in a vertical or horizontal pattern by turning the dial on the front of the nozzle.
Note: It’s always a good idea to wear safety glasses when working with a paint sprayer.
It took no time to fill in the rest of the shed with the sprayer.

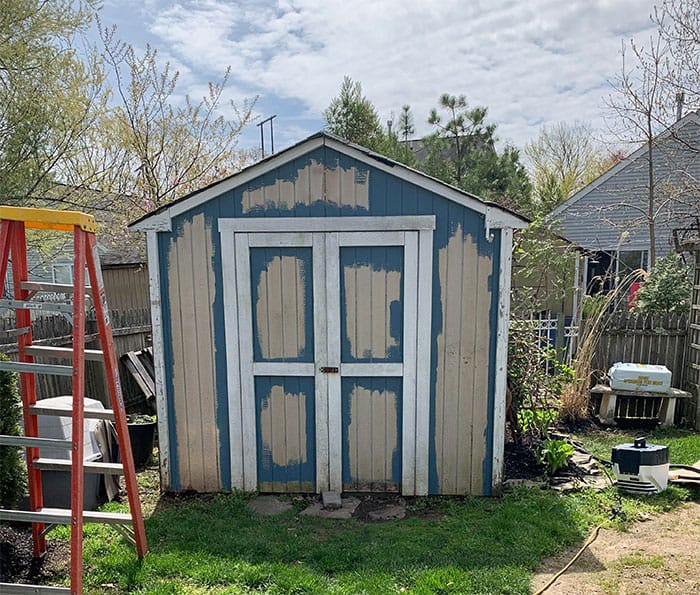
a better outdoor paint color
After I finished that side with the sprayer, I started second-guessing my choice of paint colors. I decided it would be a good idea to stop there rather than painting the entire shed. I wanted to sit with this color until the next day. The next day, I realized I couldn’t live with that color. Not the wow factor I had in mind.
I remembered I had a Benjamin Moore sample pot upstairs. So I painted a swatch of a color called Hale Navy onto the front. I knew right away I liked that better. Though I didn’t really want to start from the beginning again, I did anyway because I knew it’d be worth it.
I started from the beginning with cutting in again. Then I gave the whole shed a fresh coat of paint with the sprayer. If you are using a lighter color, you may need additional coats of paint for full coverage.
Once that was complete, I painted the trim a bright white for contrast. You can use painter’s tape if needed, but I find that when I use a good, angled paintbrush, I can get a straight line without the help of tape.
A good quality angled brush, along with a paint sprayer, will help you achieve a professional-looking finish.
This color makes a dramatic statement, and I love how the greenery contrasts with the dark blue!
The darker shed paint is also great to help disguise the dirt and grass stains that inevitably get on it.
Clean Up Tips
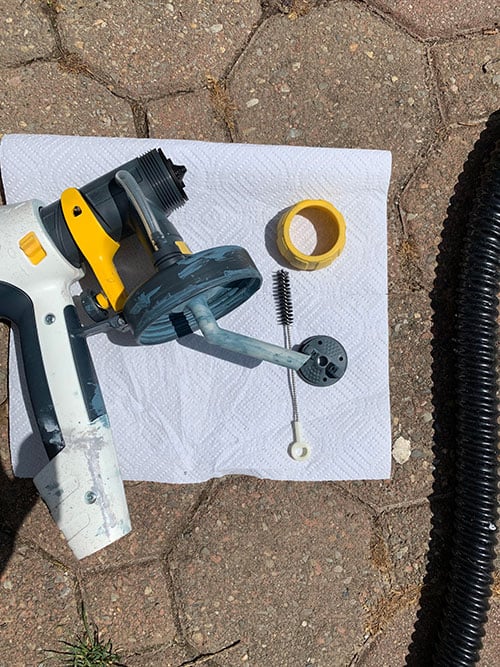
It’s important to clean the sprayer correctly after use to prevent it from clogging.
Cleaning the paint sprayer is easy. First, empty the canister of any remaining paint and run water through the sprayer until it comes out clean. I also take the nozzle ring off and give it a cleaning with the small wire brush that comes with it. It doesn’t take any more time than it would to clean rollers and brushes.
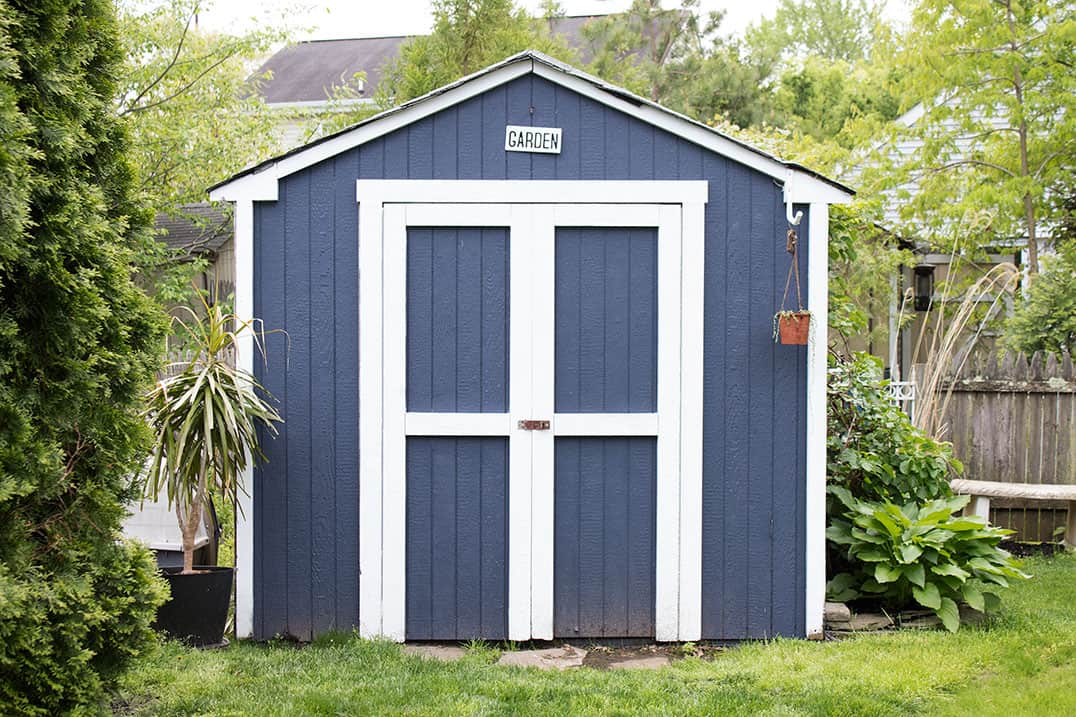
Painted shed after
Can you even believe this is the same garden shed?
With the painted shed and the yard starting to green up, the view is so much better. It’s like night and day from what it looked like before! The makeover completely transformed our entire outdoor space.
If you’re wondering what the vines are, one is a climbing hydrangea, and the other is a hummingbird vine. The hummingbird vine gets beautiful orange flowers that bloom almost all summer long. Those flowers will look beautiful against this dark blue.
Update: We soon discovered hummingbird vines are invasive and began sprouting up all over the yard, so we removed that one.
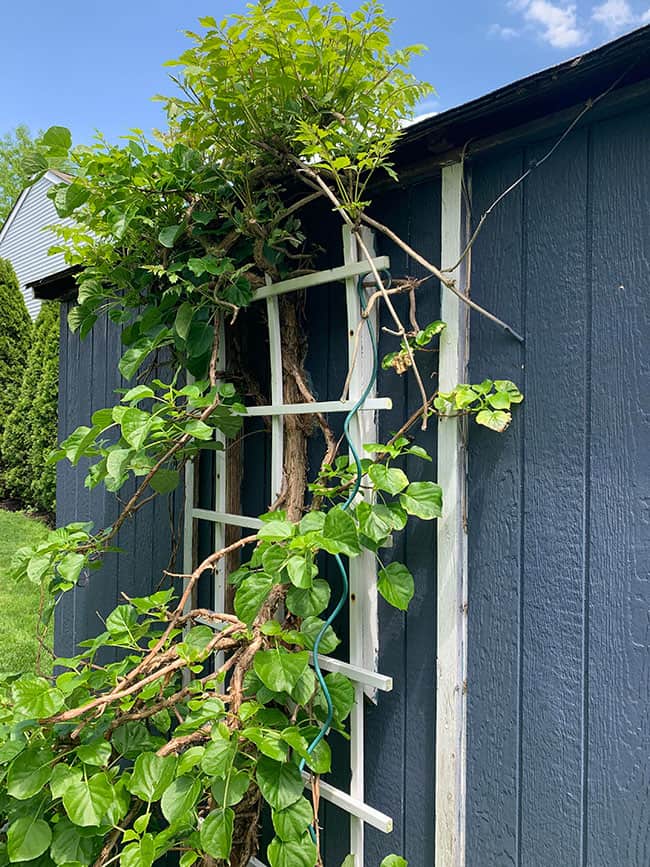
The climbing hydrangea is a slow grower and not invasive, so I would recommend it. It’s beautiful in contrast to the blue paint on our shed.
Now, if only I could get my husband to help me paint the house to match. 😉

What kind of paint for different types of sheds
As I mentioned, ours is a wooden shed, which made this process straightforward. However, if you have a metal shed or a shed with siding, your prep work and the type of paint you use may be different.
Using the right type of paint for your shed’s material is essential. For example, oil-based paints may be best if you have a metal shed. Do your research on which types of outdoor paint would be best before beginning.
Other than that, the process of painting the shed would be the same; a paint sprayer works on any surface.
Did you enjoy our painted shed post? You can see more of our outdoor DIY projects below!
Please pin and share with your friends:
faq’s on painting a shed
*This post was in partnership with Wagner Spray Tech and may contain affiliate links. All opinions are my own; you can read my full disclosure here.
Looks like a brand new shed! 🙂 Great job! I’m sure it was disheartening to have to start over with the new blue, but it really looks fantastic now. 🙂
Thanks, Claudine!
Love your shed! Amazing transformation. And I have to agree about the color also. Painted (had someone paint ;-)) my house trim last year. I went with a colonial type blue that everyone thought would be too much on our brick house. Now I wish I had went with a deeper navy or indigo. Anyway, your shed looks fresh and quite lovely.
Thank you, Gwen!
That looks so gorgeous Roxanne💜😉
That came out so nice. What a difference. Good job.
Thank you!
That looks like a new shed. Great choice with colors
Thanks, Laura!
Your shed turned out great, Roxanne! Love the darker blue ~ very pretty. We’ll eventually be painting ours but for now it’s that ugly metal beige. 😉
Thanks for the idea,
Barb 🙂
LOVE your project! Well done!
Starting over is an itch, but SOOO worth it.
That anchor emblem from above the door, would be especially fitting on this color. Next project?
Yes, I live on a sailboat, so love all things nautical, especially my sailor! I married the boat 29 years ago, so thank goodness I have 4 daughters who let me dig in their flowers and paint their fences. LoL
Good job, your shed is a centerpiece now!
love the color choice on your shed called hale navy . now to go find that color at my local garden center. hope i can find it that color wont be happy till i do have to have that color… thanks for sharing this.
I love the color on your shed. Glad you went with this color. Looks lovely. But what I wanted to know is really the shed. I have been looking at building (or buying) one for my yard. I love yours. Did you build or buy it? Can you share with me the plans or where purchased? Thanks, Carol
[email protected]
Thanks again
Hi Carol, it was a build kit from The Home Depot!
Love the darker blue. It is amazing what a coat of paint can do!
Please delete my other message above…sorry!
I love Hale Navy! What an amazing transformation. I bet you are just thrilled!