How To Remove Paint from Wood Furniture
HOW TO REMOVE PAINT FROM WOOD USING SEVERAL METHODS FOR THE BEST RESULTS.

As I mentioned when I shared my hutch makeover a few weeks back, I tried several different methods to remove the finish from the shelves. I wanted a natural look on that, and although it was a bit labor-intensive, it was definitely worth it. I also wanted to practice on that one before touching the vintage dresser I found on Facebook Marketplace.
You can read the different methods I tried to remove the finish from the hutch here. Today I will focus on how I removed the paint from this vintage dresser, using the methods I found most effective.
What You Will Need to Remove Paint From Wood*:
Zip Strip (update: no longer sold, try Citristrip instead)
Safety Glasses
Rubber Gloves
why remove paint from furniture?
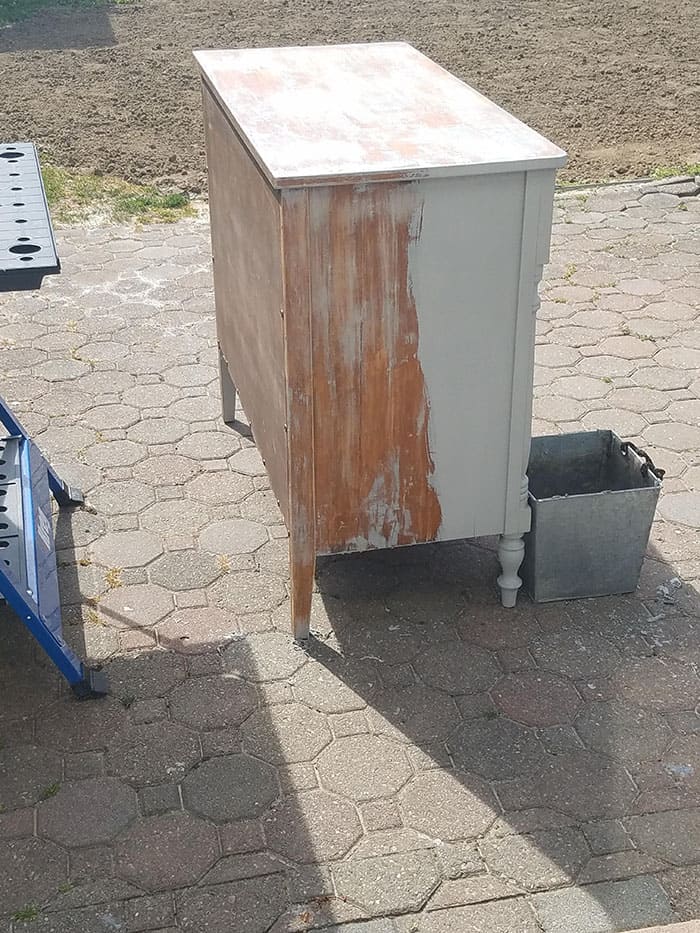
This is what the dresser looked like when I picked it up. I realize it’s beautiful as it was. However, the one time I found a piece that was painted beautifully, it turned out that the color was the exact same color as the walls in the bedroom where this was going.
What are the odds of that?
Had that not been the case, I would’ve left this as-is. My original design plan for this bedroom was to feature an unfinished wood dresser, so there were two legitimate reasons to tackle this project.

Step 1: prepping to strip paint
First, I removed the drawers and brought the dresser outside. The chemical stripper I used is called Zip Strip, and while it’s not the worst thing I’ve ever smelled, it definitely needs to be done outside or in a really well-ventilated area. I purchased it from a local hardware store. I did an online search and found it isn’t carried in the major stores as I would expect.
Update: This isn’t even sold anymore. I now recommend Citristrip, which claims to have no harsh fumes.
You should wear rubber gloves & safety glasses when using these chemicals to protect your skin. I had a drop or two splatter on my arm, and it was uncomfortable.
Step 2: Apply the paint stripper
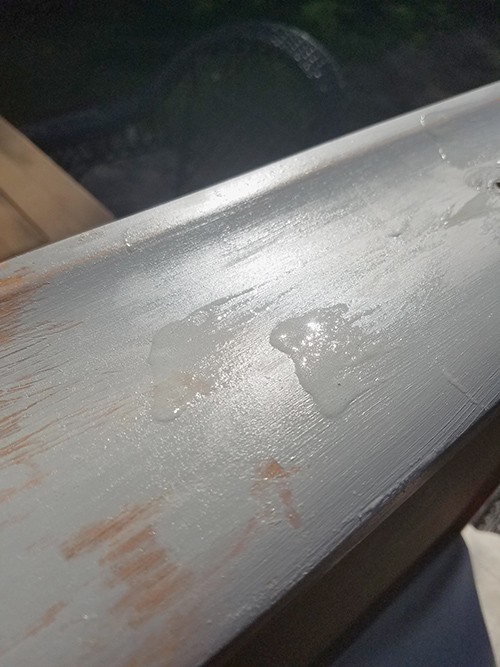
I worked in sections, painting the zip strip on and letting it sit. The directions say to wait 10-20 minutes, but I found 10 was enough. After 20, it was starting to dry, but that could also depend on the weather conditions, so I would recommend testing it first.
Then I used a spackle knife to scrape off the paint in the areas where I applied the zip strip. I found using one straight motion rather than a back-and-forth motion was much more effective.
I did all the flat surfaces this way, sometimes going over stubborn areas twice.

The top section definitely had to be done twice. Here is another progress shot when I moved onto the sides.
Step 3: sanding the furniture
Once I went through the process with the chemical remover, I sanded the entire piece down with my husband’s palm sander. This helped smooth it out as well as get down to the lighter wood tone underneath, which was what I was looking for.
What made me nervous about removing the paint on this vintage dresser was the spindle legs on the front. Scraping those would be too difficult. I picked up a wire brush from my local hardware store for those sections. I used the paint remover on the spindles first, as I did with the rest, but I wiped it off with paper towels rather than the spackle knife. Then I used the wire brush to remove the rest.

The wire brush worked well for this, thankfully. One end had a small scraper on it, which really came in handy.
step 4: sanding the drawers and pulls
Once the frame of the dresser was all done, I worked on the drawers in the same way. First, the chemical remover, then scraping, and finally sanding. For the knobs, I let them sit in a bowl of the zip strip and used the wire brush on those. I found the more generously you apply the Zip Strip, the better the paint will come off.
I also used an angled sanding sponge to get down into some of the corners where the wire brush didn’t fully get to. That worked perfectly.

final thoughts on stripping paint from furniture
To remove paint from wood furniture is not an easy task, in fact it gets tedious!
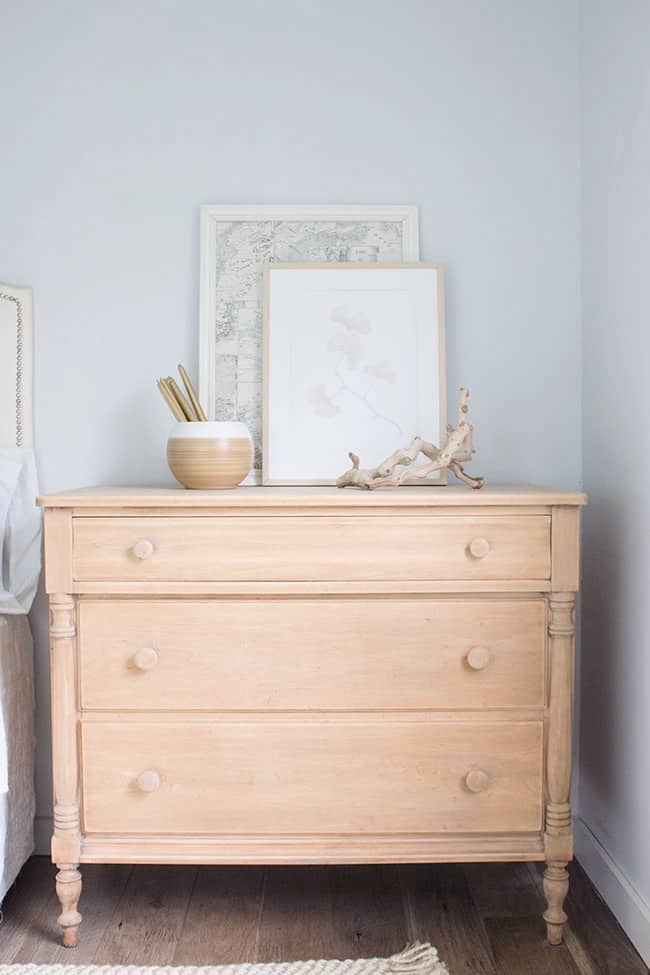
However, I’m so glad I didn’t let the amount of work required to remove paint from wood furniture deter me from doing it because I love how this looks now!
(Update: It’s been several years since I’ve done this project, and this dresser is still one of my favorite pieces. We have since moved, and now it lives in our living room as our TV console table!)
I am still considering adding a light cerusing wax or possibly a whitewashed stain, like we did on the hutch shelves. I’m going to wait until the rest of the bedroom is complete before I decide on that.

Next up is to buy a headboard. I know there will be lots of Memorial Day sales this coming weekend, so I’ll be shopping for the best deal.

(Update: You can see the finished bedroom makeover here.)
Pin it for later:

*This post may contain affiliate links. You can read my full disclosure here.
Wow. That’s not an easy task. Especially when you are going to leave it natural which means getting every little detail done. Great job!
I absolutely love this dresser in the natural state and love the style as well. I think you’d agree it was worth the effort although it was a huge undertaking.
I have stripped furniture over the years and it’s a ton of work. Worth it though, depending on the piece!
I just love the look of natural wood. You did a fabulous job. Thanks for the tutorial and ideas.
A lot of work, but yes worth it. Turned out great and I love it.
It turned out great, well done! The natural wood is really something special! Thanks for sharing. All the best, Carolina at Ironmongery Experts.
Looks sooo good! Getting sick of beautiful wood furniture being turned into carnival pieces!