How To Make Your Photos Look Vintage
HOW TO EASILY MAKE YOUR PHOTOS LOOK VINTAGE IN PHOTOSHOP, IT ONLY TAKES A FEW SIMPLE STEPS!
Last summer I picked up a few vintage prints at the flea market. You may remember I shared how to paint picture frames and mats after I bought those. I’m just now getting around to hanging them up in my bathroom and realized I needed one more to fill in the wall space.
The odds of me finding a similar vintage photo in the correct size would be unlikely so I had to get creative. My idea was to make a new photo look vintage to match the flea market pictures. It turned out to be surprisingly easy so I wanted to show you guys how to make your photos look vintage.
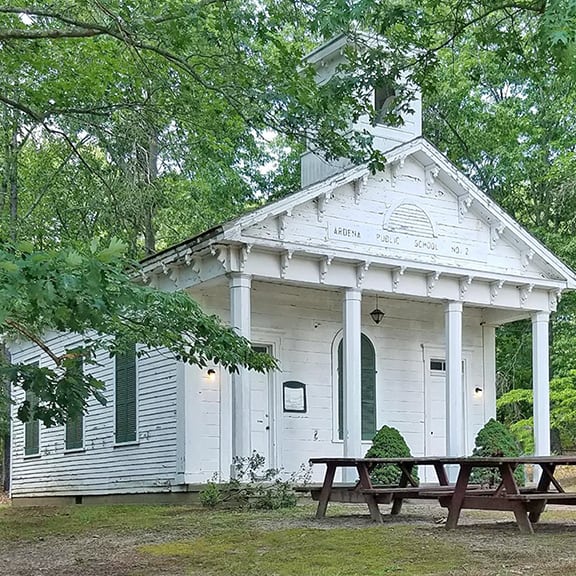
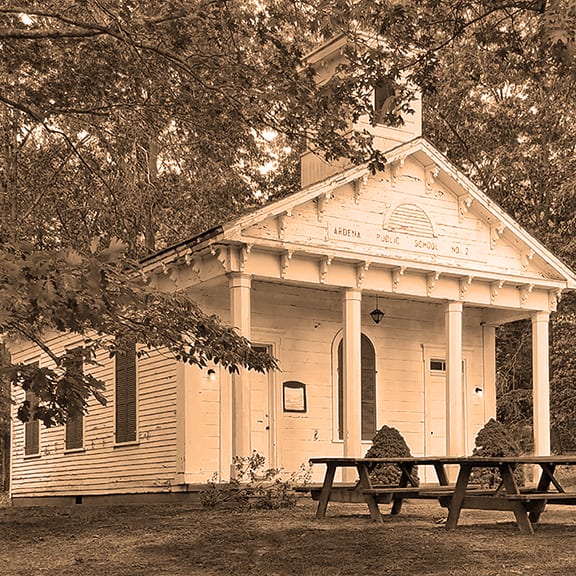
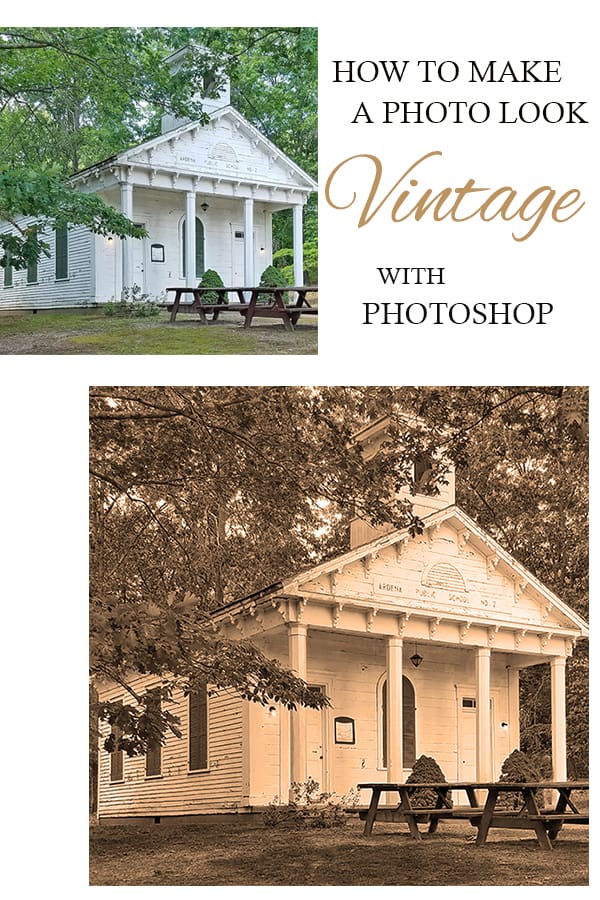
For my photo, I’m using this picture I took of a historic church in my county. The photo I actually used for my bathroom wall is different because I took that one from the internet. I’m not sure if it was a photo you’re legally allowed to take regarding image rights. So shhh on that.
First, open your photo in Photoshop. Along the top toolbar click on Image, then Adjustments, and finally black and white.
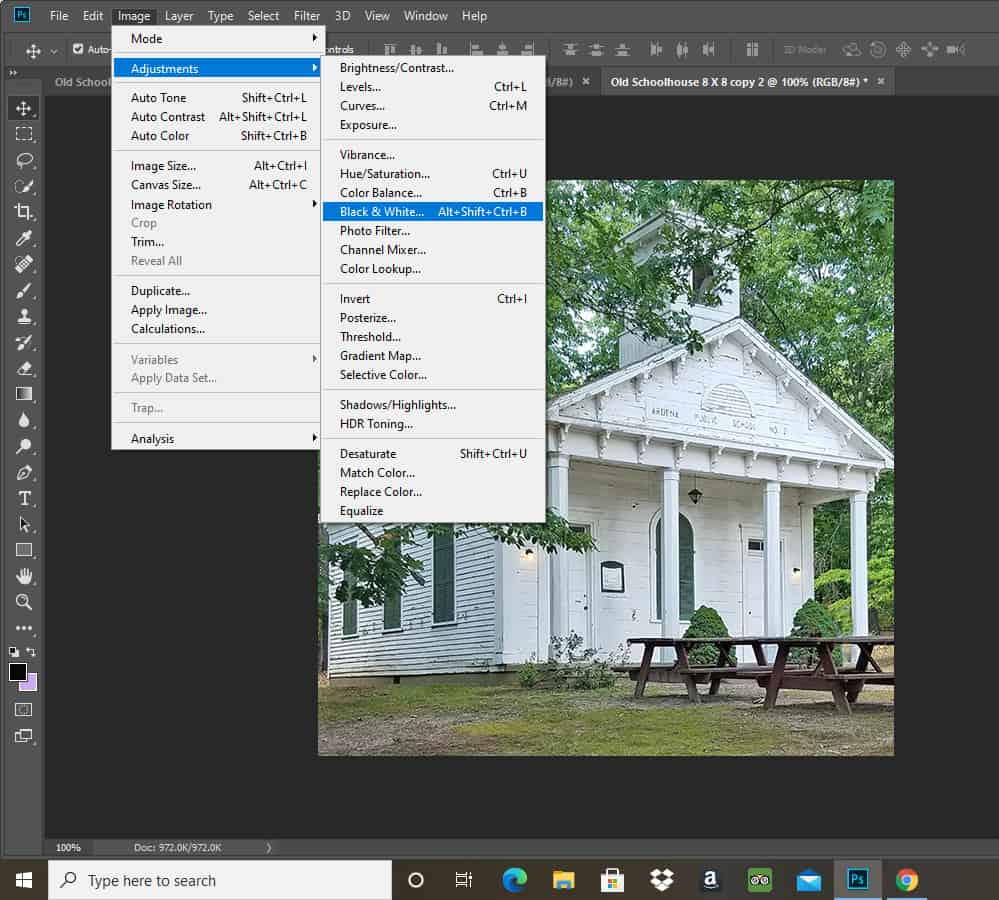
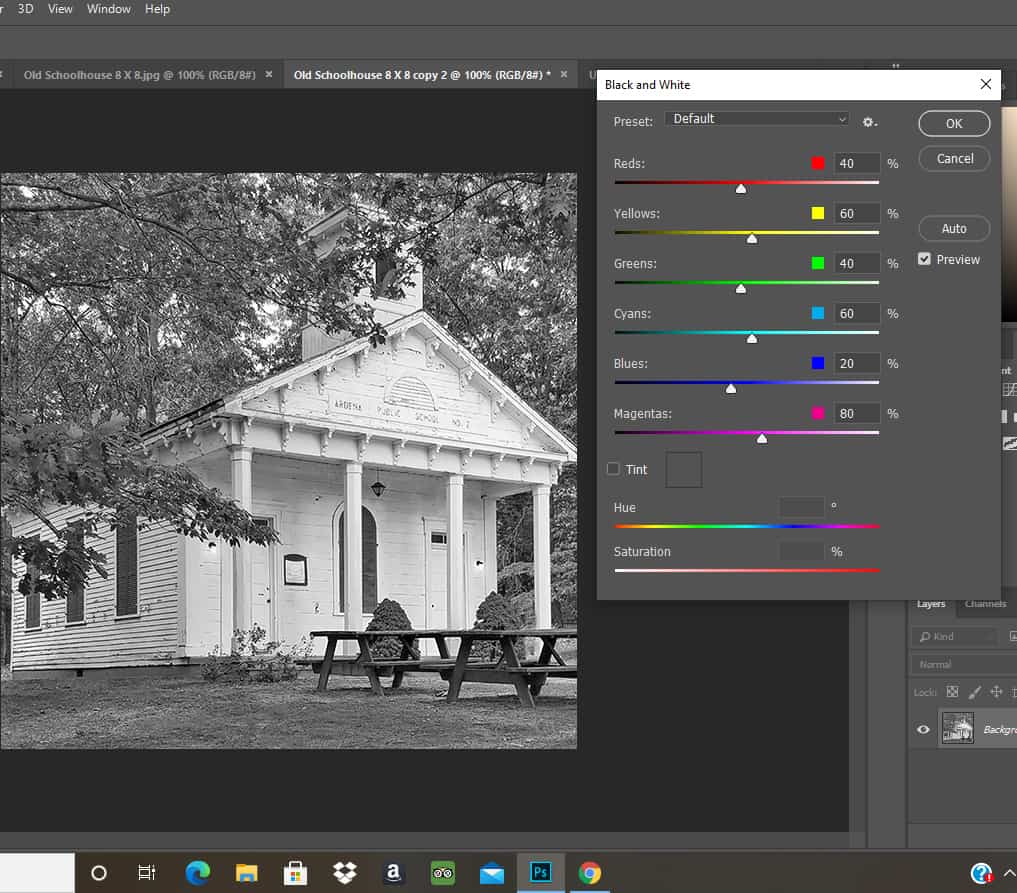
A new pop-up will appear and your photo will turn black and white. You can adjust the levels of the sliders to get different effects if you like. I didn’t change these much because the next step will give us the vintage look we want.
You can click OK to close that popup.
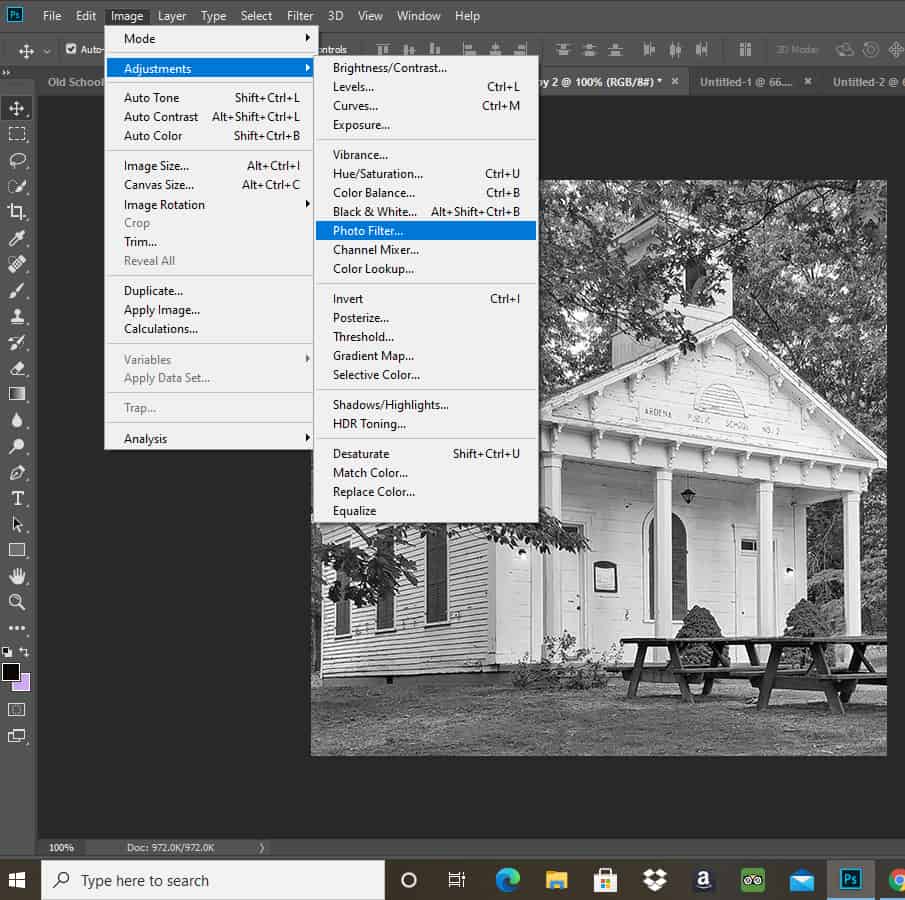
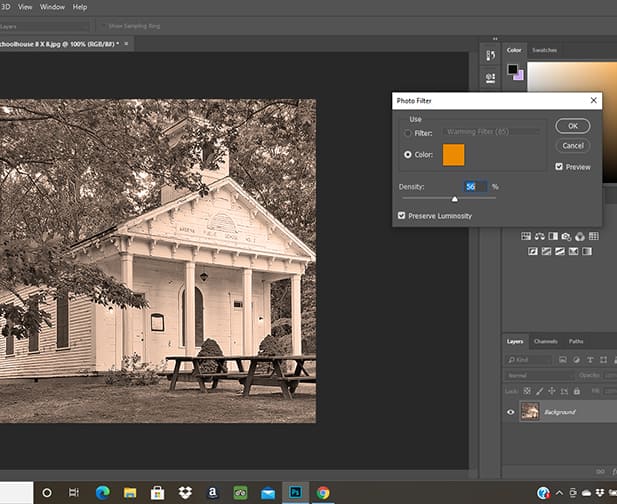
Next, click Image, Adjustments, and then Photo Filter. This step is how you make your photos look vintage.
You will see a new pop-up appear. I believe the orange color showing is the default here but I’m not positive. Click the circle next to the word color and slide the density bar to add overall color (thus making it look vintage) to the photo. It’s basically that easy, but there are a few other options you can experiment with.
For example, you can also click on the color square in the pop-up to change the color effect if you want to.
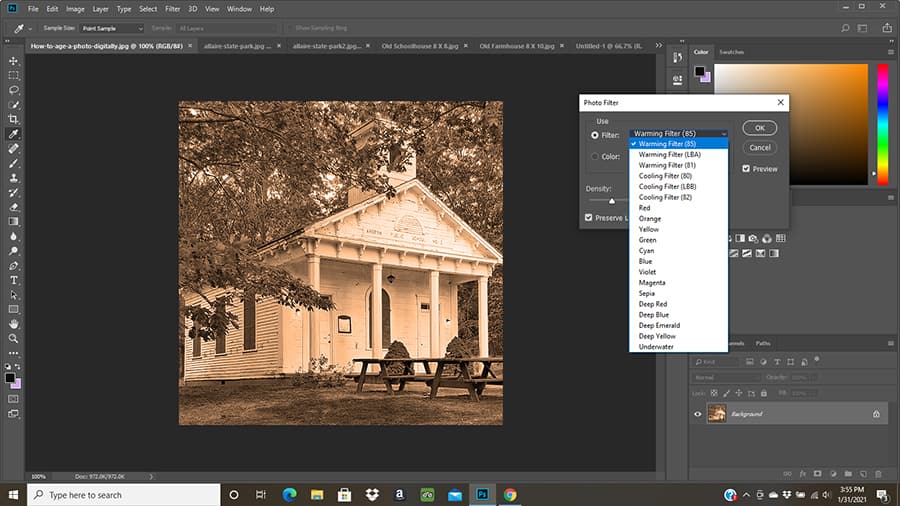
Or you can click the circle next to the word filter.
When the filter circle is highlighted, you can see more preset options from the dropdown menu. Click on those to try out different color filters.
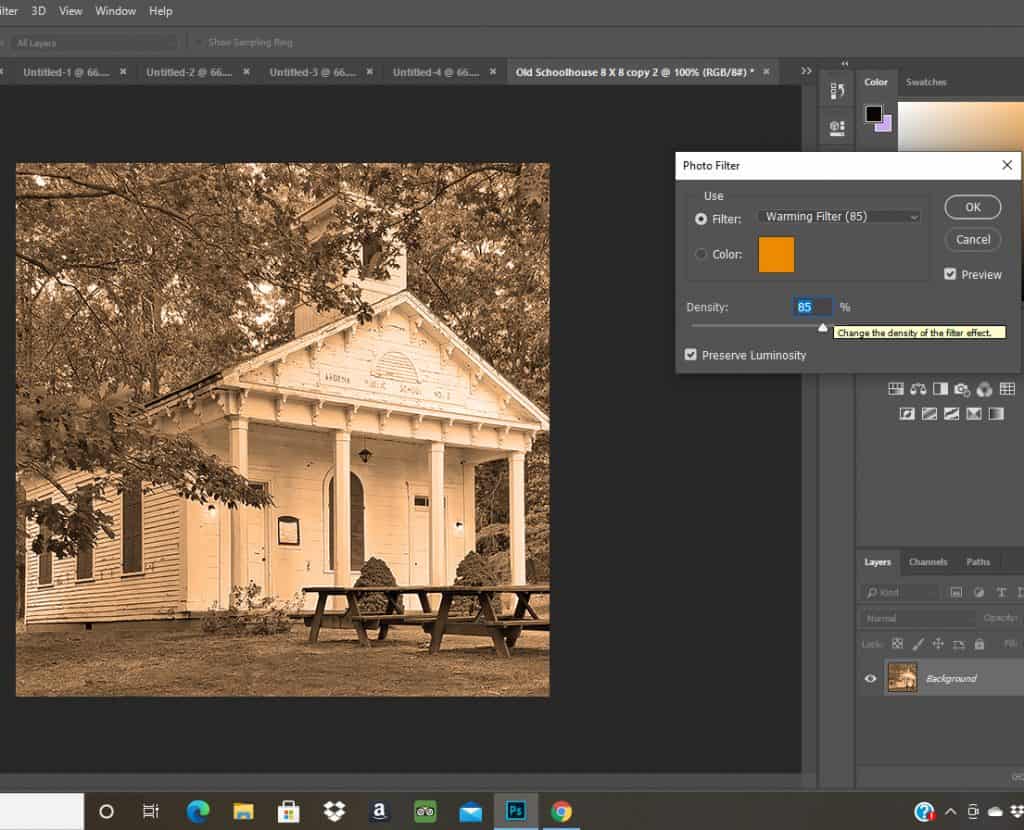
Looking at this photo now, you’d never know it wasn’t a true vintage photo, would you? For my final photo below, I used the orange color and a density of around 75.
This would be a fun way to create a really unique gallery wall. You could take a variety of different photos and make them look cohesive with this filter.
I know Photoshop can seem intimidating if you’ve never used it, but honestly, if I can learn it, anyone can!
I didn’t take any pictures of the wall in the bathroom yet. I’m thinking of making a few changes in there, but when I do I’ll share them!
PIN IT FOR LATER:
If you liked this post, you may also like DECORATING WITH FLEA MARKET FINDS!
This post may contain affiliate links, for more information see my disclosure page.
I frequently use this technique for aging new photos and love the idea. I use PicMonkey and have found that turning my photo black and white first, as you did, then applying the “sepia” filter and fading it gives me a pretty good replica. I sometimes fade the black and white first before applying the sepia, it depends upon the photo. But it’s so fun! Thanks for posting thisi