DIY Card Catalog Ikea Hack
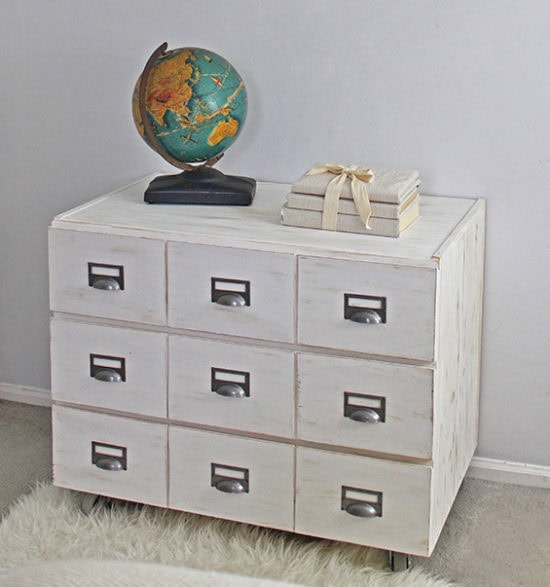
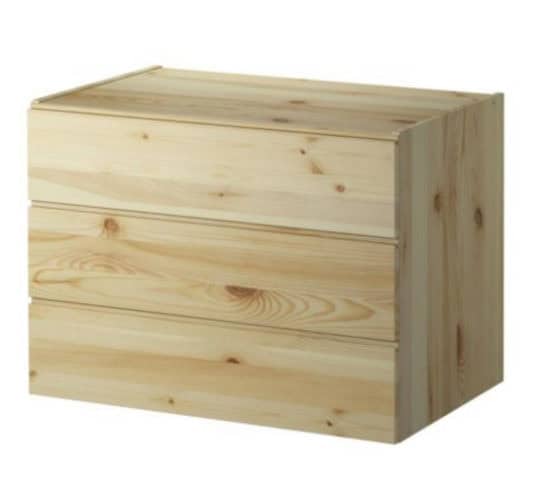
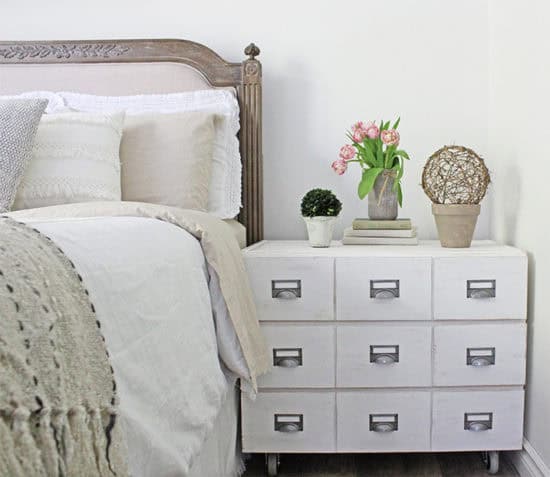
For the last few weeks, I’ve been cleaning out my younger daughter’s room and trying to get it organized. If you knew how messy my daughter is, you would know this is a major undertaking! Her old dresser was falling apart and we had to get rid of it. We haven’t gotten a new one yet, and I’m debating about whether to replace it at all. Instead, I may try to incorporate more clothing storage into other areas. I went to Ikea and picked up two of these IVAR chests. The size of these makes them a perfect fit on either side of her bed, to use as nightstands as well as clothing storage. They are obviously very plain, so I thought an Ikea hack was in order for these.
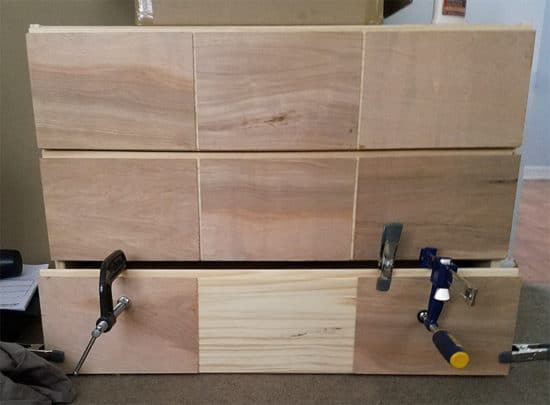
After I brought them home, I had an idea for making them a little bit prettier. I used some leftover wood from our shiplap wall in the kitchen that was perfect for this project. The wood is a thin veneer, called luan so I cut some of it into squares to attach to the front of the drawers. I used Elmer’s wood glue* to bond it to the drawer fronts and held it in place with clamps until it was set. I picked up these clamps at the store but my husband had two of these C-Clamps which were better because you can center those. I used all of them. I did two sections at a time, leaving the clamps in place for an hour in between.
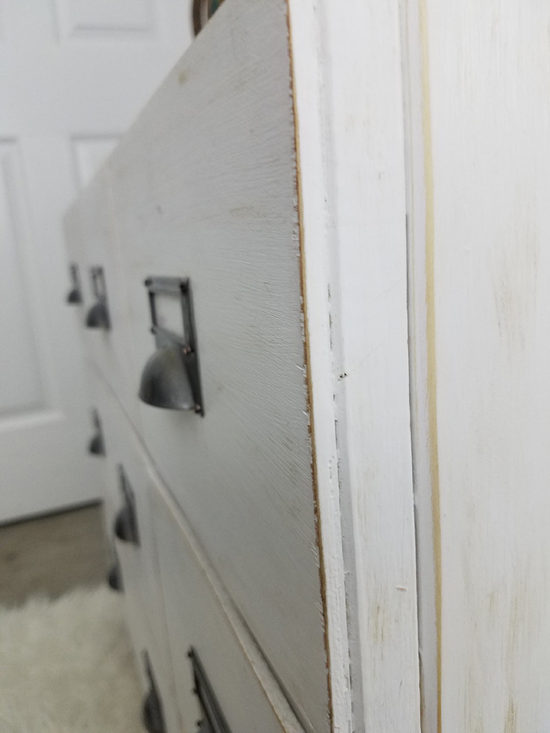
Once I had the drawer fronts in place, I painted it white with Annie Sloan chalk paint (you can read more on how to use chalk paint here). Once that was fully dried, I did some light sanding around the edges to give it a slightly distressed look. To seal the paint, I used the wax that goes along with the chalk paint. It comes in either a clear or a dark finish. I wasn’t sure how aged I wanted this piece so I tried something different and combined the light and dark wax together for a lightly aged look. I used approximately 1 part dark wax to 3 parts of the clear. Here is a close up of the side of the drawer, you can see how thin the wood veneer is.
Next I needed hardware for the drawers to give it some detail. After searching I found these card holder bin pulls online at Wayfair*. As soon as I saw these, I knew they would be perfect for the look I was going for.
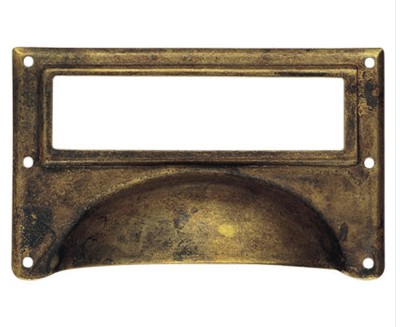
I really love the aged brass finish on these, and that is what I ordered. But after thinking ahead to what I want to do in this bedroom, and the colors I plan on using I decided they needed to be more of a silver/gray finish. I had a can of Rustoleum hammered metal spray paint, so I sprayed them with that.
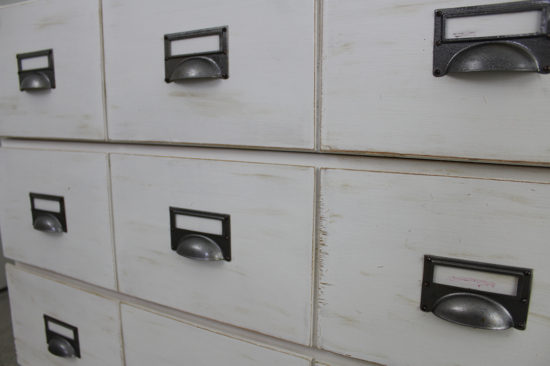
I love how it looks like a little card catalog!
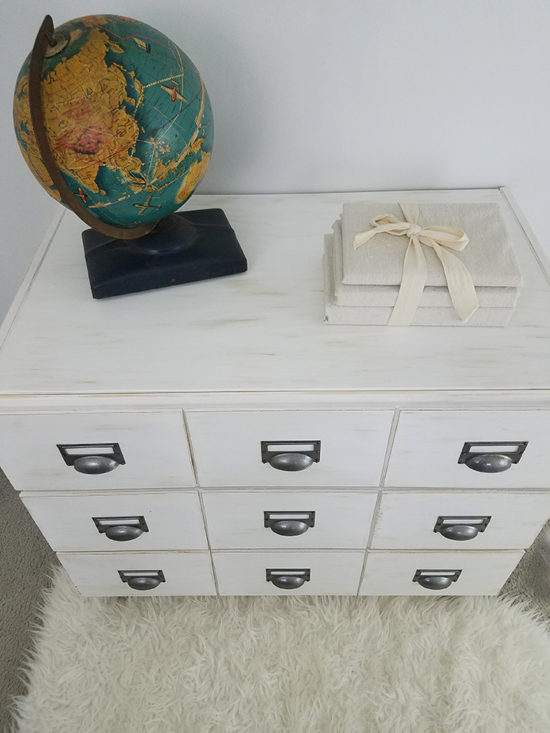
We also added casters to the bottom of the chest. I originally planned on using furniture legs, but casters were a lot less expensive. The best deal I found was on this set of casters from Lowe’s. I like that I can move the piece around easily especially since I’m still working on her room and I intend to paint it.
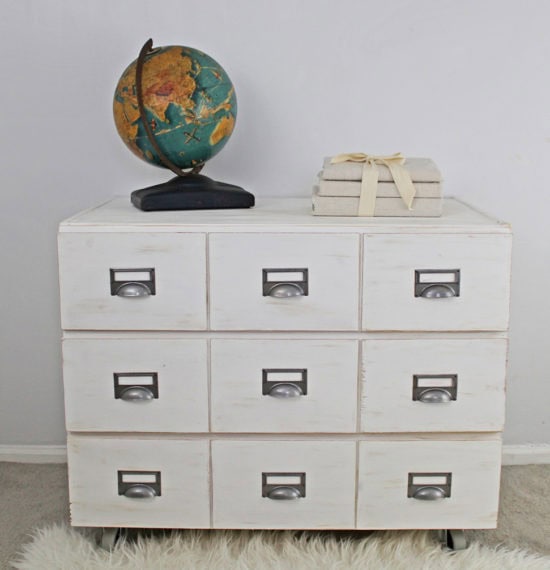
I only have one nightstand done so far. I’m still putting the finishing touches on the second one so for now I’m keeping this one is in my older daughter’s room until I finish up the painting. That is, once I get through the mess. Wish me luck!
(Updated, the room makeover is complete, you can see the full bedroom makeover here!)
*Thanks to Wayfair and Bosetti-Marella for supplying the hardware for this project! This post contains affiliate links, you can read my full disclosure here.


This turned out stunning! Shared!!!
Thanks Jessica!
That is beautiful! Love the drawer pulls. It really “pulls” it all together, HA!
lol….Thanks Rachel!
Oh wow, it looks fantastic! I love this! It really looks beautiful, I love the drawer pulls.
Genius! I loooove it! Awesome job 🙂
Cool idea! I wouldn’t have thought of putting facing on them like that.
Oh My Gosh! this looks like a really expensive piece! what a great idea. I have seen something like this in Pottery Barn for $600 or more!
Amazing DIY!
This looks so awesome! I love the faux card catalog drawers.
Love the way this turned out. It gives it so much more character!
Found this on the “Inspire Me Tuesday” party at A Stroll Thru Life, and I love it!!! I can’t wait to try this out. Thanks for sharing:)
Crazy clever! A great looking piece. Pinning & sharing!
I love the look of a card catalog – this is such a great way to get it! Nice job Roxanne!
You would never ever think this was an ikea dresser. It has so much flare and personality. Great work. Pinning.
Hello Roxanne Hun, I love this project, makes me want to hit Ikea – Love the card catalogue
I think this is the best IKEA hack I have seen so far! I love the card catalog look..pinning and sharing!
Thank you Susanne, that is so sweet of you to say!
Great job! I love the concept. One could even take it a step further and add partitions inside the drawers if they wanted to keep their things categorized.
I discovered your site after seeing you on tv today and love your style! I have a question about these drawers. When you cut the three squares to glue on each drawer, other than the gap between them, did you cut them even with the outer edges of the drawer? In one picture it looks likes there’s a 1/4” gap on the side edge.
I LOVE THIS! I started to gather my materials together. When I went to Wayfair to see what those drawer pulls cost, I was shocked! $9+ a piece! Did you get a discount? That comes to (18 pcs.) over $162 just on the pulls. I might have to rethink this.
Yes, I had a gift card. I have since noticed less expensive (though not exactly the same) ones here: https://amzn.to/2r9GggX.
Thanks Roxanne, there are several styles for very reasonable prices. I appreciate you answering so quickly. Project is ON!