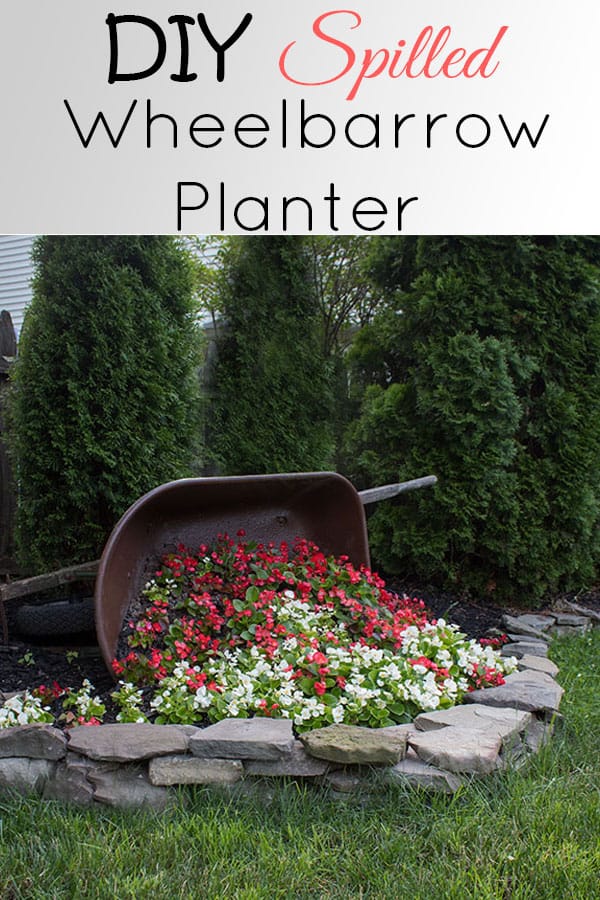
DIY Tipped Wheelbarrow Planter

Working on our yard has been a top priority around here. I’m trying to get the major projects out of the way before it gets too hot. This wheelbarrow planter is a cute idea I thought some of you might be interested in.
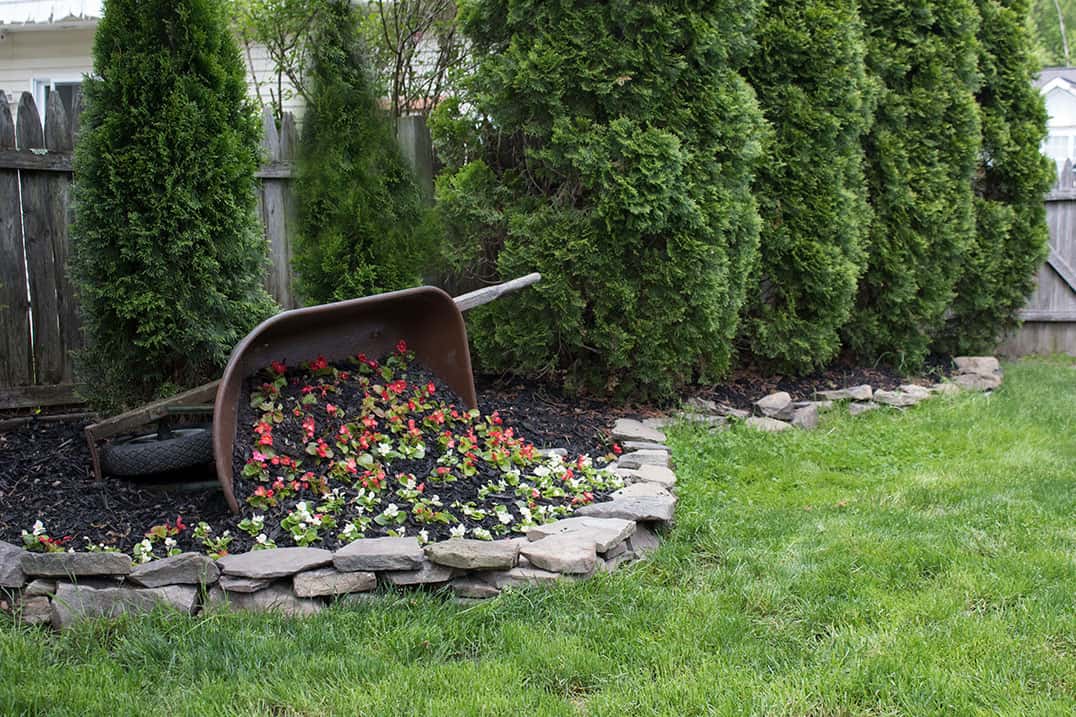
We have a friend who is a landscaper and he was over helping us remove sand from a pool we took out last year. I mentioned I wanted to make our old wheelbarrow into a planter and he gave me this idea for incorporating it into the landscape. This is a brilliant idea if you’re looking for large garden planters. Chances are you can find an old wheelbarrow around somewhere for less than a giant planter would cost.
Preventing the Wheelbarrow Planter from Rotting
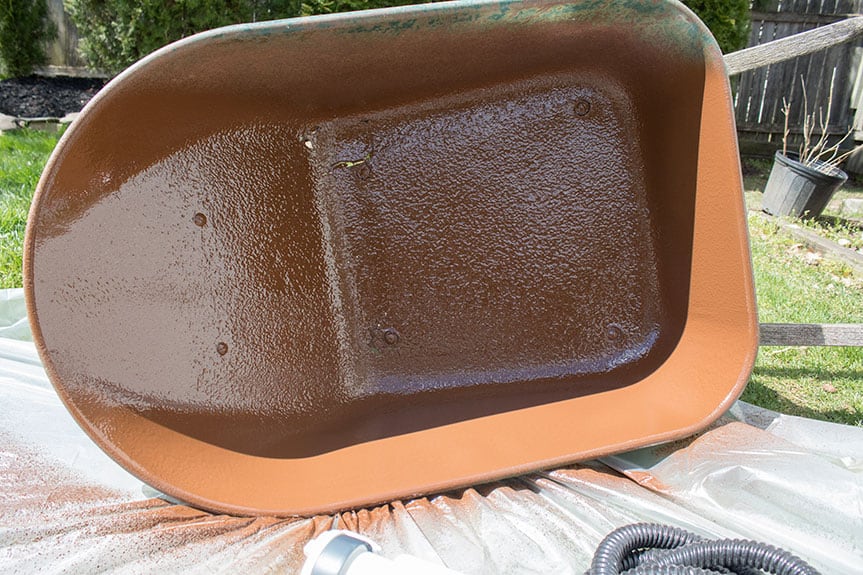
Because the wheelbarrow is old, it had rusted through in some spots. That concerned me because turning this into a flower planter would mean it would be getting excessive watering, and possible rot out completely. I had seen a paint advertised last year that stops rust, so I decided to paint the inside of the wheelbarrow with that first to help guard against the watering.
I chose the color brown (bear with me here) considering this was going to be the backdrop for the flowers. The idea was to have a color that wouldn’t compete with the flowers themselves, and I wasn’t sure what color flowers I’d be planting here.
I removed the wheelbarrow from the bed my friend set up and hosed it down well to remove dirt and debris. Before painting, I let it dry completely and wiped it out further with paper towels.
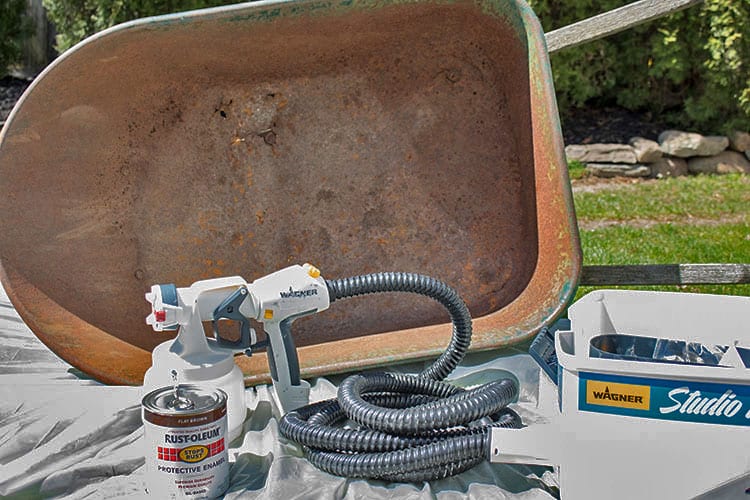
What you will need for the Wheelbarrow Planter :
Old Wheelbarrow
Gloves
Paint Sprayer (I prefer the flexio 5000)
Mineral Spirits (for clean up)
Prepping the Wheelbarrow
I used my paint sprayer on this because painting it by hand would have been a pain. First, I set up my painting area with the supplies. The Studio Pro sprayer (which is what I used for this) comes with two different nozzles. I have since upgraded to the Flexio 5000 paint spayer.
Most of the time I use the control finish nozzle on my projects but this time I used the iSpray nozzle. It’s a bit bigger and I knew it would knock this one out super fast.
Because this is something that is going to be outdoors, I used oil-based paint. The directions on the sprayer suggest using a high material flow setting for oil-based paint, which is what I started on but ended up turning it down because it was a little too powerful. I would suggest always starting on a lower setting and working your way up.
The adjustment ring on the sprayer allows you to choose which way you want the stream of paint to come out. I went with a vertical stream for this and used a side to side motion while painting.
This took all of about 2 minutes to paint! I flipped it over halfway through to better reach the other side of it without having to spray upwards. Actually, I was a little disappointed it went so fast because using the sprayer is fun!
I would highly recommend wearing gloves, especially when working with oil-based paints. Once that gets on your skin, it can be difficult to remove.
When I finished painting, I disassembled the sprayer and emptied out the remaining paint. I then filled the canister with mineral spirits and ran that through the sprayer to clean it out. Mineral spirits are recommended when using oil-based paint. With other paints, I run soapy water through it instead.
I let this dry for two full days before filling it in with potting soil.
Filling the Planter
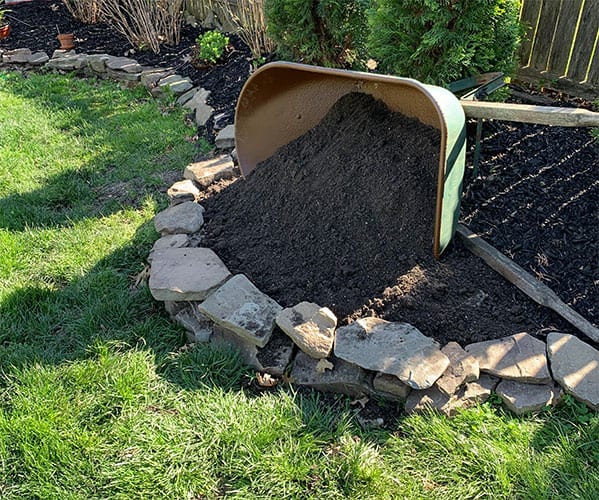
After I filled it in with soil, I decided to extend the rocks out a little further than what it shows above. It looked a little cramped this way.
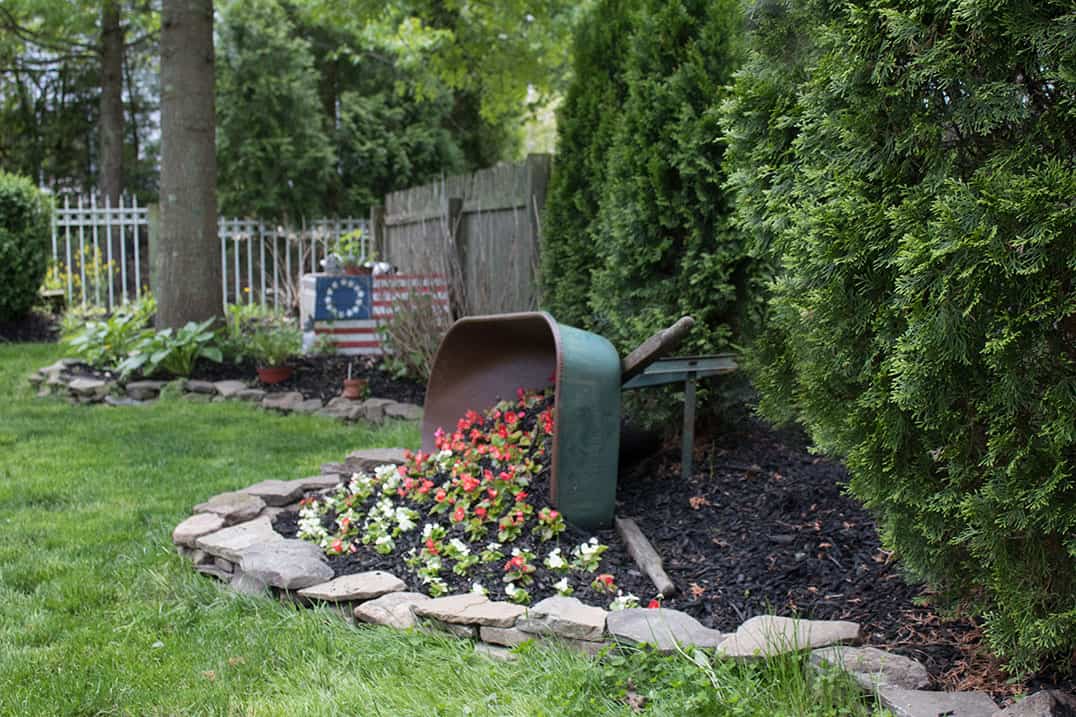
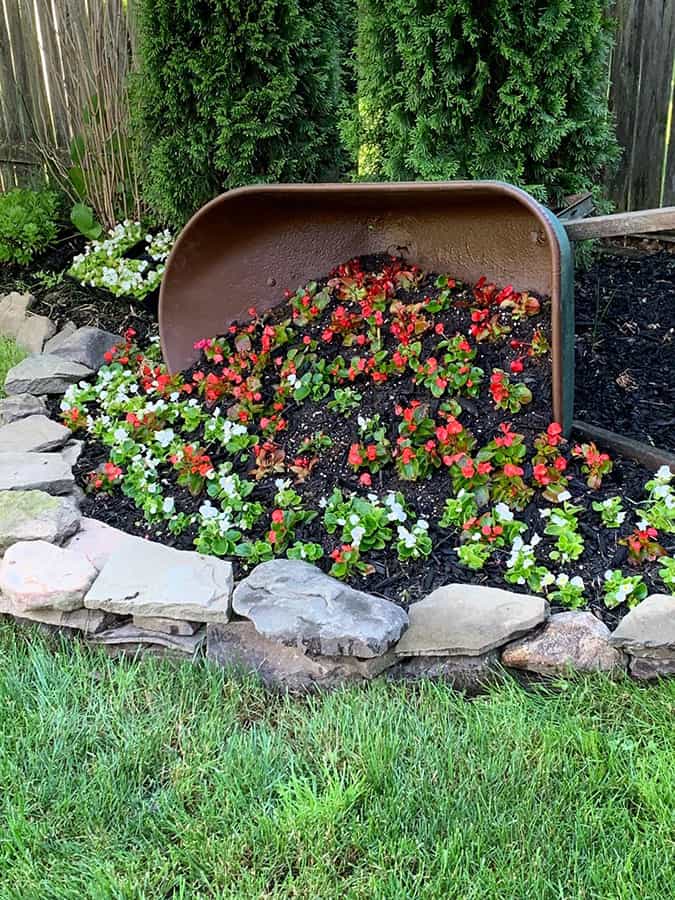
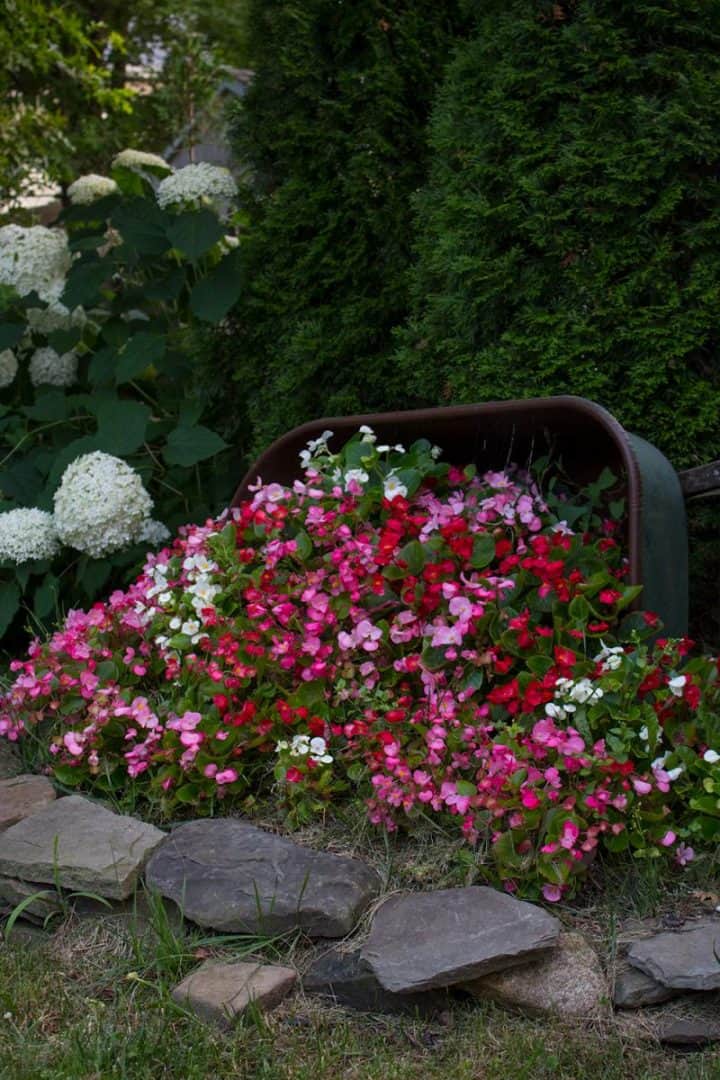
Lastly, I filled the wheelbarrow planter up with flowers. I used begonias because this is a mostly shady area, and those always seem to do well regardless of where I plant them. Once they get a little bigger, this will really fill in nicely.
I’ve had a little trouble with the neighborhood stray cats tearing this up since planting. But I’ve found a really good solution to keeping them out. I’ll share more on that soon. (Update: See how I keep the cats away here)
Between this wheelbarrow planter, painting the shed, and adding string lights in my backyard I haven’t touched my front yard yet. Next week I’ll be starting on projects in that area. I have big plans for my little porch!
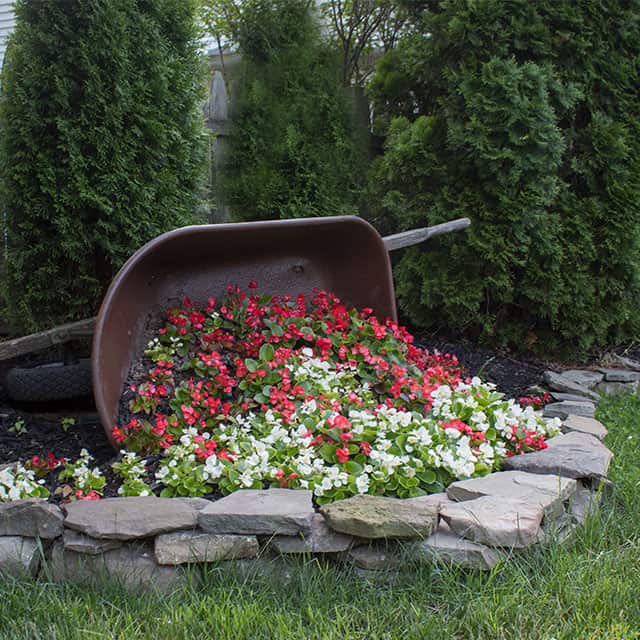
Update: Here is how it looks about a month later with the flowers all filled in!
Update 2: This is how it filled in by the beginning of August! I also have upgraded to this paint sprayer because I get so much use out of it!
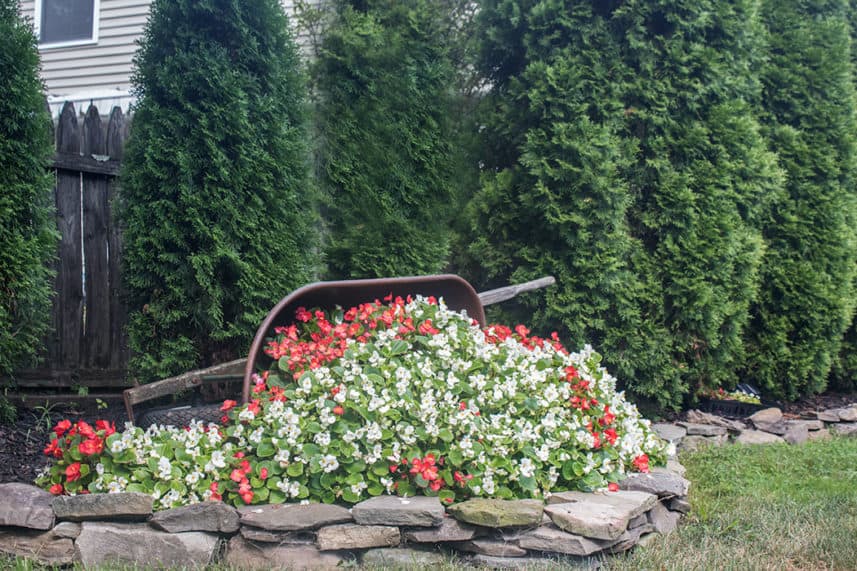
By the end of August, the flowers completely filled in the wheelbarrow and surrounding area. So pretty!
And here is how it looked the next year by the Fourth of July when I planted the begonias a little earlier in the season.
Update: In the fall, I switched out the begonias (they get leggy by the end of the season) and replaced them with mums. This was beautiful and lasted from early September through November!

If you love gardening, you may also enjoy this post on the 10 Best Plants for Shade Gardens!
Pin It:
Here’s a slideshow of the progression from start to finish!


*This post was in partnership with Wagner and may contain affiliate links. All opinions are my own.
Beautiful! If I borrow this idea – which, most likely, I will since I have an old wheel barrel to use…I’ll refer to your post as my inspiration! Thanks for the tip to paint the inside!
Thank you!
Very nice I love that sort of UNEXPECTED thing in my garden as well as in my house. The unexpected makes people stop look and smile.
love this idea. everyone has a rusty wheelbarrow lol. i am wondering what you did for the stray cats though.
Hi Joan, you can read how I keep the cats away here: https://thehoneycombhome.com/how-to-keep-cats-out-of-the-garden-without-hurting-them/
My friend said her husband sprayed their flower beds with vinegar — didn’t harm the plants, but the cats didn’t come back! (Sorry — I don’t know why this is all caps.)
How did yOu keep the dirt from settling? How did you keep it all up in the top?
Good question Lana. The dirt did settle a bit after I planted the flowers. When that happened, I added more dirt to the top area and replanted that row. Also, once the begonias grow, they fill it in nicely.
Yes but how do you prevent a “mud slide” in the event of heavy rain? I made mine into a fairy garden a few weeks ago but now I’m worried about it washing out when it rains heavy. I did put a lot of moss over the soil and some rocks. fake plants for now until next summer.
My very old wheelbarrow broke down today. I was going to throw it in the landfill. But after seeimg this idea, i am going to repurpose it! Thank you for showing me how I can make this happen!
Great idea! Wondering, where did you buy the Gloves? I want to but them.
I purchased a wheelbarrow at a garage sale a year or so ago and have been deciding what to do with it — this is it! I couldn’t get holes PUNched in the bottom so I will try this. yesterday i bought spreading pansies (who knew there was such a thing!) and they are going in there today or tomorrow. thanks for the idea!
Pansies will be beautiful in the wheelbarrow! I will have to look for spreading pansies near me!
My dad and I are repurposing an old wheelbarrow his grandpa gave him when he moved into his first home. I too am interested in how to prevent a “mudslide” or recover from one in a torrential downpour. Anyone have any experience with this?
I haven’t had any issues with “mudslide” in the wheelbarrow. I do pack a lot of flowers in there so that may help. Also, when the wheelbarrow is on its side like this, the one side that’s on top acts as sort of a cover for that top row of plants.
This is a great idea for a garden planter!
Hi! I love this idea! Do you remember how many begonia plants you used? I think my wheelbarrow is a tad smaller.
Thanks! I used between 3-4 flats of begonias.