DIY Cabinet Handles
I feel like all I’ve been doing for the last few weeks is painting. I do love to paint, but it doesn’t make for very interesting blog posts! I finally have a project to share this week as well as some progress on my half bathroom makeover. To be honest, I really jumped into this $100 Room Challenge without any kind of design plan. By last week I realized I really needed to get it together and figure out what exactly I wanted in here.
I mentioned in week 1 of this $100 Room Challenge that I wanted to refinish the vanity. A few years back I distressed it to look like barn wood and while that was okay, I really wanted a softer look. I decided to refinish it again for a lighter rustic wood look. First I painted right over the vanity with Annie Sloan chalk paint in Paris Gray. I continue to stick with this chalk paint because it’s just so easy to work with. I gave it 2 coats and once that was dried, I started added the dark wax for that distressed wood look.

Only I realized as I was staining it, that this look is really not what I wanted in here anymore. I left it alone for a few days and finally starting to think about my overall design plan. I realized I really liked the Paris Gray paint without the stain better so I painted it all back to gray.
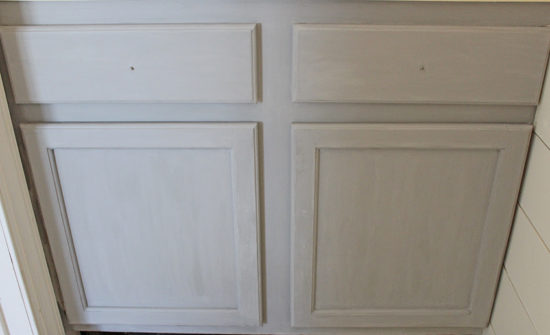
I like it SO much better now that it’s gray. The cabinet knobs and pulls I had in here were good enough, but I was feeling like I wanted to change those up. I love the look of the longer length cabinet handles that have been popular lately, but to buy pulls like that can add up. I’m really trying to stay on budget here, so I decided to get that look, DIY style.
A few years back we made a DIY light fixture out of copper parts and I remembered we used a copper tee pipe fitting with that. So I went over to Home Depot to look at those. I found the 1/2 copper tee that I had in mind. Then I tried fitting copper pipes into that, but it didn’t work because those tees get narrow in the middle. They are not meant for putting copper all the way through, just half way. Not to be deterred, I headed over to look at wooden dowels. None of those fit exactly either. I could fit a thinner one all the way through but then the dowel was too loose. My husband suggested getting one that fit snug and sanding it enough to fit it through. That turned out to be the winning solution! Plus dowels are much cheaper than copper pipe. One dowel cost $1.79 and was long enough to cut into the two pieces that I needed with some leftover. The copper tees were $1.12 each and I bought four of those.
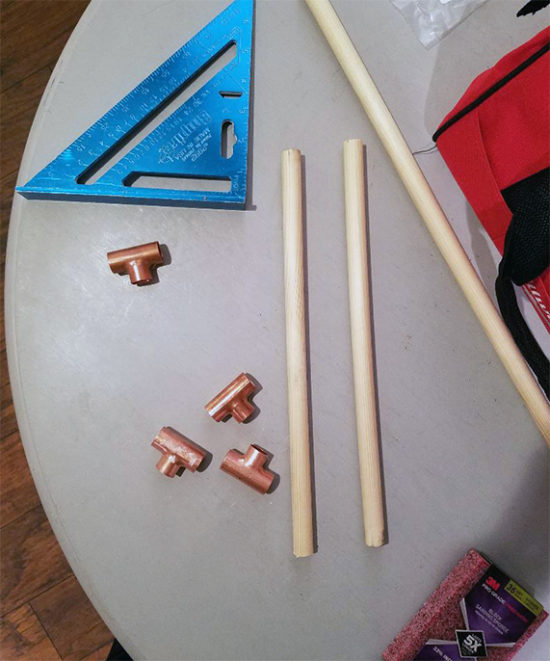
We cut the dowel into two 13″ pieces for my cabinet doors. Then my husband sanded it enough to get the dowels through, leaving one inch of the dowel exposed on each end.
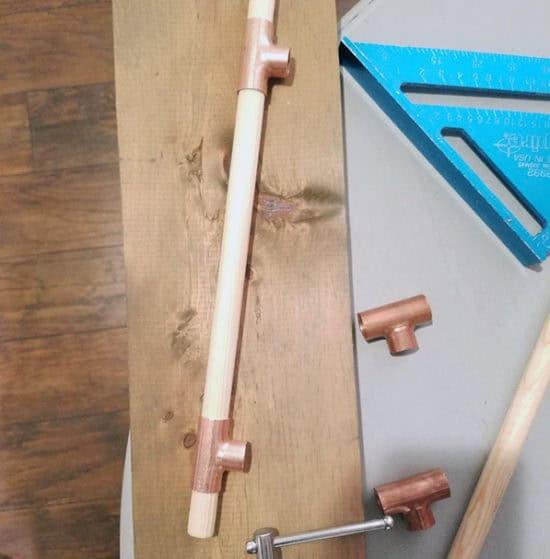
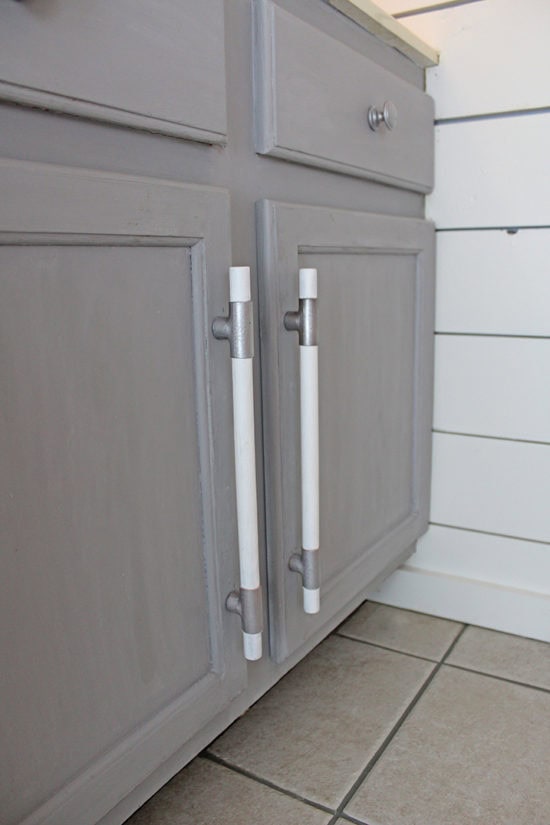
I was all over the place deciding what color to paint these. Copper would look beautiful against the gray vanity but it wouldn’t match anything else. Darker would balance the mirror frame, but wouldn’t look nice against the gray. I ended up going with white and silver. I painted the wood dowels white and spray painted the copper tees silver.

We attached them to the cabinet doors from the inside using 1.5″ wood screws.
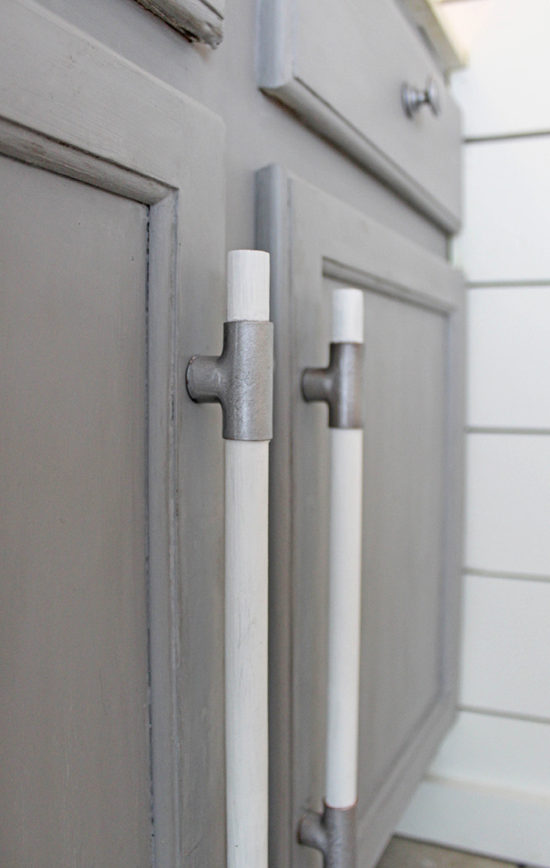
Here’s what it looks like now with the new cabinet handles.

As far as sticking to the $100 budget, here is where I’m at so far.
Money spent so far:
Zinsser primer: $13
1 Gallon of Behr Paint: $24
Wall Decor $12
Materials for Door Pulls: $6
Spray Paint: $6
Grout Renew Paint: $12
Total so far: $73
That leaves me $27 and I still have the floors to do, which I’ll be sharing next week for the finale. I will likely be going a little over the $100 budget. Thanks again to Erin at Lemons, Lavender and Laundry for hosting this fun $100 Room Challenge! You can see where my friends are all at this week with their makeovers below!
Update: You can see the amazing floor transformation here!

What a great trick! I live those long door pulls too, but they can be so expensive! How clever to DIY some! (And I love the gray cabinet color!!)
How cool! Love the big pulls!
Thank you Molly!
I just love those cabinet pulls! What a great idea. I can’t wait to see the final reveal.
Thanks Wendy!
I love the handles! They are too cool!
Thank you Emy!
That is so smart! They look really great!
The cabinet and pulls look amazing! I was just trying to find pulls like this and wondering if I could make them myself. Brilliant!
What a creative idea to make those handles for your vanity!
This is an awesome solution and what a great price point! And I really love the gray vanity. Can’t wait to see the reveal!
You are so smart! What a fab DIY!
So clever, they look great! I love the vanity color, too!
What a great DIY for those pulls! Those size would’ve blown the budget for sure and yours look amazing.
Hi Roxanne,
I absolutely love the paint on the cabinet and your handmade handles are so gorgeous. What a difference it all makes. Can’t wait until next week!
What a great idea! It’s always fun to hear how people process through their decisions and come up with ideas. Can’t wait to see this room next week for the reveal!
In a great trouble of cabinet-handle! Maybe I have got my solution! In a hurry to apply of it. Thanks, Roxanne for sharing such helpful DIY idea!
I love your gray cabinets, and your DIY handles are so creative!
I have a question for you about how you screwed the handles to your cabinet doors. From the back of the door, did you screw through the copper T so that the screw went into the wooden dowel? If so, did you pre-drill a hole so that the dowel wouldn’t split?
I am definitely stealing this idea 🙂
Thanks!
I want to know how you got the wooden dowel thru the copper T. Did you sand down your dowel to fit the T or drill out the inside of the T where it is pinched to prevent pipes from sliding thru? I love this effect and want to do it on an entertainment/library wall I just had built.