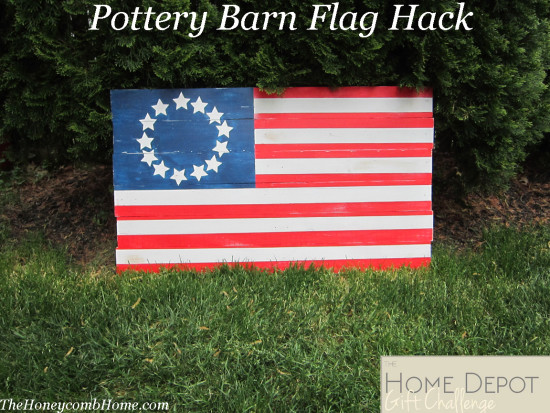
Pottery Barn Flag Hack

It’s the 15th of the month today, which means it’s time for our Monthly Home Depot Gift Challenge! If you are new to this, each month a group of us bloggers gets together and one person picks an item from Home Depot with which we have to create a gift for a specific recipient. This month the chosen item is a 2 X 4 and the recipient is a new home owner.
I was definitely intimidated by the chosen item this month, because I have zero woodworking skills. I’m sure I’ve mentioned before that my husband does not like DIY projects, which is frustrating because when he’s motivated he does amazing work! So, I needed to pick a project I could complete on my own.
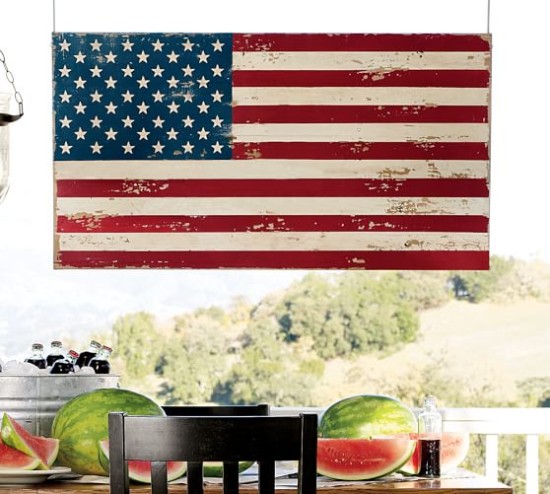
After much thought, I decided to make a wooden American Flag. I’ve always loved this one from Pottery Barn, but I wasn’t willing to pay $160 for it.
I figured that since Home Depot will cut the wood for me, at no additional charge, this was something I could pull off without any chop saw skills.
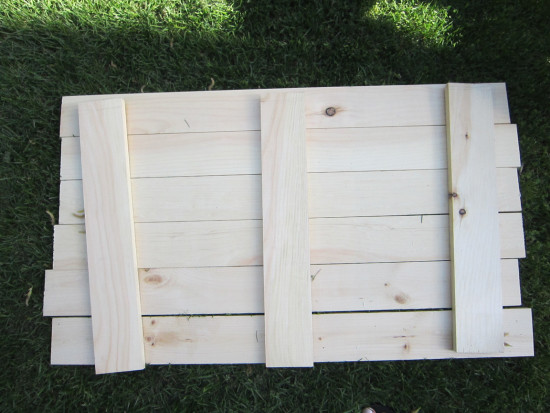
I picked the size I wanted the flag to be and figured out my measurements before I went to the store. I used 1 X 4’s instead of 2 X 4’s so the flag would be a little lighter and easier to hang. I bought 4 of the 1 X 4 X 6’s. I had three of those cut in half and the fourth I had cut into thirds.

The piece I had cut into thirds was going to be nailed to the back of the flag, holding all of the pieces together.
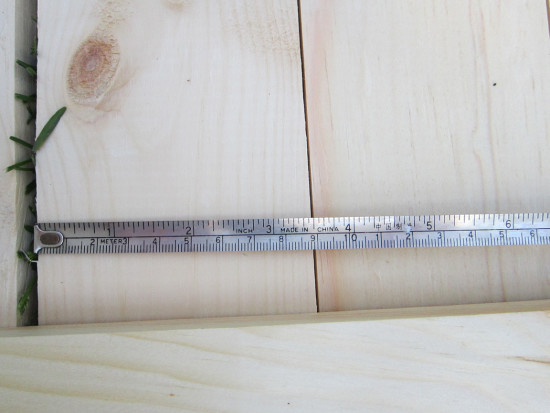
This is where I ran into a problem. Apparently even though they are called 2 X 4’s, they don’t actually measure 4″. They actually measure 3.5″. Which makes no sense to me. You should also note the depth doesn’t measure 2″ either, (and that is the case for the 1″ pieces I used as well) , they come in under the 2″ mark. How do people build houses with this stuff?
Because of that, my 3 pieces for the backing were too long and needed to be further cut down. At this point, I was debating whether to use the miter box, which would’ve taken forever, or bring them back to Home Depot for the cuts. Luckily for me this is when my husband became interested in this project and decided to help. It must be the American Flag thing, he’s an American flag, Chevy truck kinda guy. So he got out the chop saw and sawed off the overhang for me. When lining up the front pieces, we realized they were also out of wack, some were longer than the others so we had to trim those pieces down as well. Then we used a nail gun to secure the back pieces to the front.
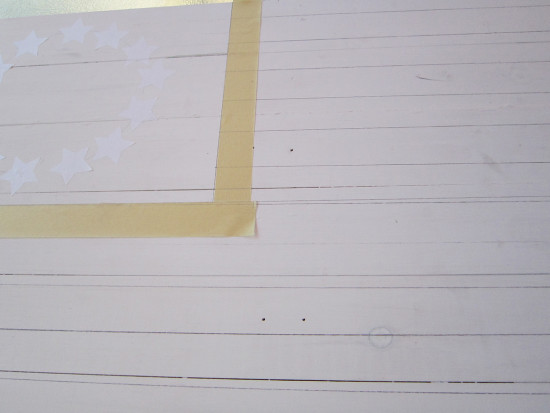
Once it was assembled, I painted the entire flag white. I used Annie Sloan chalk paint in pure white. Next, it was time to draw out the stars and stripes. Overall my flag measures 35.5″ X 21″. I started with the stripes. I needed 13 stripes divided into 21″, so they were spaced approx. 1.6″ apart. Full disclosure, this part was tricky and took a few tries to get it right. Once we had the lines drawn for the stripes, I then sectioned off a space for the stars. My box for the stars comes in about 15 3/4″ from the left and 11″ from the top. We drew that on the flag and taped it off. I also picked up 2″ star decals from Amazon to use for this project. My husband suggested using the star pattern from the 1776 flag, which I loved. So we made ours Betsy Ross-style.
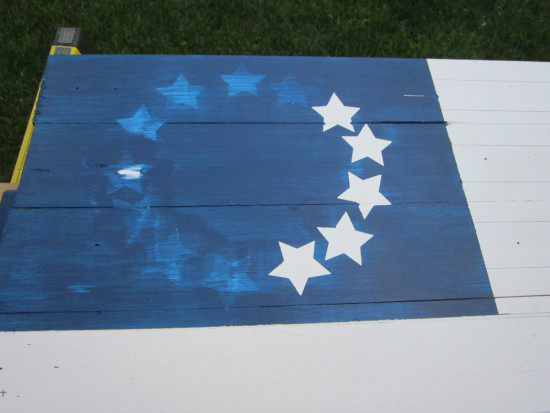
Once the stars were in place I painted that section with Benjamin Moore Symphony Blue (2060-10).
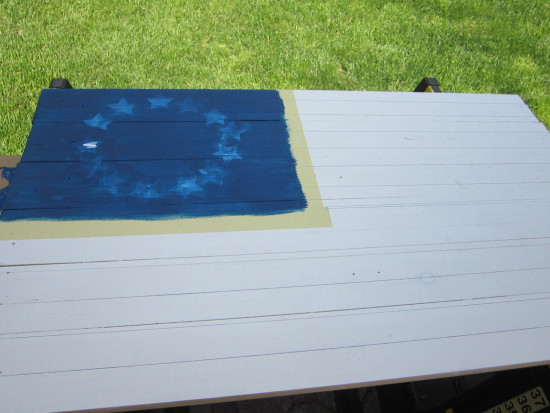
I let it dry and peeled off my star decals.
Next, I taped off the rest of the flag to make my red stripes. I used Benjamin Moore Red (2000-10) for the stripes. I should also mention when I went to my local hardware store for the paint, I was planning on buying those little sample pots for this project. It turns out, Benjamin Moore has stopped making those sample pots. So I ended up buying a pint each of the red and the blue paint, which was way more than I needed.
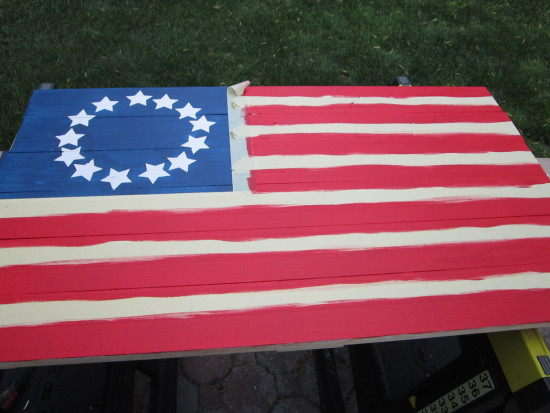
After that was dry I removed the tape. When it was fully dry, I went over the whole flag with a sanding sponge to give it a distressed look like the Pottery Barn version.
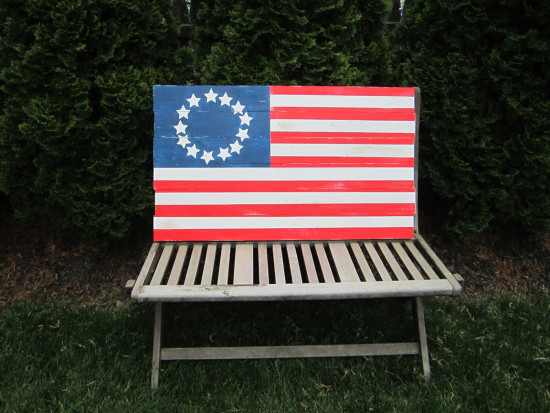

The gift recipient of my flag is my friend who just moved into a new home. The same friend I made the Peg Board Spice Rack for, she is loving our little DIY challenge. 🙂 And my husband ended up enjoying this project so much, he wants to make another.
Materials Needed to make a 35.5 X 21″H Flag:
3- 1X4X6’s cut in half
1- 1X4″6 cut into three 20.5″ pieces
Red, white and Blue paint
Painters tape
Hammer and nails (or nail gun)
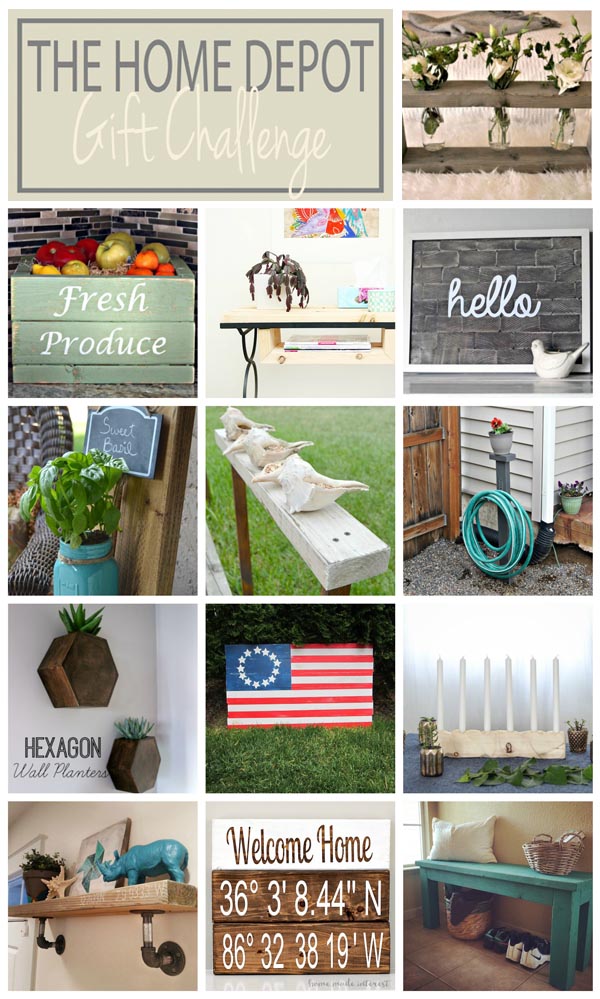
If you missed any of our previous challenges, month #1 was a copper T, month #2 was a wooden dowel, and #3 was a peg board. Be sure to click the links below to see what everyone else made this month with their 2X4’s! You can also follow our Pinterest board here, or follow along on social media with the hashtag #HomeDepotGiftChallenge.
This post contains an affiliate link.
Love it! What a great way to decorate for the upcoming holidays.
Great PB hack! Looks fantastic!
What a perfect way to decorate for the 4th of July. Great knock off!
Love this!! And our husbands sounds veeeeeery similar… 😉 Mine’s totally not into DIY projects either, NOR am I good at all with any power tools! Ha! I love the 1776 star version better, and I love how it turned out!
Fantastic outdoor piece, Roxanne! Love it and I’m so impressed with your mad DIY skills.:)
This looks so great! What an awesome piece to hang out side for a 4th of July party!
Love this! I loved that flag last year and wanted to make one too! Yours turned out great!
I love this, Roxanne! I’ve always admired that PB flag, too, but not the ridiculous price – thanks to your fun tutorial, I can make my own!
I almost made a flag too! I’m happy I didn’t since yours would’ve showed mine up, it turned out beautiful!
Your flag turned out so great! I love it!! Thanks for the tutorial and inspiration. I always admire that flag at PB, but no way I was gonna pay that price. I think thanks to you, I’m gonna try to make my own!!
Thanks! Good luck with yours!
Love the flag. So Great! Smart move using the 1×4’s.
Brooke
Love the flag. I think I will have to try to make that too. I like the PB one but not the price. Yours turned out just as cute. Thanks for sharing.
Love this! Now I want to make one, too! Also the idea of your gift challenge; what a great idea!
Love the flag! This is a great idea for the upcoming holidays! 🙂
I love this so much, Roxanne! Thank you so much for sharing at the Talented Tuesday Link Party – I know our readers will love it, too! 🙂
I love your Pottery Barn Hack Flag! Thank you for sharing at the Thursday Favorite Things Blog Hop! Take time to to visit my site where I featured you at my Tuesday Treasures round up. Hope to see you at the party tonight!
This is so perfect for folks who are in a POA and can’t have flagpoles up, love it Roxanne!!
This is awesome! You were so smart to choose the old flag–much easier to do just a few stars than 50!
Thanks for linking this post to Grace at Home. I’m featuring you this week!
I really love this! I might do this on a smaller size for my shabby chic living room!
Found you via Imparting Grace.
Have a Lovely Day!
Super cute. Just a little fyi on the wood not measuring correctly…when wood says any size such as 1×4 or 2×4, then that is the size the wood was when it was originally cut at the sawmill. Typically lumber is cut from recently harvested lgos, therefore they still have moisture in them. When the piece of wood dries it shrinks, that is why it is smaller then it says.
Thanks for the info! 🙂