Roman Clay Fireplace How To (Get the Look of Real Stone)
THIS ROMAN CLAY FIREPLACE SURROUND WAS AN EASY DIY PROJECT, AND COSTS VERY LITTLE TO GET THE LOOK OF REAL STONE!

Last week I told you guys all about my new wood fireplace mantel. This week, I want to show you how I used Roman Clay on the surround to get the look of natural stone.
I was a little nervous to try this one because Roman Clay was not something that was on my radar until a friend recommended it to me recently.
What Is Roman Clay?
Roman Clay is a specialty paint finish that will give you the look of natural stone. It has a much thicker consistency than regular paint. You can find it online at Portola Paints. It comes in a large selection of colors and is applied with a spackle knife.
Roman Clay Fireplace Prep Work

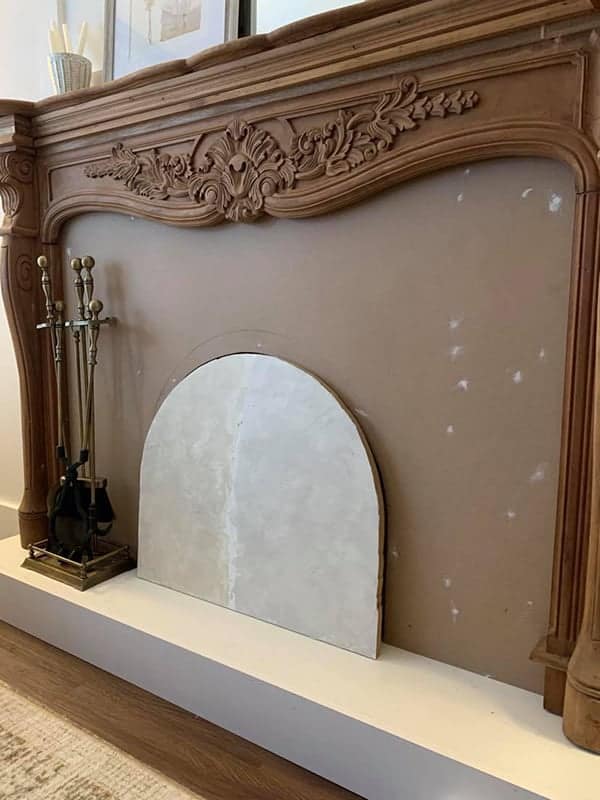
There isn’t too much you need to do in prepartion for this project. You set up exaclty as you wood for painting. Only you will need much less in the way of tools. I used a spackle knife, painters tape and the Roman Clay.
After I taped off the mantel, I went back over the tape with a spackle knife to trim the edges. I find it’s a little easier to apply excess painter’s tape and cut it down that way. It gives me more of a straight line.

Color Options
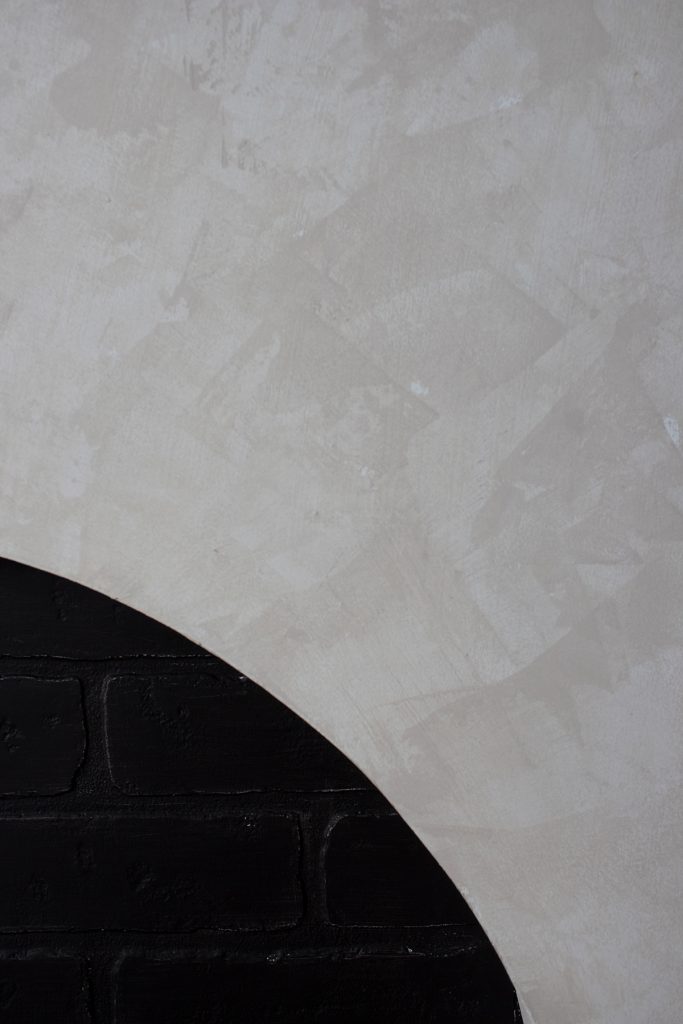
On the Portola Paints website, there are 60 colors to choose from. I ordered a few sample pots and then narrowed it down to only two. I practiced my Roman Clay technique on the arch that was scrap from the mantel. This was also a good way to try out the two colors on a larger scale.
On the left is the color Patagonia and on the right is the color Saint Sauvant. I really loved them both and couldn’t make up my mind for days! Finally, my daughter convinced me to go with Patagonia.
How To Apply Roman Clay
Applying the Roman Clay is really easy! I’ll list the simple steps here but I’m also including the video how-to because sometimes a visual is the most helpful.
- Protect surrounding areas with a drop cloth and painter’s tape.
- Prime your surface with a white primer if necessary.
- Apply Roman Clay in small amounts using a spackle knift or putty knife.
- Use sweeping motions when applying, going in different directions. This will give you a natural texture.
- Go back over each area until smooth.
- After the first coat is dry, very lightly sand the surface.
- Apply a second coat of Roman Clay if desired.
Even though it’s a simple DIY, I thought having a short video of the process would be more helpful with this one as opposed to photos only. Here is a quick 3-minute video of the whole process if you’d rather just watch that.
As I mentioned in the video, I only did one coat of the Roman Clay on the fireplace. The finish appears much lighter on camera than it does in person. I was happy with the color and the texture so I opted to not do the recommended second coat.

How Much Will I Need?
Obviously, this will be determined by the size of your project and how many applications you choose to do. For my Roman Clay fireplace surround shown here, I used less than one sample pot! If I had done a second coat, I would have needed a second sample jar.
You can check Portola Paints website for more information on quantity needed, or reach out to them directly with more detailed questions.
Here is a close-up of my finish, in the color Patagonia. You can see the texture a little better in this photo.
Roman Clay is such a great budget-friendly way to get the look of real stone! That one sample jar cost me $10. You can even use it on walls and most any smooth interior surface!
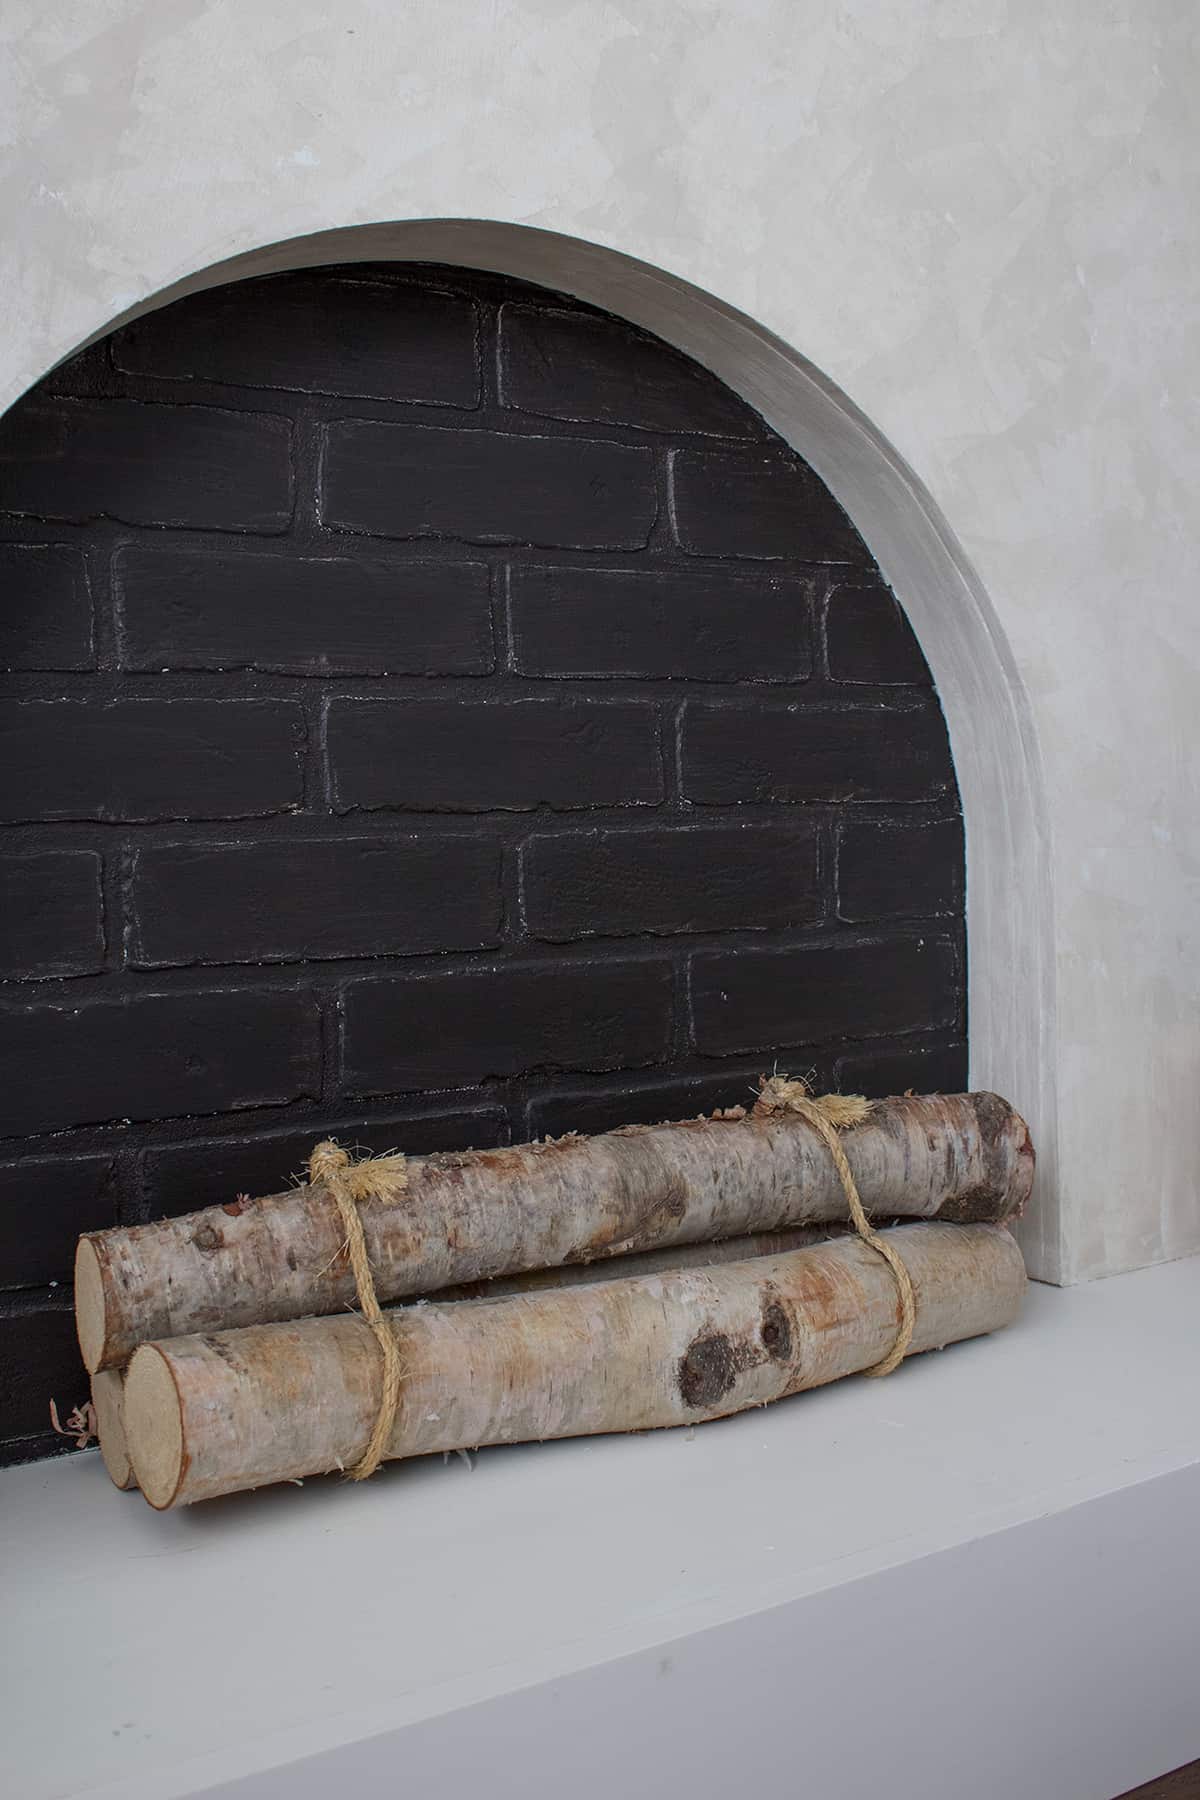
To give the illusion of more depth, I painted the existing brick veneer black.
I am so happy with the results and how easy the process was. This was a fun DIY.
I like it so much I’m considering applying Roman Clay to my bathroom walls. I want to use it everywhere now!
This looks amazing! Great job! laura
Thanks, Laura. 🙂
Oh I Love it and want to try it now!
Thanks, you should!!
This looks amazing! My mind is turning, think where i can tRy this. Thank you f sharing.
Can you apply over brick?
I’m not sure, I would ask the manufacturer on that one.
Do you have to seal it in?
No sealing is necessary, but mine is a faux fireplace so if you were using it on a working fireplace I would ask the company that makes the paint.
What paint did you use for the brick?