Our Small Bathroom Renovation Reveal!
Check out our small bathroom renovation reveal and how we used stylish finishes to transform this small space into a cozy cottage retreat!
Let me tell you – renovating an entire house is no joke! There are so many decisions to make, and they’re all expensive! It can get really stressful at times.
In our new house, we started with only one bathroom. It was my least favorite room in the house because it was so cramped. We did add a second bathroom during our renovation, so this will now be the secondary bathroom.
It will be the bathroom guests use when they come over, but it will also function as our daughter’s full bathroom.
Today, I’m sharing this small bathroom renovation, complete with before-and-after photos, tile choices, and all the pretty details that made this space feel brand new. The renovation stress was worth it because I truly love how this bathroom turned out!
BEFORE: WHAT WE WERE WORKING WITH
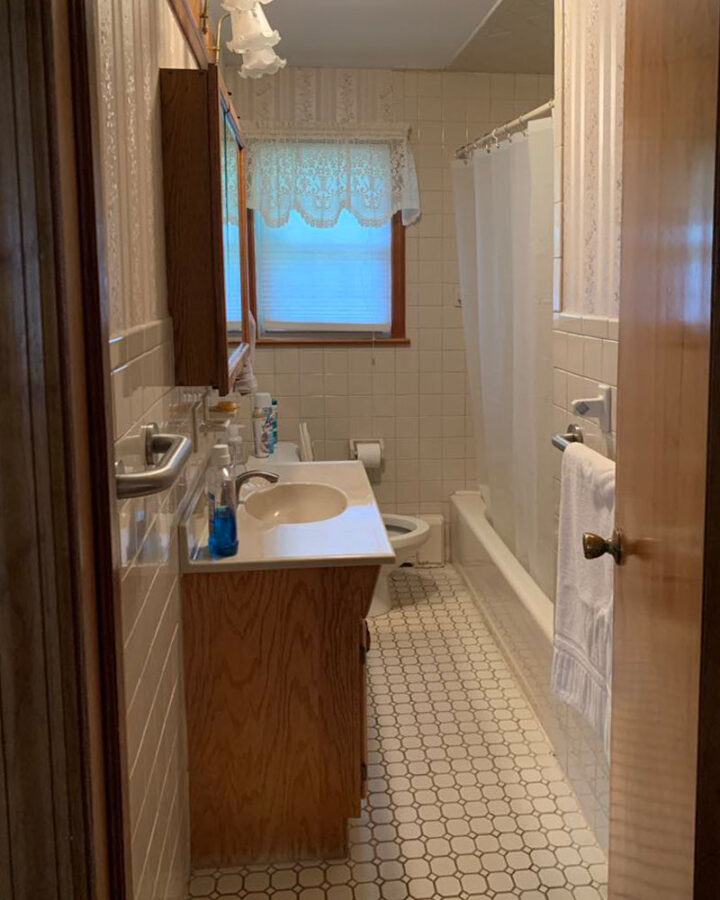
Here is what we started with. The bathroom was functional and had a window that let light in, but that’s about all it had going for it.
Look how close the toilet was to the bathtub. You couldn’t sit straight without your knees hitting the tub. It all just felt a little tired and cramped.
Notice how the door opens up to a solid wall? On the other side of that wall was the closet from a bedroom. We ended up taking the closet from that bedroom to enlarge this space for a little more breathing room.
That neighboring bedroom was also divided up to make a master bathroom as well as a linen closet.
The Design Concept
I worked on many mood boards for this bathroom. Originally leaning towards blue accents, but my daughter loves gree,n and we found the perfect tile that happened to also be green.
Once we found that, I made a final mood board that I stuck to for this bathroom renovation.
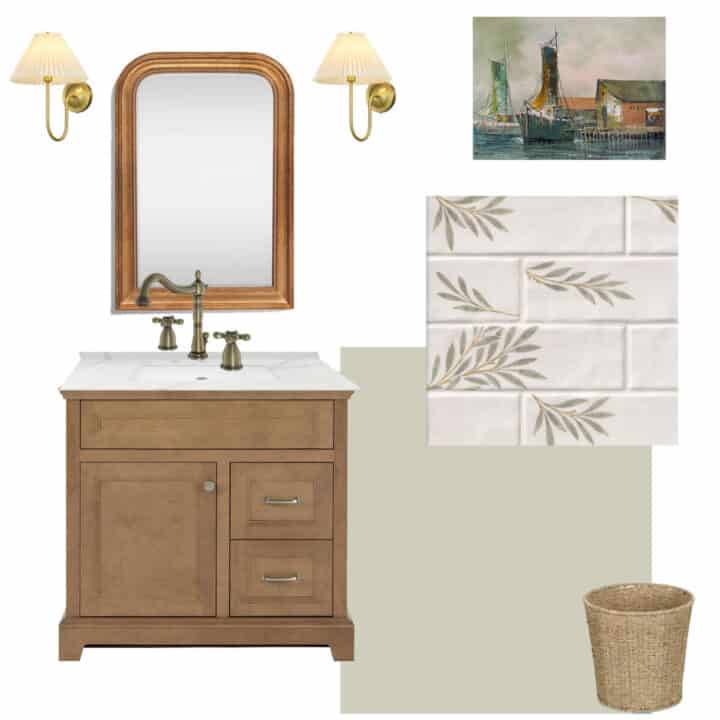
I even have that painting shown on the board, which helps to pull all the colors together. That painting is vintage, but you can find similar paintings here and here.
After: Updated Cottage Vibes
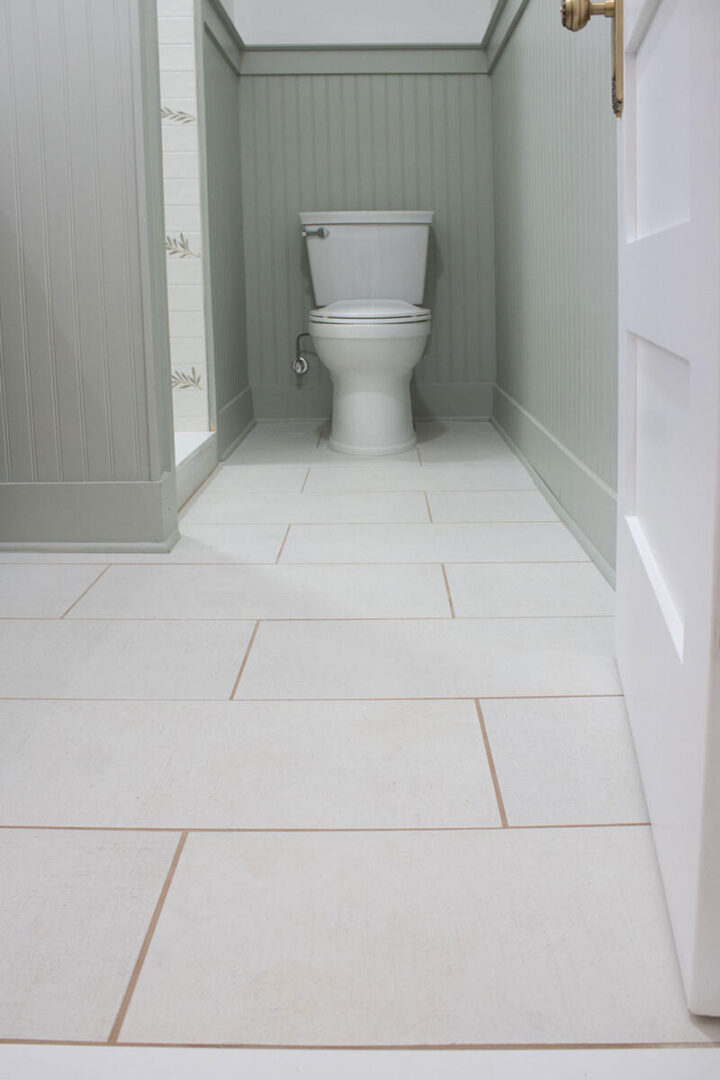
By taking space from the adjoining bedroom, we were able to change the layout. Most importantly, we were able to reposition the toilet so that there aren’t any obstructions.
From the beginning of construction, I tried to be very aware of the budget so that I could get molding details at the end. For example, the beadboard in this bathroom. Beautiful wall moldings make all the difference to me and help a space feel more thoughtful.
The Shower Tile
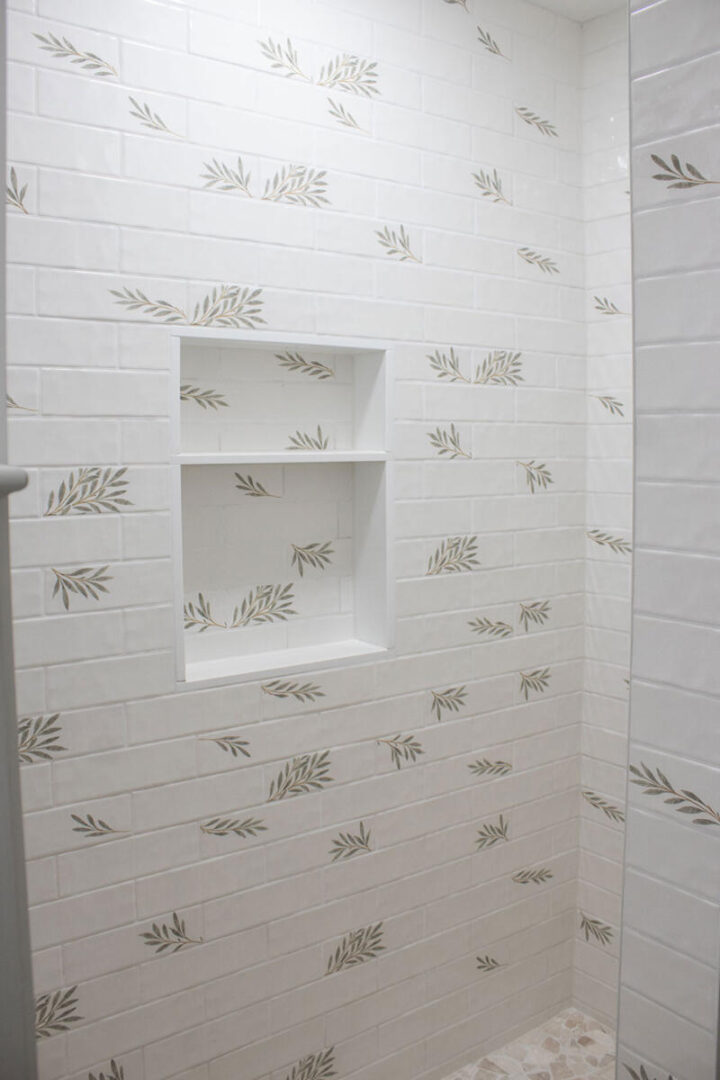
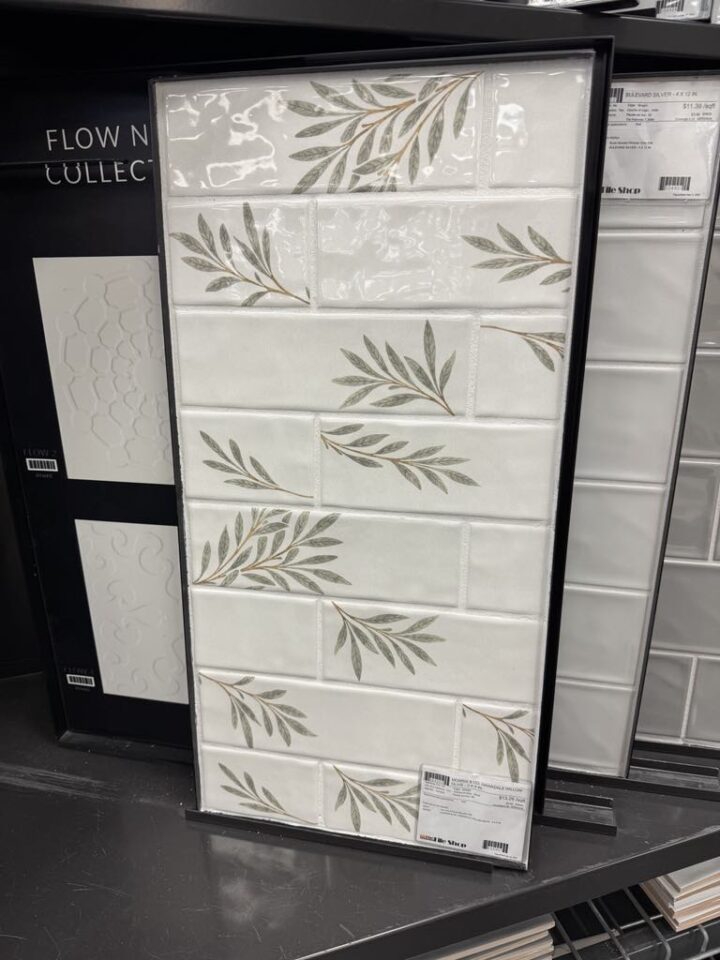
The shower tile was the first thing I picked for this bathroom, and I could not love it more. When I saw it in the store, I knew I had to use it somewhere in the house.
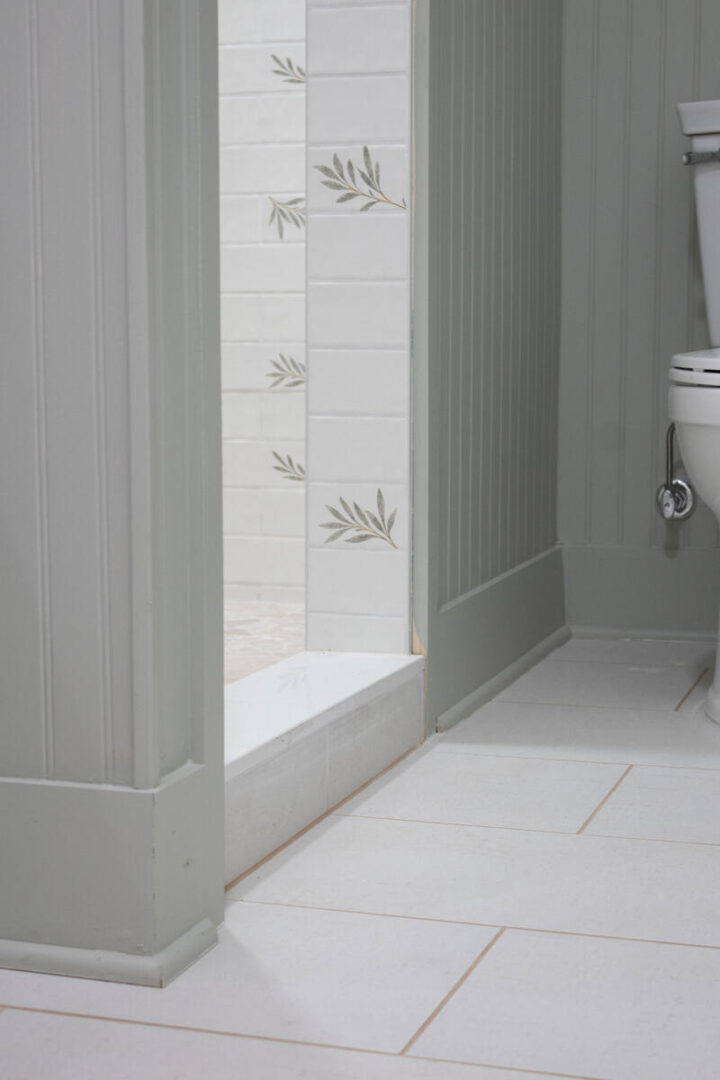
It’s the Willow tile from The Tile Shop, which I purchased in-store locally.
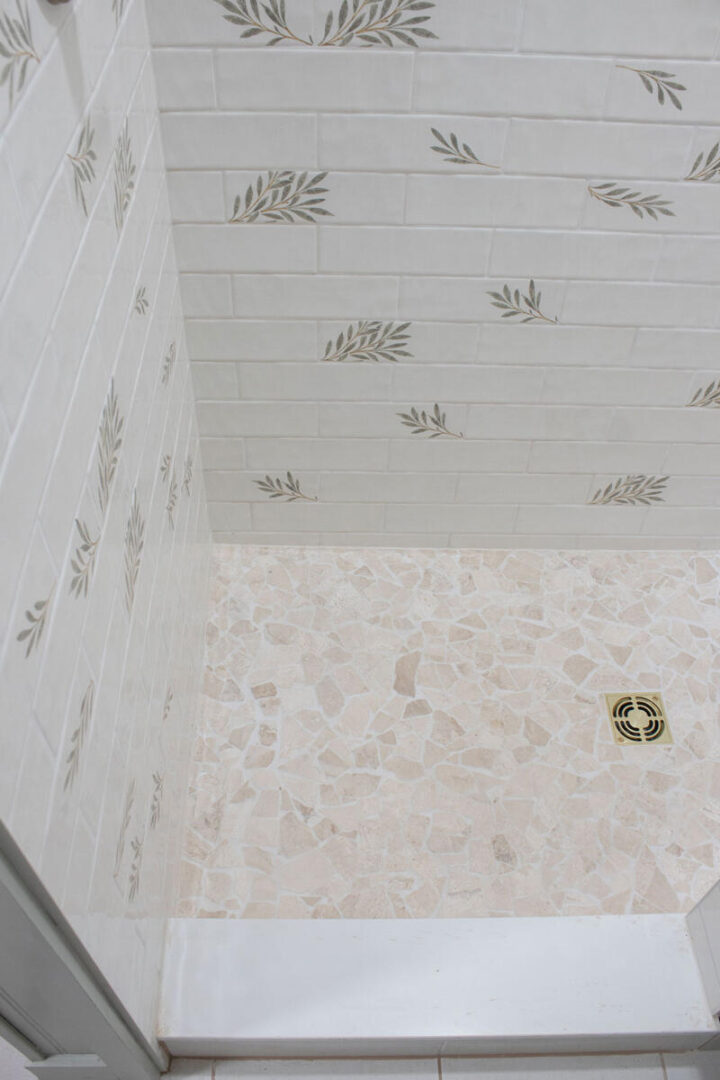
I was back and forth on whether to have it installed randomly (as we did) or in a block form, but I’m glad I went with random because it feels more casual and natural. The bright white background on the tile also helps the small shower feel larger.
For the shower floor, we used a cobblestone in a muted color that matched the stems on the willow tiles.
Large floor tile for a small bathroom
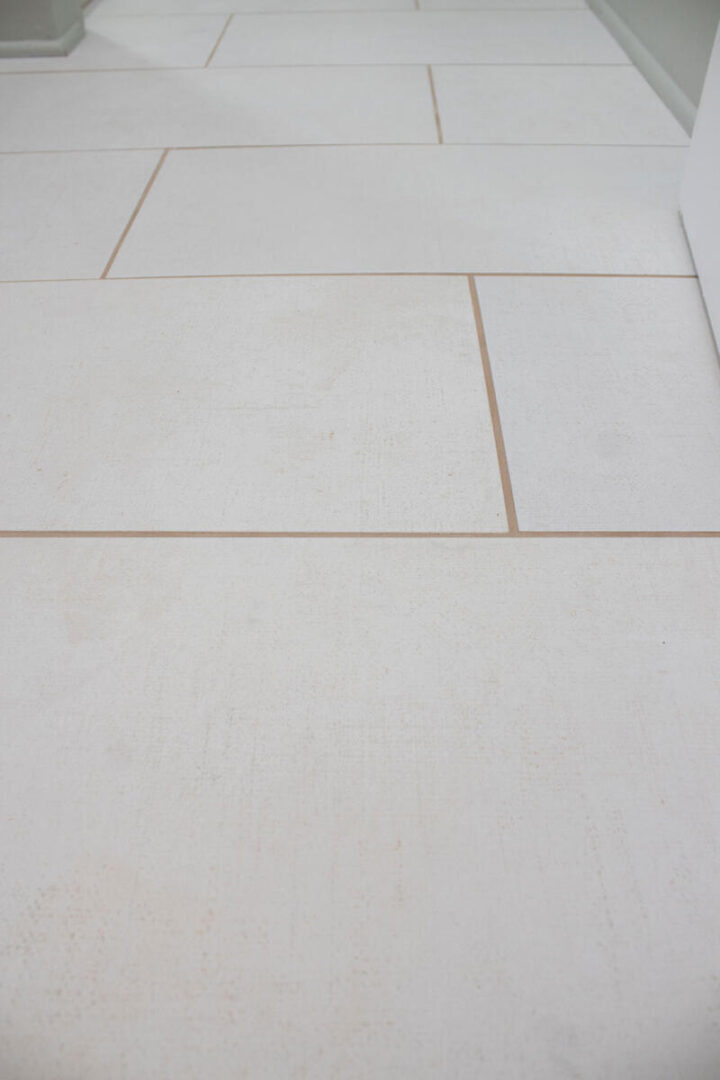
For the bathroom floor, I chose a large-format tile with texture. I had seen textured tile in an open house I went to years ago, and that always stayed in my mind. It was such a subtle detail, but so pretty.
The subtle texture on this tile gives it a natural, stone-like feel without being rough underfoot — it’s just enough to add grip and visual interest without overwhelming the space.
We paired it with a light brown grout to accent the willow tile and the vanity. The brown grout pulls it all together. The grout was suggested by the rep in The Tile Shop, so I have to give him credit for that.
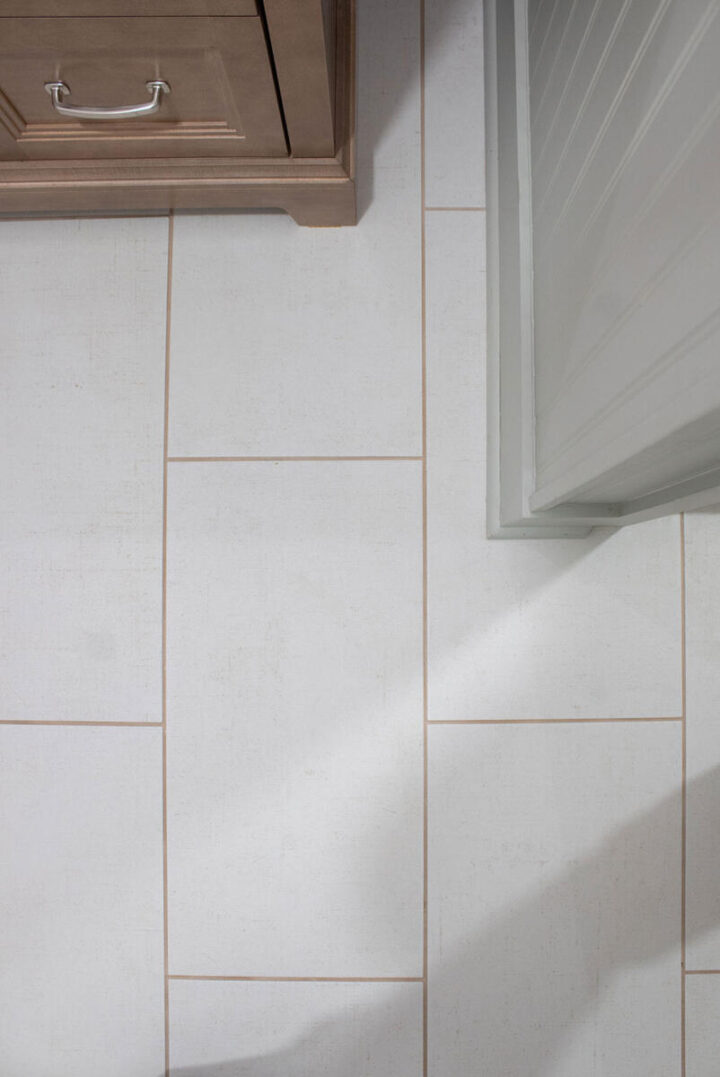
I am slightly concerned that keeping textured tile clean will be a challenge. It’s a possibility that the texture will give dirt places to settle, but we will see. I can do an update on that in a few months.
The vanity – Warm wood and Vintage Charm
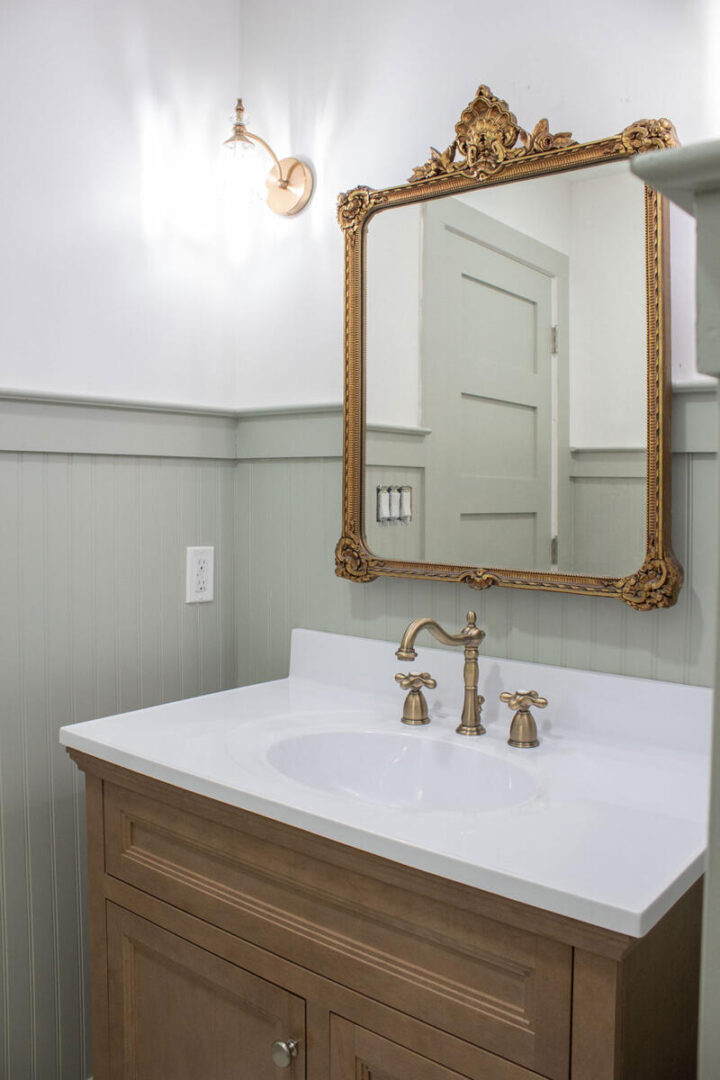
We really wanted this bathroom to feel cozy and timeless, like something you’d find in an old countryside cottage. So instead of going sleek and modern, we chose a warm wood-tone vanity. It brings so much warmth to the space and helps create the warm, lived-in feel I was looking for.
Above the vanity, we hung a vintage mirror that I already had. It has a beautiful aged brass frame, and it pairs perfectly with the vanity. Which is funny because it’s the only one I didn’t bring over initially (I have many vintage mirrors!), and when none looked just right, my daughter suggested this one.
It was a perfect fit!
Here is a similar style mirror I spotted online.
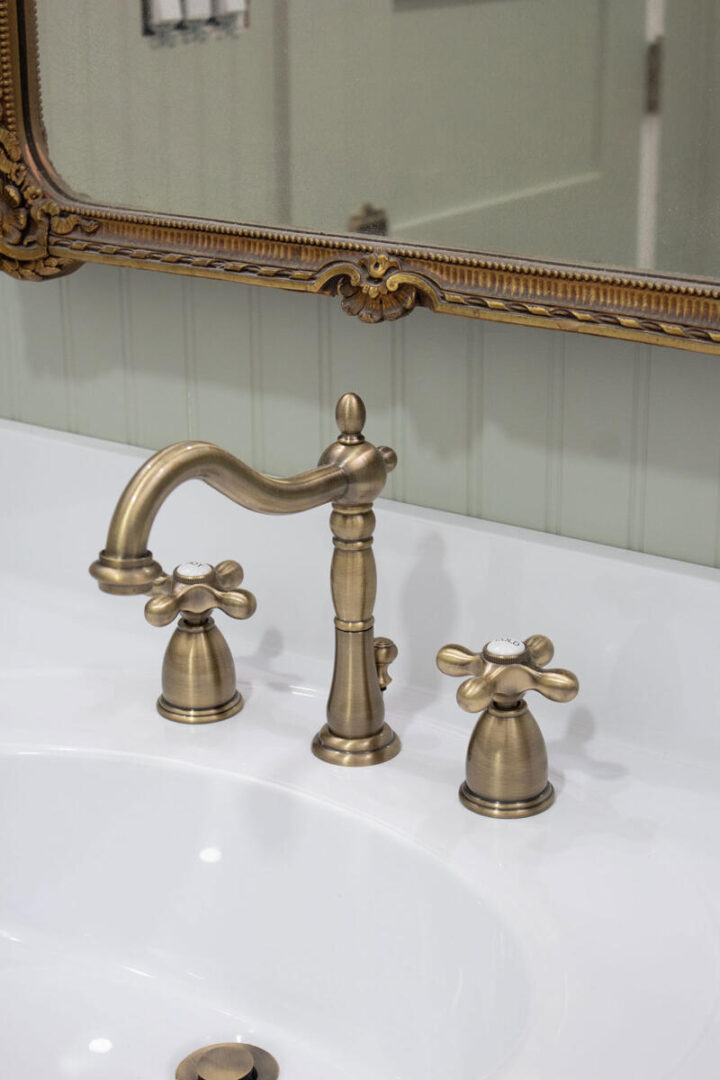
The new faucet has a vintage look with an antique brass finish. One thing to note with this faucet is that you’ll need a sink with the holes set for an 8-inch spread. Most vanity tops have the predrilled holes closer together. Because this vanity didn’t come with a sink top, I was able to order a white marble vanity top that fit these faucets.
We bought simple (and very budget-friendly) vintage brass glass sconces to accent everything else we did.
Before & After: The Transformation
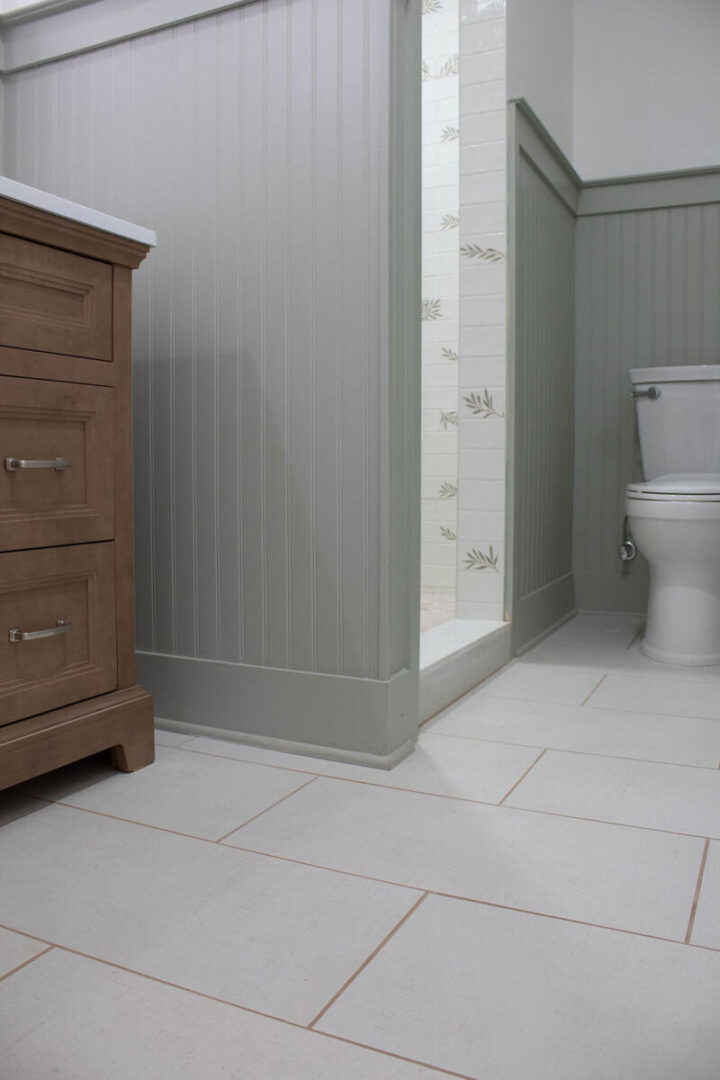
As you can see, we enclosed the shower with a wall rather than having glass doors all the way across. This was quite the controversy! Everyone tried to talk me out of it, saying the bathroom would look smaller.
My thinking was that when guests come to our house and use our bathroom, they’ll be staring straight into our shower – soap, shampoo bottles, and all. I also knew I wanted to do the 3/4 beadboard, and I thought the wall would look more in keeping with that than sleek glass doors.
I do not regret this decision.
We are still waiting for the shower door to be installed, that’s why you don’t see a door in these photos. We ordered a simple, hinged door.
I painted the beadboard green to make it more interesting. The color is Soft Sage from Sherwin-Williams. The upper walls are Polar White from Behr.
Lastly, we did lose the window in this bathroom when we put on an addition to the back of the house. However, we have enough lighting that it still feels light and airy.
What do you think of our small bathroom renovation? Here is a quick video tour of the before and after!

You may also find these bathtub shower tile combo ideas helpful!

If you don’t have a bathtub, check out these beautiful walk-in shower tile ideas.
All of your choices are coming together beautifully. Shower tiles are my favorite 💚
Thanks, they’re my favorite, too!
It looks beautiful- timeless. One question: did you mix metals in the bathroom?
Hi Susan. I mostly stuck with antique brass, though different brands are slightly different finishes. The vanity knobs are silver because that’s what it came with. I’m okay with that but figured I can always change them out later, too!
Such a beautiful bathroom. Great tile choices. Like a mini spa.
Thanks!!
I love it! Everything you chose is beautiful! The mirror is perfect and the faucet is so pretty. Well done!!
Thank you, Jan!
Your new bathroom is beautiful! I believe you made the right decision going with the beadboard wall instead of having a glass walI in the shower. I would have done the same. I look forward to seeing more of your renovation!
Thanks, Susan!
L❤️VE this! Great job and the tile is everything.
Thank you!
Love it , excellent taste
Thank you!
Love your choices, but one of my bathroom pet peeves is having the toilet the first thing seen through the door. Ruins it for me.
Hi Roxanne, love the tile choice and wondering what you think of the textured tile now that you’ve lived with it a bit? I’m considering it for our primary bathroom.
Thank you!
Hi Cyndie, I love the look of the tile but I do believe the dirt accumulates in the texture a bit more than smooth tile so it needs to be cleaned more often. Even knowing that, I would pick it again. Hope that helps!
Yes! Thanks!