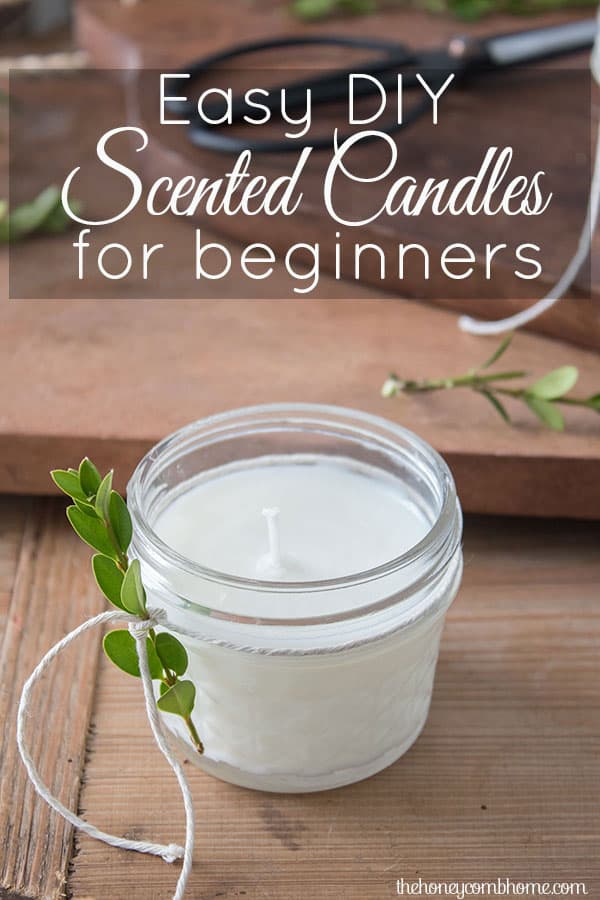
Easy Candle Making For Beginners
There’s just something so cozy about a handmade candle—the soft glow, the calming scent, and the fact that you created it yourself. If you’ve ever wanted to try candle making but felt intimidated, don’t worry! This guide to easy candle making for beginners will walk you through the process step by step.
You don’t need fancy tools or complicated skills, just a few basic supplies and a little creativity. By the end, you’ll have beautiful homemade candles you can enjoy, gift, or maybe even start a new hobby.
Why Make Your Own Candles?
Why would you want to make your own candles, you ask?
There are several reasons why candle making is better than buying new ones. Here are a few reasons you may want to consider DIY candles.
- It costs less to make your own
- You choose the scent
- Easily control how much or how little scent you want
- You can get creative with the jar/vessel that you use for the candle
- It’s fun and easy
- They make great gifts
DIY Candle Making Supply List:
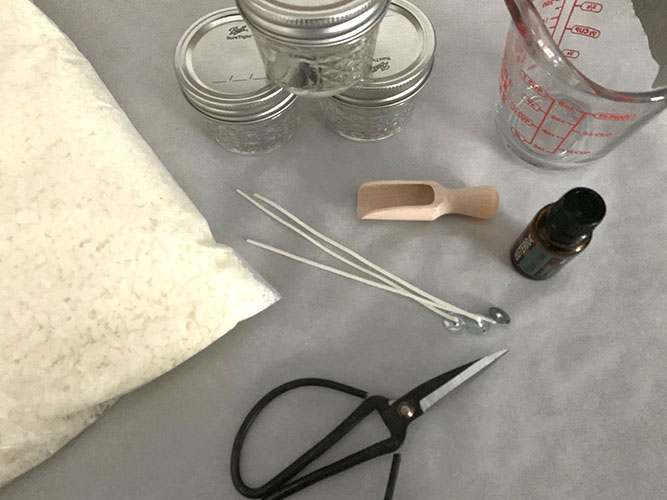
Jar or Vessel (I used these quilted glass jars)
Scissors
Spoon or scoop
Measuring Cup
Essential Oils of choice (I used eucalyptus)
For my candles, I chose eucalyptus oil because it’s one of my favorite scents of all my oils so far. The first benefit listed under eucalyptus essential oils is that it’s used to clean surfaces as well as the air, making it a perfect choice for candle making. It’s also used to promote feelings of relaxation and clear breathing.
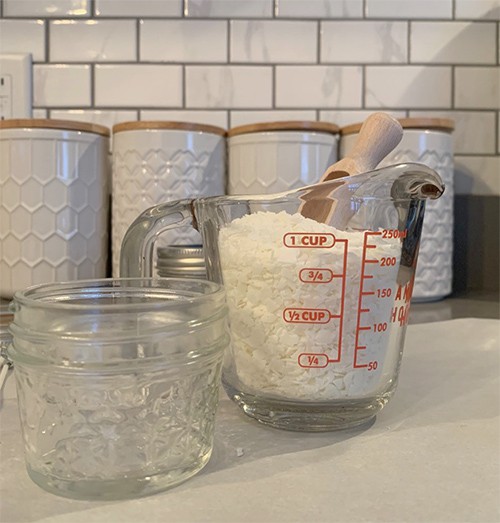
I ordered a two-pound bag of the natural wax for experimenting. How much you’ll need for your own soy candles really depends on the size of your containers and how many candles you’d like to make. For simple DIYs, a pound of wax would probably be plenty.
Another fun idea would be to shop thrift stores for glassware and old jars to experiment with as candle containers. You can test your vessels first with a little hot water to be sure they won’t leak.
essential oil vs fragrance oil for diy candle making
For my candles, I chose essential oils because they are a more natural option and because I already had them on hand.
For more professional candle making, usually fragrance oil is recommended. Fragrance oils have a stronger scent and burn more evenly than essential oils.
Fragrance oils are often created specifically for candle making and can be found in far more scents than essential oils. They are usually less expensive as well. For more information on the differences between fragrance and essential oils, you can read this article.
which type of wax for diy candles
You have several different waxes to choose from for candle making. The most popular are soy, paraffin, and beeswax.
I chose soy because it’s softer and easier to work with than paraffin wax. It also burns longer and at a cooler temperature than paraffin. Beeswax, though a great option, was less desirable to me because it has its own natural scent that can interfere with the essential oils.
Paraffin wax
Paraffin wax offers a nice, strong scent and is less expensive than soy. However, it’s not as environmentally friendly and burns faster than the other two options.
SOY Wax
Soy wax is a natural material made from soybeans. It’s softer and easier to work with than paraffin. As mentioned, it has a longer burn time and burns at a cooler temperature than paraffin as well.
Beeswax
Beeswax is a natural, environmentally friendly option that burns longer than both soy and paraffin. One downside is that its natural scent can interfere with other added scents. It also tends to be more expensive.
Candle making setup
The first thing you’ll want to do is to determine the amount of wax you will need for your container. A good ratio is to figure out of much the container will hold and double it. For my 4 ounce jars, it took 1 cup of soy wax.
I laid parchment paper across my counters before beginning so clean up would be easy.
Using a double boiler would be ideal for melting the candle wax. Since I don’t have one, I used a small saucepan instead. I keep an old saucepan that is used strictly for candlemaking, as they are hard to clean after.
melting the candle wax
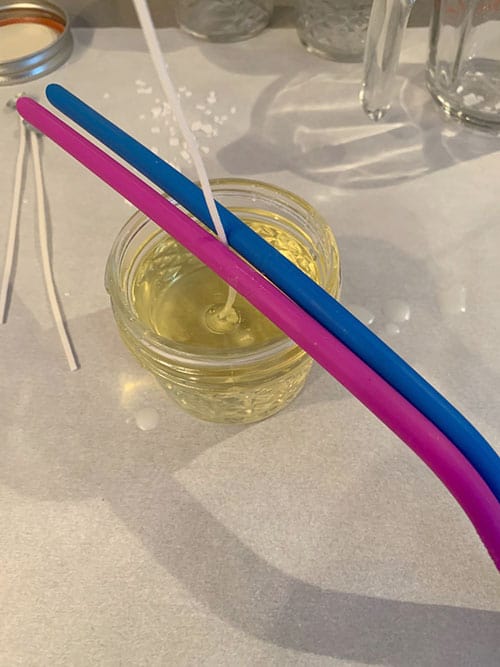
Melt the wax over low to medium heat, stirring often. When the wax is about half to three-quarters melted, add a few drops of essential oil and continue stirring. I used about 4-5 drops per jar. You can use more if you prefer a stronger scent.
Also, while the wax is melting, I dipped the bottom of my candlewick into it and placed it in the bottom center of the container. For this part, you will need something to hold the wick straight up. I’ve seen most people use chopsticks or popsicle sticks, but I didn’t have any. Instead, I used rubber straws and plastic utensils to hold mine up.
pouring the candles
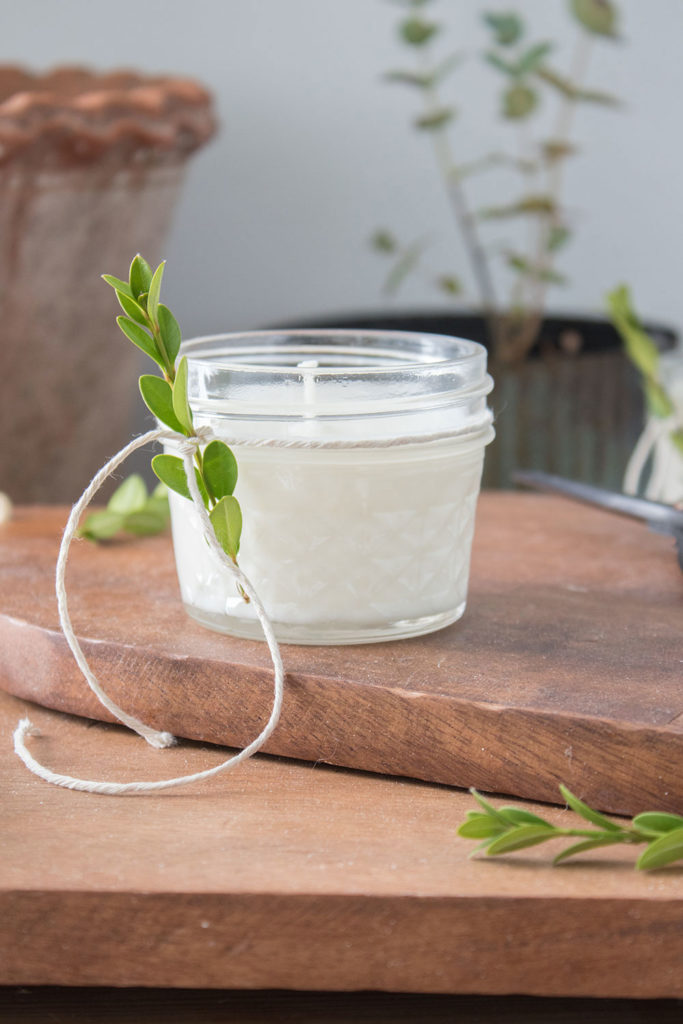
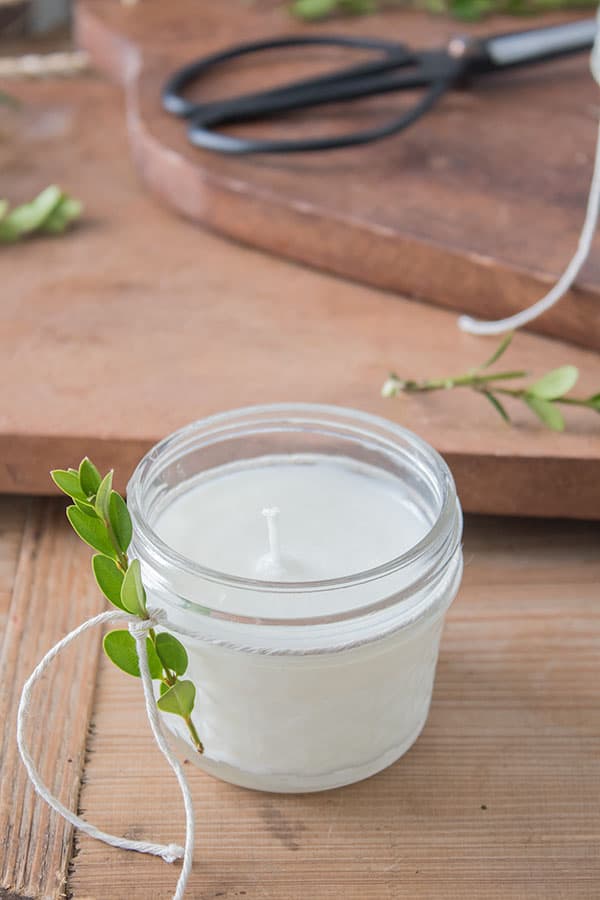
Once the wax is completely clear, carefully pour the melted wax into the jar. I like these small jars, which are similar to mason jars, for experimenting. Be sure your containers are sitting on a flat surface before pouring the wax.
Next, I removed the straws and held the wick up with one hand while pouring the wax in with the other. Then I promptly put the straws back to keep the wick straight. I found this to be the easiest way to keep the wick upright.
I did not fill mine up to the top of the container; I left a little bit of breathing room at the top.
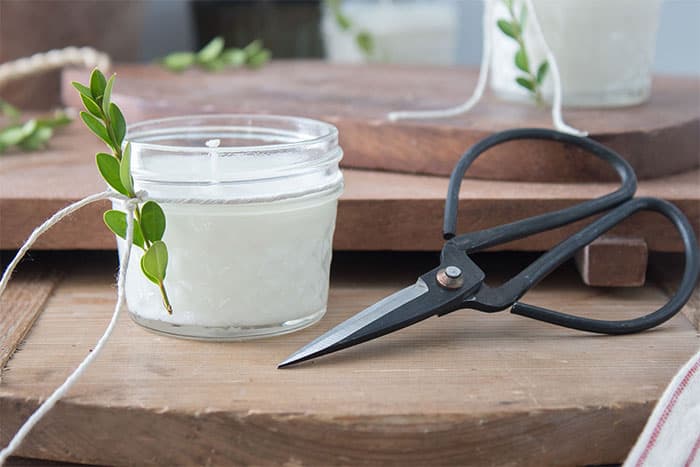
It’s as simple as that! Allow the candle to sit until the wax turns solid. You can see it will start turning white from the bottom up as the wax cools.

To dress mine up, I added a sprig of boxwood that I attached with a string. I would’ve preferred to use a sprig of eucalyptus, but I didn’t have any on hand. You could use any decorative elements you have on hand and even attach them with hot glue instead of string.
creative candle ideas
You can get as creative with dressing up the jar as you do with the scents. For Christmas, you could make peppermint candles and tie a cinnamon stick to the jar.
These would make great gift ideas as well. Especially if you have a long list of co-workers, teachers, bus drivers, neighbors, or even hostess gifts. You could even roll up and tie a lottery ticket onto the jar in place of greenery. Place the candle in a cute little gift bag, add an ornament to the bag, and you have a great presentation at a small price.
I wouldn’t rule this out as a gift idea for men either. You can use a more masculine scent like cedarwood (one of my favorites) or sandalwood.
Another thing to note is that if you’d like to add color to your candles, you can do so by adding a crayon to the wax when melting.
There really is no limit to the different types of candles you can create with these simple candle making basics! For example, I’ve since made my own floating candles with citronella as well as pillar candles with flowers pressed in. It’s really fun to experiment.
Easy Candle Making FInal thoughts
Because there is such a variety of essential oils that are great for many different health and beauty concerns, it can be hard to keep track! To make it easy, we put together this quick reference guide on essential oils to help you see at a glance the benefits of each! Get creative and make your own signature scent!
Here’s a quick video of the candle-making process for those of you who like a better visual!
If you found this step-by-step guide helpful for making your own homemade candles, leave a comment and let us know! We love feedback!
Please Pin:
I am going to give This a try.I never realized how easy it was to make candles!Thank you for your amazing blog!
You’re welcome, Angela. Thank you for the kind comment!
I have tried this method but my candles sank in the middle and the scent throw was weak. They look nice but don’t burn well.
This sounds super easY! I read somewhere else, there are different types of wax and wicks. How do i know which Wick Goes with which wax and does it really make that much of a difference?
my candles too, sink in the middle. How do i remedy that?
Let your wax cool to the consistency of a slushy before you pour into your jar
Hold the front door! I should have made tons of candles by now…wow! Super easy! ThannnkSsss
I see you have that particular brand of EO. Are you satisfied with this company?
Tia!
Yes, I am!
If I get glasses from the dollar store, will they hold up as candle jars?
I’m not sure, I would definitely look for glass that is on the thicker side if you decide to try that.
Thank you for sharing your idea on making candles.
I will try. If you have any other tips, (when you made mistakes share with us how you corrected it).
Sick as the candle not burning when finished. Great job & tutorial!!!
Can dried flowers be added? They won’t catch on fire, will they? Lol
My husband took a wooden tongue depressor and split it in the middle length wise part way. The wick fits in between perfectly with no adjustments after adding wax.
Smart!
How do you prevent the wax from sinking in the middle? That drives me crazy and has stopped me from moving in to make more candles!
Hmm, that’s interesting. I’ve never had that happen to me!
I AM WANTING TO DO THIS IN TEACUPS?
I have made them in coffee mugs and fancy tea cup and saucer.
Love that idea 🙂
This looks like such a fun and easy project to do for DIY gifts! Thanks for the inspiration!