DIY Custom Fireplace Surround
Remember a few weeks ago I showed you how to seal chipping paint? The paint I was sealing was on a vintage mantel I found at a flea market. Right after I sealed the paint, we began a living room makeover. This makeover was on the lighter side, without any major construction (yet). The only project we did here was to build a DIY custom fireplace surround for the mantel.
Today I wanted to share with you exactly how we did that. It’s a great way to get the look of a fireplace in a room where there isn’t one.
I should mention this isn’t a functional fireplace, obviously. It’s purely decorative and provides a pretty focal point for my living room that can be switched out as easily (and as often) as I change my mind.
What You’ll Need:
Multi Max Tool (to cut existing molding)
A Large Piece of MDF, sized to mantel
1 X 2 X 6’s for frame
1 X 6 X 6’s
Prep The Wall:
When we started this project, we had chair rail molding in this room. We’ve since updated this wall with board and batten. We needed to remove a section of that, as well as a section of the baseboard molding. (Truth be told, for some reason, the baseboard on this wall wasn’t actually attached to the wall. Which worked out in this case because we didn’t have to remove that piece.)
Find and mark the center of your wall. Next, measure out from that center spot where the two ends of your mantel will be and mark those as well. You should have 3 marks, each end of the mantel and the center of the wall.
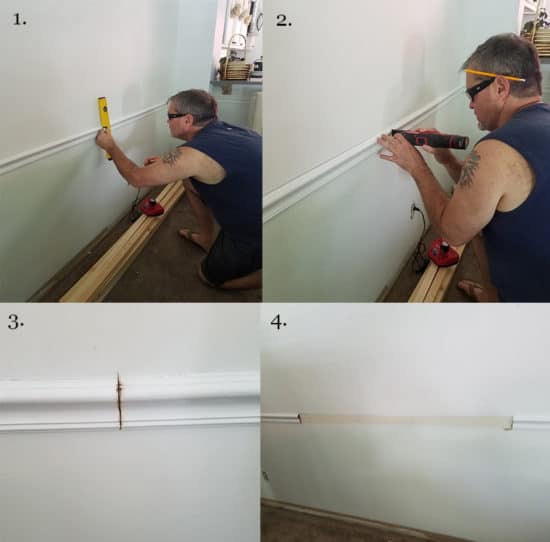
For the existing moldings, you will need to cut out the width of your mantel using the two end spots you marked. We aligned our laser level line with the two end marks and used a multi-max tool to cut the molding in these two spots. Remove that section of molding.
How to Build A DIY Custom Fireplace Surround
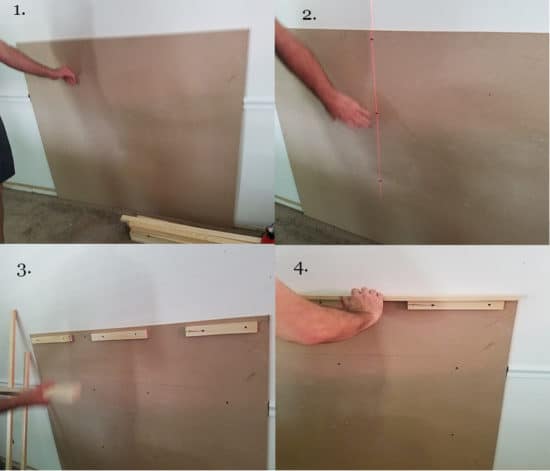
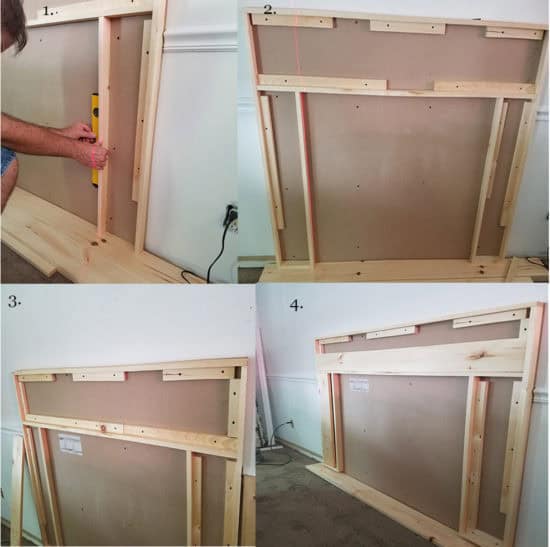
Now that the wall is prepped, add your back piece (we used MDF) to the wall, which you need to cut (or have Home Depot cut for you) to the same dimensions as your mantel. We used a stud finder to mark where the studs are and marked that line with the laser level. Screw the backboard on to the wall in those spots.
From here, there are several ways you can go about it. You could just attach your mantel to the backboard but there are a few reasons we didn’t do that. I wanted the mantel opening to have more depth for adding decor. Secondly, my vintage mantel is fragile and I didn’t want to nail through it if possible.
My husband came up with a plan to build a frame that the mantel could fit in to, like a big puzzle piece. We used 1 X 2 X 6’s (which are actually 1.5″ wide, I’ll never understand why that is). The top of my mantel is 7.5″ in depth, add the 1.5″ and my mantel top will come out from the wall 9″. We have a rather small living room, so I didn’t want it to jut out too far.
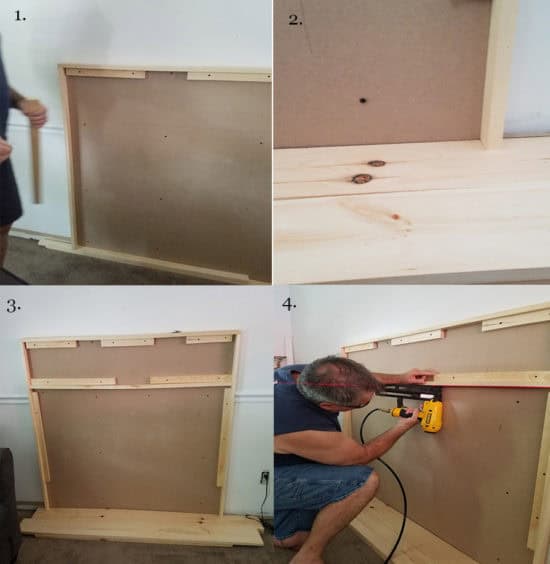
Next we attached the wood pieces in a frame that echoes the mantel. Then he added support pieces, as shown below.
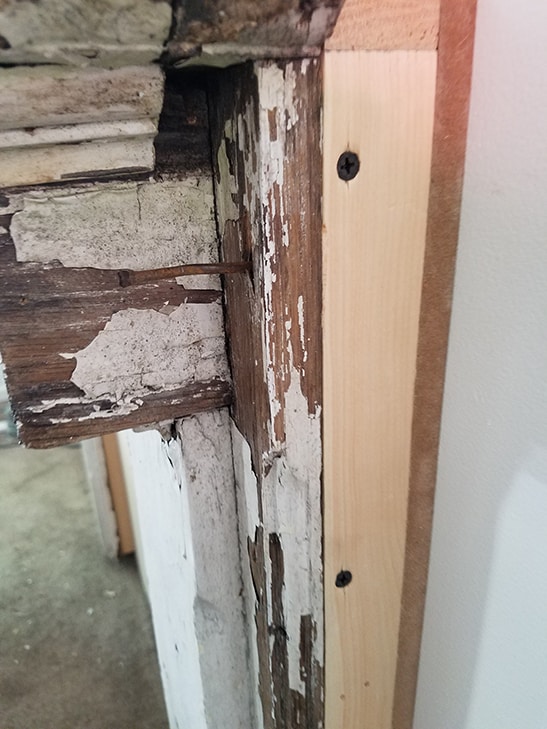
We used 1 X 6 X 6 wood to frame out each column. Then we cut two more pieces to go across the back of the top half of the mantel. You see in picture 4 above, one of them in the frame. We were just making sure it fits in the frame in that photo. As you see in the photo below, We added two of those to the back of the mantel. We nailed those to the back of the mantel. Those are the only nails we put through the mantel itself.
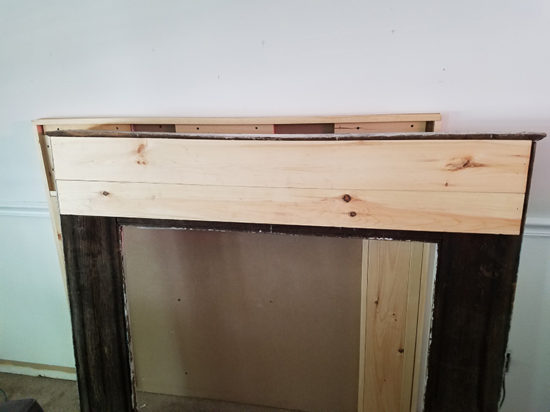
After attaching those two boards, we set the mantel into the frame of our fireplace surround, fitted like a puzzle piece. Then we screwed nails from the sides of the frame into those boards on the back of the mantel. This way most of the nails and screws are in the frame and not in my mantel.
Finishing Details:
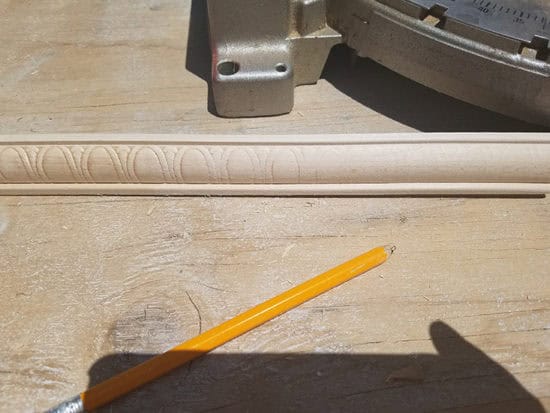
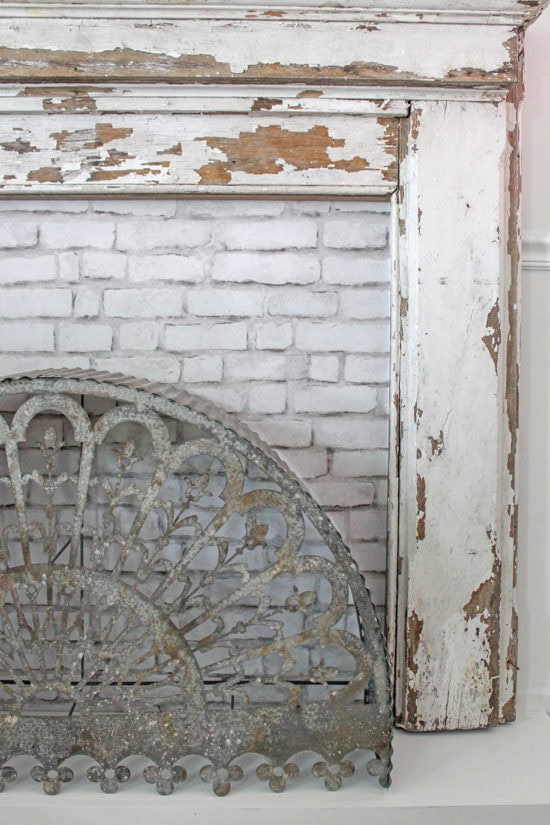
Since the mantel had a decorative piece of trim around it, we had to figure out how to continue that on each side where we added the frame. The problem was we had to match the detailing on the existing mantel, (circled below.) The arrow shows the piece we added.

We were not able to find any trim in Home Depot that matched this exactly, but we did find this piece which was exactly right except for the etching. To make it cohesive, we sanded off the etching as you can see below,
Once that was in place, I needed to stain all of the wood in the fireplace surround that we built to blend with the mantel. We went to Home Depot and my husband picked Varathane Wood Stain in Briarsmoke, which matched perfectly to the exposed wood on our mantel. I like this stain color so much that I’ve already used it on other things.

Finally, we wanted to add a hearth underneath of our decorative mantel. To do this, we left a gap between the bottom of the frame we built and the floor. We used two pieces of oak stacked on top of each other because it fit perfectly. My husband added a finishing piece of wood around the sides of the hearth pieces so that you cannot tell its 2 pieces of wood stacked.
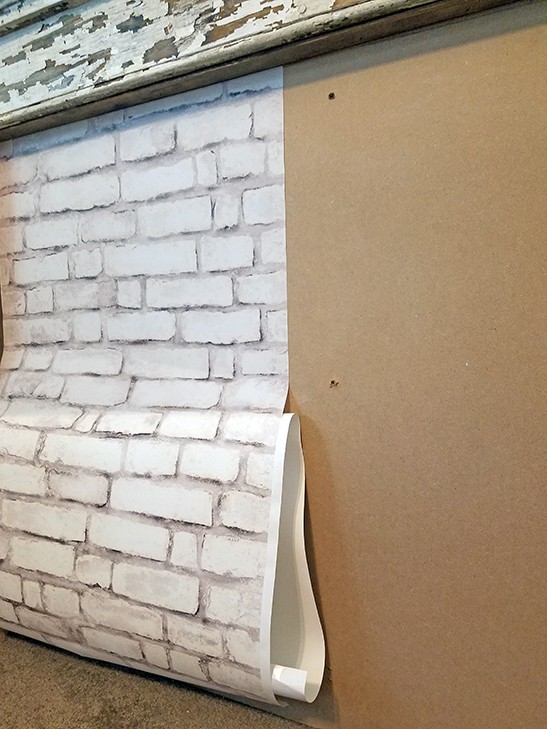
Lastly, I covered the MDF wood with removable whitewashed brick wallpaper. I love that this can be switched out when I get tired of it, I do change my decor often around here.
Another idea is to use Roman Clay to get the look of natural stone.
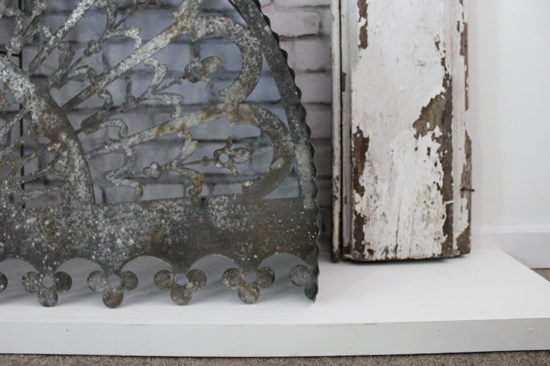
When I bought the mantel my intent was to fill it with books like I did in my daughter’s dorm house makeover. Incidentally, I received this Metal Filigree Arch Wall Decor from Antique Farmhouse that was originally for my daughter’s bedroom makeover. It looked so perfect in the fireplace that I decided to keep it here instead.

Since completing this project, we also installed new flooring throughout the downstairs similar to the vinyl plank flooring we installed in our daughter’s room. It makes the room look bigger and more cohesive.
Here is how the custom fireplace surround looks now that we’ve completed the board and batten and flooring as well.
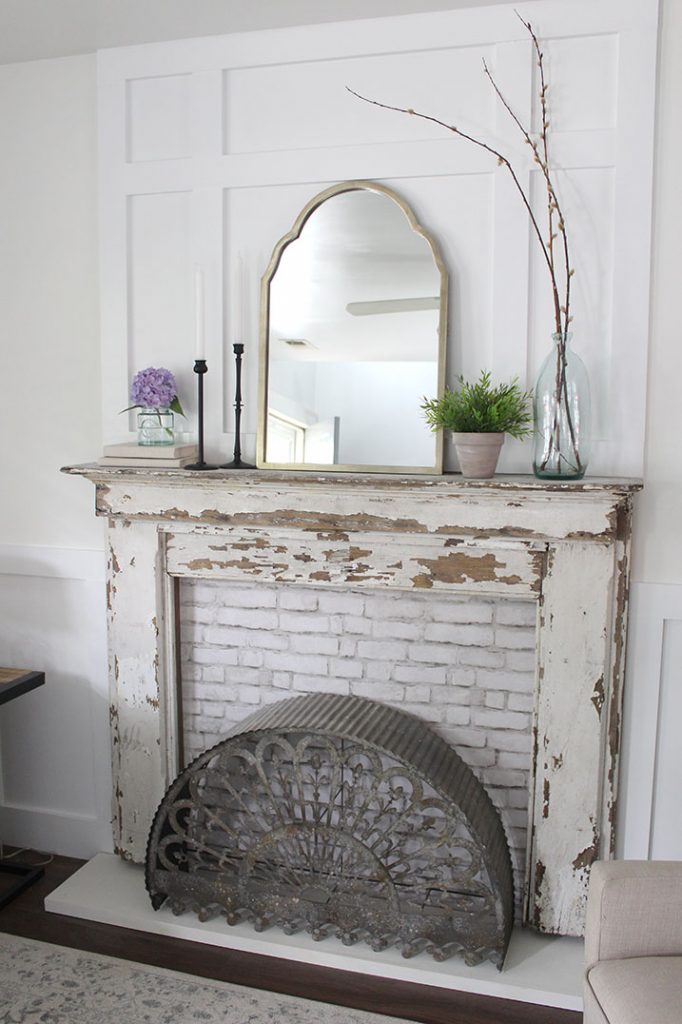
Chipping away, one project at a time slowly adds up to big results! Adding in vintage pieces from the flea market really helps to add some character to an otherwise plain room.
This post contains affiliate links, you can read my full disclosure here.
Looks fantastic! I have a black mantel with chippy paint that I guess I should seal. Great tutorial too.
Thanks Cindy, the sealer I used really works great and it’s so easy to apply!
This is so pretty Roxanne! I am obsessed with that piece in front of the fireplace too!
Thanks Deb!
Absolutely stunning! I have a faux fireplace I just shared on my Instagram last week and getting ready to change up my real fireplace some too. Pinning away these gorgeous images!
Thanks Amber, I am heading to Instagram to check out your fireplace!
This looks really great!
Thank you!
This is so amazing! I LOVE IT!
Thanks Lindsay!
This looks fantastic Roxanne! I like that you were able to come up with a solution that allows you to move and change it if ever you want to! Very smart! And the whitewashed brick wallpaper is such a cool touch!
Thank you Emily!
Your fireplace looks amazing! I’m thinking about doing something similar to my place, because I think fireplaces make any house cozier and more elegant. Thank you for sharing the details!
Your new fireplace is really gorgeous. It looks wonderful with the chippy paint. Its beautiul.
Very lovely! Thanks for sharing @ Vintage Charm!
Your hubby did a fabulous job of making the fireplace look like it was there all along. Neat trick with sanding off the design to match the decorative woods.
That metal filigree arch steals the show! It’s gorgeous! Can’t wait to see what you have in mind next for your new fireplace! #merrymonday
Wow! That looks amazing. Wish I had seen this when we lived in a house with a place to hang our stockings! Visiting from DIY Show Off.
Oh my! Beautifully done. Can’t believe the brick background is removable wall paper!! Wow!
Following you on Instagram.
Catherine
I loved this SO much that I featured it over at today’s Vintage Charm Party!
xo Kathleen|Our Hopeful Home
Thank you Kathleen!
opps here’s the link! http://bit.ly/2gOusPL
This is so pretty! Nice job, and that brick wallpaper looks awesome!
This is so pretty and gives you a great focal point in the room.
Wow, that looks amazing! Great job! I love that Metal Filigree, it’s the perfect addition to your faux fireplace.
Wowza! Turned out beautiful! Now I am keeping my open for a mantle. Thanks for the idea.
Hi Roxanne, Congratulations! Your gorgeous fireplace surround was selected as the Vintage Charm Feature of the Year! Here’s the link to the announcement: https://mythriftstoreaddiction.blogspot.com/2018/01/vintage-charm-feature-of-year.html
Please email me your mailing address–as the winner you will receive special gifts! Blessings, Cecilia @ My Thrift Store Addiction
Thank you Cecilia, what a nice surprise today!
Hello, Roxanne! Congratulations on winning Vintage Charm’s Feature of the Year! Cecilia and I are ready to mail you your prizes, however, we still need your mailing address. You can email it to me at kathysahton16 at gmail (dot) com. Thanks and congrats again!