DIY Mini Book Page Wreath

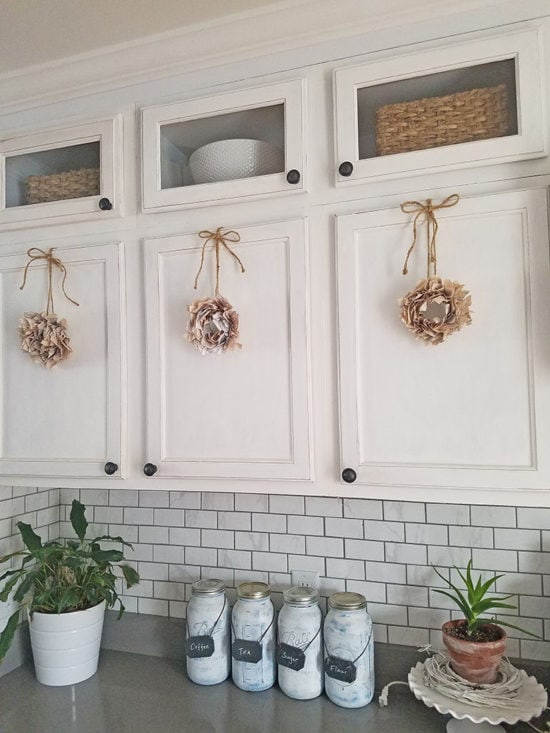
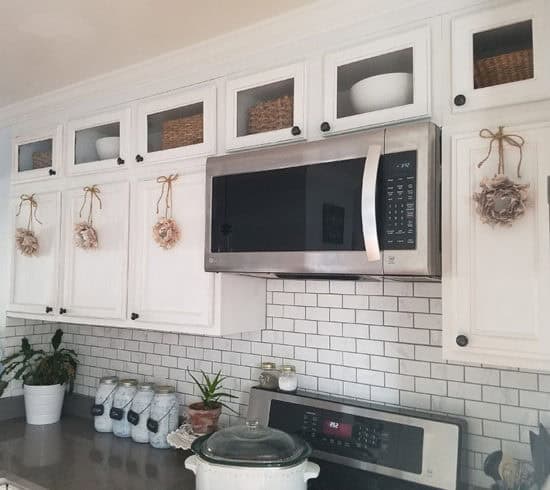
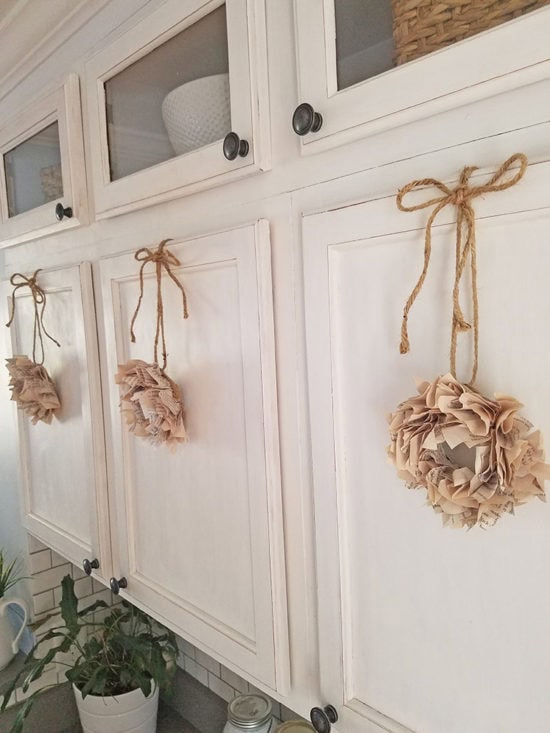
Happy New Year friends! I hope your holidays were happy! I took a short blogging break last week, but now I’m back now and I am ready for a new year and lots of DIY’s. I recently noticed some really cute book page wreaths on Pinterest, so I thought I would make my own, in a mini version. I started out with the idea that these would be ornaments for my Christmas tree and that I’d embellish them with holly berries. I ended up keeping them neutral, to be used all year. I hung them on my kitchen cabinets for now. These are so cute, and really easy to make. My husband was really surprised when I told him they were made out of book pages!
You will Need:
An old Book
A Mason Jar Lid
Hot Glue Gun
Twine

I saw a few different versions on Pinterest, but I changed some of the steps to make mine mini. The first step is to cut up the pages of your book into squares. I made my about 2″ X 2″. Then, crumble them around a pen or a marker to give it the ruffled look.
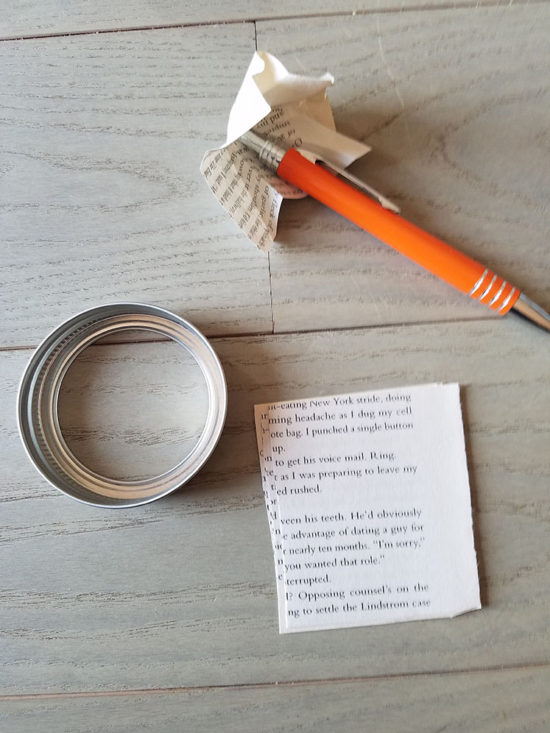
Next, remove the inner circle of the mason jar lid, you only need the outer ring.

I put a piece of parchment paper over my table, for easy clean up and to keep the hot glue from getting everywhere. Place a dab of hot glue on the inside of the ring and then attach one of your crumbled book pages onto it. I ended up using a sharpie marker rather than the pen shown to crumble the paper. It helps if you keep the paper around the sharpie when placing it on the glue, so you don’t burn your fingers.
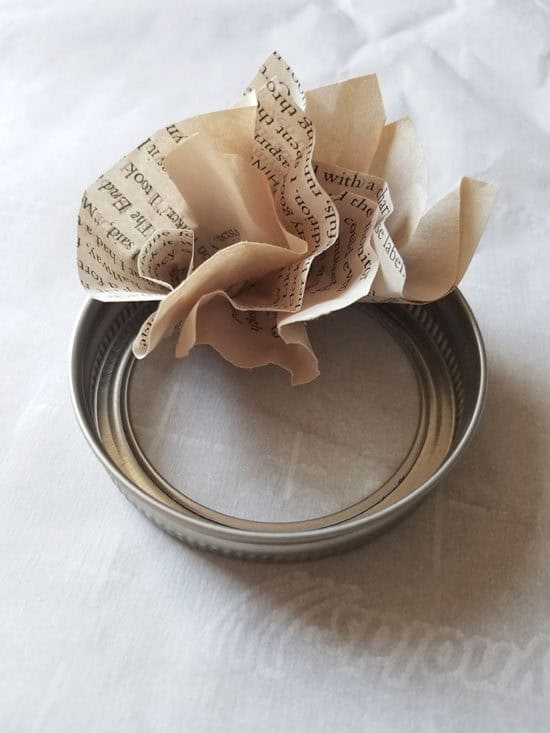
Once I had the inner portion of the lid filled, I added another layer around the outside of the lid.

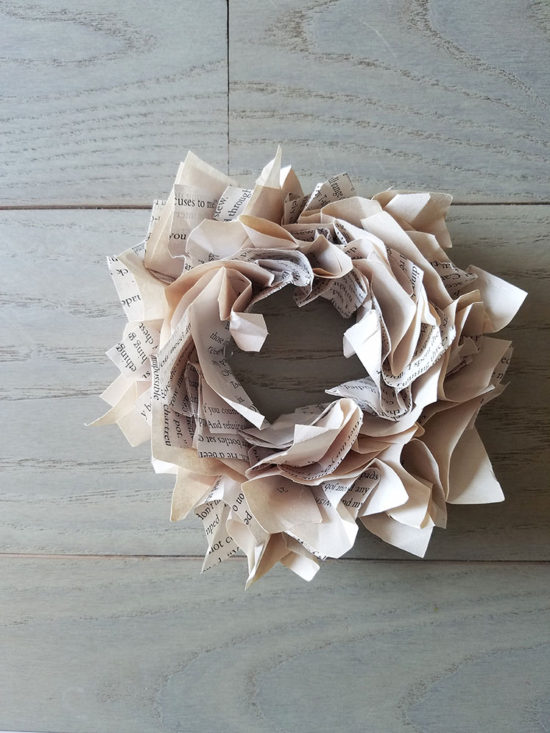
When it’s finished, look it over to see if you need to add a little in some spots, or trim it down in others.
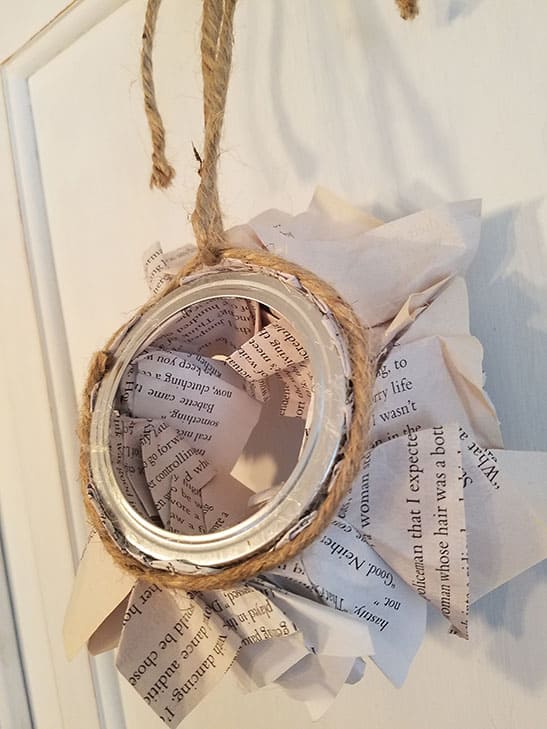
Lastly, I added a piece of twine around the outer portion on the back of the wreath. My friends Vicki and Jenn used ribbon to make a similar wreath, you can see theirs here. I attached the twine with hot glue, but only in sections. That way, I was able to add a second piece of twine through that one, to use as a hanger. The back looks like this:
Once I got the hang of it, it only took me about 15 minutes to make each wreath.
I like these so much, that I will probably make a full-size version soon.
What do you think, aren’t they adorable?
You are the CUTEST and these are ADORABLE! I LOVE them!!
LoVe this idea
Linda, this is a great idea. Thanks for your creativity.
Love this idea. Will be making these out of old sheet music for my choir members💓💓💖😊
That is a great idea too ! 🙂
Oh my gosh, that’s so cute! I love it so much!
Those are so sweet!!
Tania
These are so pretty! I love the soft colors of them, perfect for this time of year!
Love these wreaths! Can wait to see your large version!
These are straight up the cutest! Sharing.
These are so cute and really make an impact in the home for something so simple to make. Love this idea!!
Very cute! Love how they look on your cabinet doors.
One suggestion: look up the definitions for “crumble” and “crumple”.
Great idea would work great for Christmas wrapping paper.
Adorable & look pretty easy to do!
Love this creative idea! Love using old and the twine…I’m doing this!
Absolutely darling! Pinning to copy, maybe in bigger size. Wonder if you could use one of those branch-like wreaths and stuff musical sheets in it? Just love this idea of using paper to make a flower like wreath!
These are adorable and just the thing my kitchen needs! How did you attach them to your cabinets? I notice that the twine goes over the top….but then what?
How did you attach them to your cabinets? I notice that the twine goes over the top….but then what?
Hi Faith, the wreaths are so lightweight that I was able to just tape them to the inside of the cabinet door.
You could also attach a SMALL commons hook upside down on the inside of the cabinet door, and then put the twine over the door and hook it to the command hook.
You could soak the pages in coffee and bake for a more vintage look I absolutely love these
Thank you, that’s what I was wondering
I used a staple gun to
Staple
The twine or ribbon.
At the top
Of my cabinet. No one sees it and it hangs great
Could you dye the pages with Tea to make them look older or more vintage ?
Hi Donna, I’ve heard of that being done but I’ve never actually done it myself. I’m sure you could experiment with a few pages and see if you like it.
yup….could even use the small natural colour coffee filters too
I love these little guys, very charming.
So cute! I am definitely pinning this for later. Thank you.
Just amazing wreath, loving both of my wreaths! You know how well the green ribbons go in my house! I can’t wait to make some myself.
I love these they are so cute. I was hoping you would show how you hung them.
Love yOur wreaths and so simple to make. Thank you for sharing.
Hi. These little wreaths are great! I’m DEFINITELY going to make these, but will back them with felt so they don’t scratch the caBInet
Love love, what are you going to make the bigger ones with, maybe wire wreath from dollar tree store, they had a square one the other day..thanks for the awesome idea!
This craft is perfect for our local Library craft group. They will love it.
Love this idea! Did you use a wide mouth ring or regular size? Also, about how many 2″x2″ squares did you use per wreath?
Great idea, nice and simple. However I will use card cut from a sturdy box rather than waste a Mason jar lid.
Just made 2 and they came out fantastically! Love them. Your instructions were great and clear. I think I may become obsessed! Thanks!💃
I’m so glad!
LOVE LOVE LOVE!! I’m going to make them into ornaments for my bookclub ladies!
I’m so glad, they are fun!