DIY Farmhouse Table – ORC Week 5

I’m so excited to finally share our DIY farmhouse table makeover today. If you’ve been following along you know there is only ONE week left until the One Room Challenge reveal! One more crazy weekend before we can get back to some normal activities around here. You know, like showering, eating something other than peanut M&Ms and being able to leave the house without being covered in paint.
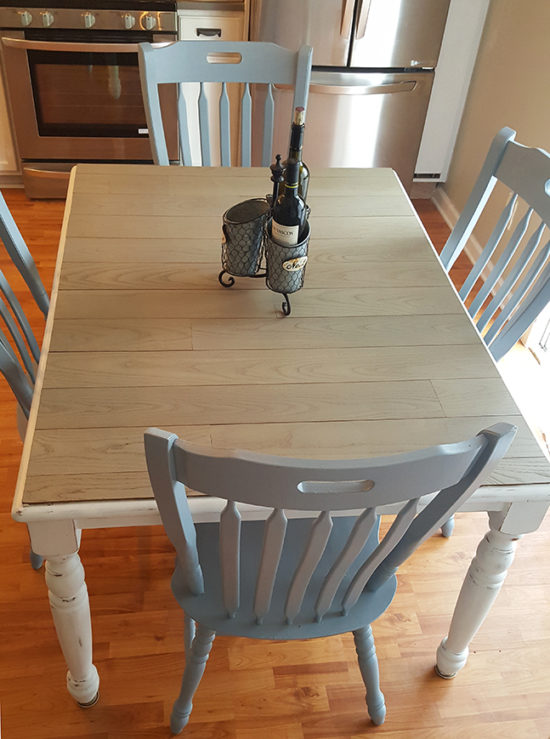
The DIY farmhouse table makeover idea started because I wanted to change the look of the extisting table to more of a farmhouse style. The shape and legs of the table were already the farmhouse style, but the top was old and outdated. The size of the table works in the room, so I decided keeping it was best. I wanted to add wood planks to the top of it and refinish the bottom with paint. I’ve really been wanting to do this for awhile now, and I’m so happy we finally got it done.
To achieve the farmhouse top, I collaborated with Stikwood. I love that Stikwood is nice and thin, so if my husband was too busy to help me with this, I could cut it myself with the miter box. It also has adhesive strips on the back of it to make attaching it quick and easy. Here’s the scary before photo of the table and chairs.

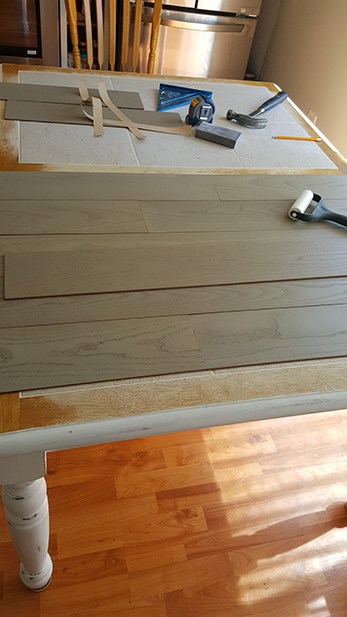
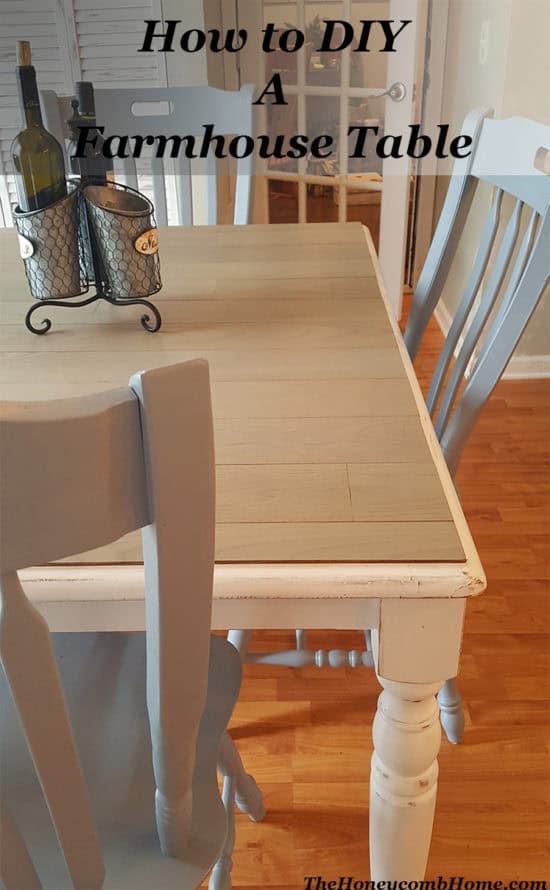
I had painted the lower half of the table white first, with a slight distressing all around. We started adding planks in the center of the table and worked our way out. The Stikwood arrives in different length planks, which is perfect for getting the farmhouse look.
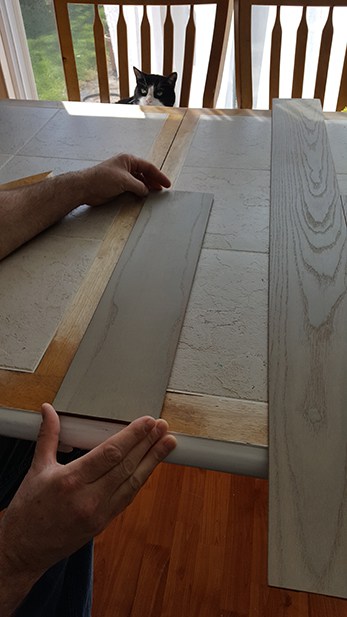
We started with that shorter plank, shown above and went from there. The adhesive on the back of the wood is very strong. We found out when we placed one of the planks slightly crooked. It wasn’t easy to get off. That’s why Stikwood works well on walls also.
When we got to the end of the table, we had to cut the last plank lengthwise as well.
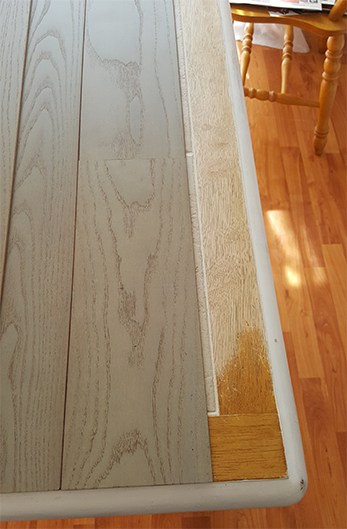
Stikwood has several awesome finishes to choose from. I picked Seafoam, which is a nice weathered gray.

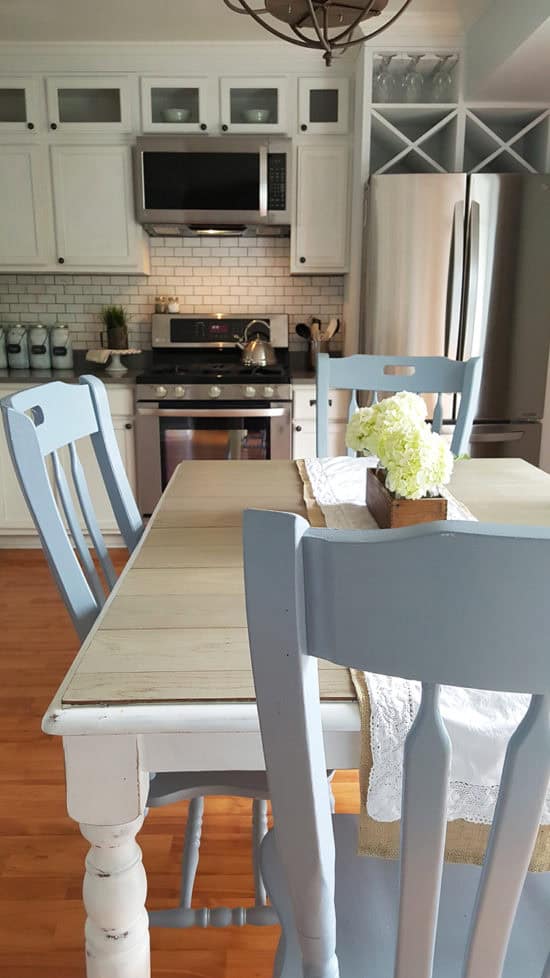
I painted the chairs with Evening Eclipse from Valspar, which really took forever. I spent at least four days on those. First each one needed 2 coats of primer, then 2 coats of paint. The DIY farmhouse table was done two weeks ago, it was the chairs that were holding me up. The wall color is going to be 2 shades lighter than that, which is happening today. I cannot wait to get rid of the green and bring in some blue!
As I was working on this project I noticed a similar table from Ethan Allen (shown below) on the cover of one of their recent catalogs. Just the look I was going for, but for a small fraction of their price.

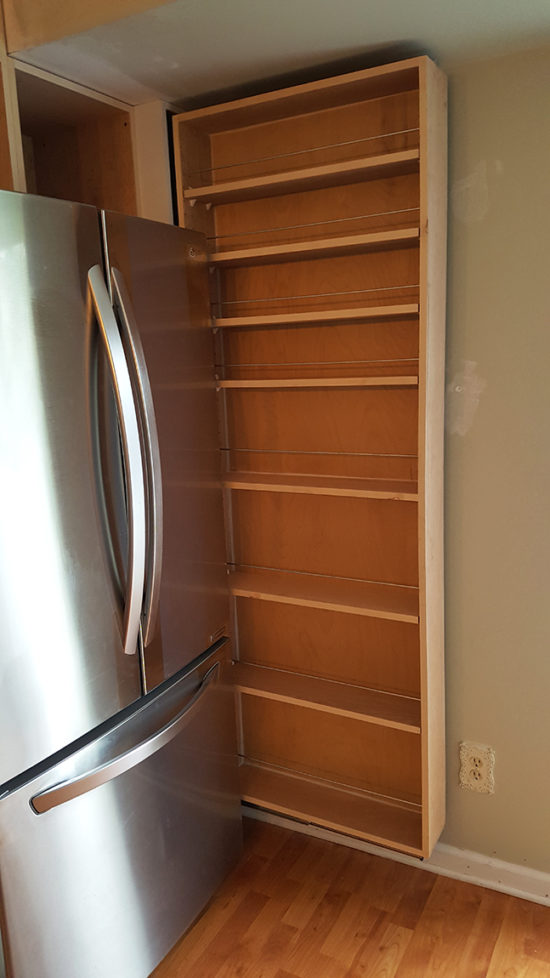
In other kitchen news, we have a slide out pantry! My contractor knocked it out of the park with this. All of this storage in only about 8″ of space!
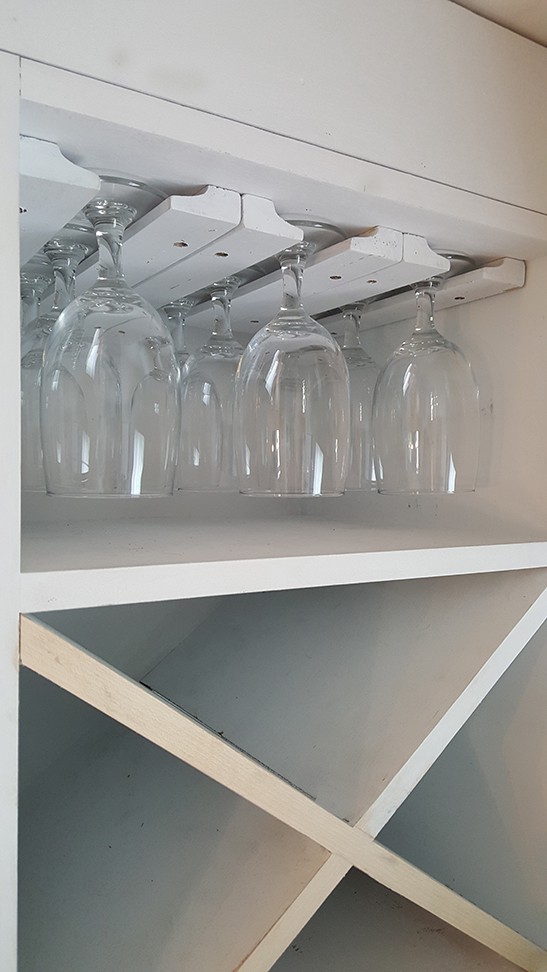
He also finished up the custom wine racks above the fridge.
Speaking of knocking it out of the park, my husband installed our tile backsplash as well, and he did an amazing job considering this was his first time tiling a backsplash. And the F bomb was only dropped once the whole day! He did not, however, get to the grouting so that’s another thing on our list for this weekend.
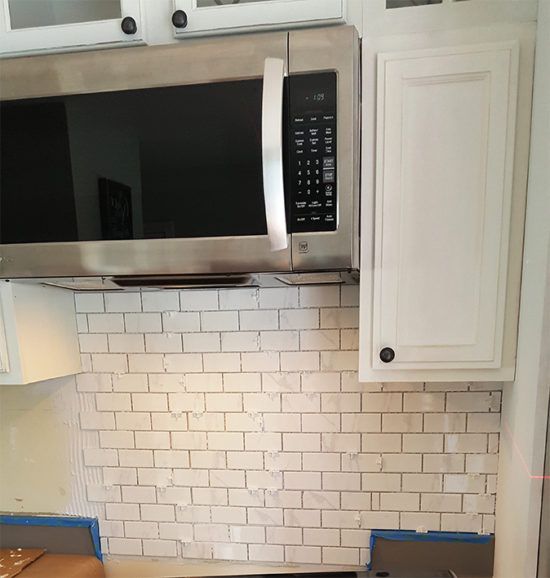
Our countertops were finally installed last week as well. The carerra marble subway tile is the perfect compliment to them. I actually chose the tile first and counters second. I knew that tile was the one as soon as I saw it.
As for my checklist:
Buy a new refrigeratorAdd a row of cabinetry above the existing cabinets to extend to the ceilingNew countertopsNew undermount sink- New backsplash
Paint existing cabinetsAdd glass fronts to some of the cabinet doors- Install lighting in new upper cabinets
- Install lighting under lower cabinets
Add new cabinetry hardwareInstall new pendants over the sinkCompletely makeover the existing table and chairs- Paint the walls
custom built-ins over the refrigeratorcustom slide out pantry- crown molding
- add bun feet under cabinets
Next Thursday to celebrate the reveal, I will also have be having a giveaway for everyone who’s been following along. you won’t want to miss it! If you’ve missed previous weeks, you can catch up here.
Week 1- Kitchen Makeover Before
Week 2- Kitchen Design Plans
Week 3- Kitchen Pendant Lighting
Week 4- Installing Cabinetry Hardware
Week 5- DIY Farmhouse Table
Week 6- Kitchen Makeover Reveal
This post was sponsored in part by Stikwood, all opinions are 100% my own. Read my full disclosure policy here.
Your farmhouse table is fabulous! Love the Stikwood product – good to know for the future. Your kitchen is beautiful! Cheers to a great week and the final push for the big reveal!
Thanks Vicki, I could think of 100 ways to use Stikwood, it’s amazing!
I would have never thought to just overlay new wood on an existing table! It looks fantastic! You have made so much progress!
Thanks, Amanda. I thought about other ways of going about this makeover, but this was simple and effective!
The table looks great! What a cool product and I like that it looks easy to use. The backsplash is lovely, and props to your husband. Looking forward to seeing the reveal next week!
Thanks, Sharon. It really was SO easy to use!
Wow Roxanne what a fantastic transformation. I can’t wait for the reveal! I love the direction the space is going in. As a fellow ORC participant it’s been wonderful to gather some fantastic inspiration. I’d love for you to share your progress at Thoughts of Home on Thursday. Our readers would love to see it. The gathering is at http://www.decortoadore.net
Thank you Laura, I will check it out.
Oh my gosh that table went from horrible to absolutely stunning! GREAT job! Also I LOVE that sliding pantry. I wish I had a good corner in my kitchen to make one of those!
Yes, the table makeover is a dramatic before and after! And the sliding pantry is SO awesome, thank you!
I love how you used the Stikwood on the top of your table – what a great idea and it turned out beautiful! 100 times better than before!! I can’t wait to see your kitchen next week!
Thanks, Jenny. I’ve had this idea for quite some time, so glad I finally got to do it.
Gorgeous job!describes that farmhouse table! What a transformation. I love anything that is white and well done! Look so forward to seeing your reveal.
Best Maria:))
Thanks Maria, everything is better in white!
Wow, love how the Stikwood made over the table! Such a great idea! And I’m swooning over that side pantry and subway tile!!!
The table looks great. What a good idea to use the stick on wood to change the look completely.
Happy Thoughts of Home. We are so glad you joined us. 🙂
What a great job! It looks fabulous. I can’t wait to see the reveal.
This is amazing!! What a cost-effective way to get that table! Perfect for anyone that doesn’t feel comfortable with power tools too!
I’ve never heard of that Stickwood product how awesome! Love all the changes coming together. That backsplash and that wine rack is perfection!
The table came out amazing! I love how perfect it fits into the overall feel of the kitchen. And that pull out pantry is something I definitely in my home, it never feels like there is enough pantry storage for our family! Thanks for sharing, can’t wait to see the completed room.
That is such a brilliant idea! Your table turned out great and I love the work you’ve completed so far in your kitchen. Pinned, tweeted, and shared. Thanks for sharing at Merry Monday, hope to see you again next week!
Where can Stickwood be purchased?mit looks like a great product!
You can purchase it online at Stikwood.com, it really is a great product.
Thanks!