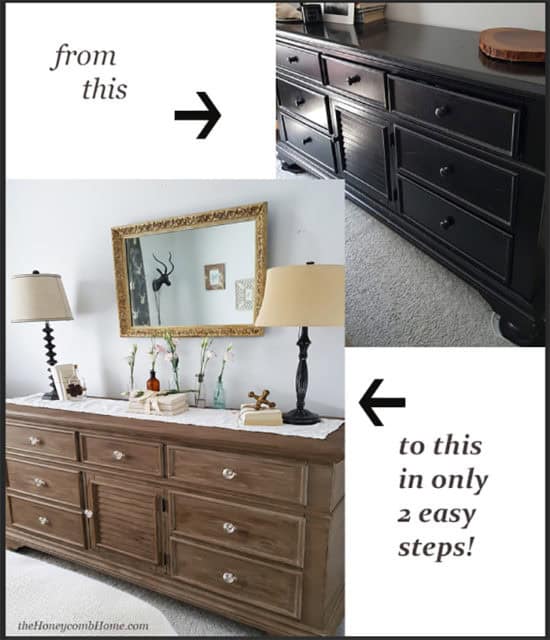
DIY Barnwood Dresser Makeover – In Only 2 Easy Steps!
I know I’ve been missing in action around here for a few days, I was away at a blogging conference which I’ll be sharing more about later this week. This barnwood dresser makeover I’m sharing today was completed before I left but I didn’t have time to write it up until now.
In my usual style, I’ve been jumping around from project to project lately. Now I’ve moved back to fixing up my daughters room which you may remember from the closet door makeover awhile back. This one started with the mirror above the dresser. My mother-in-law had given it to my daughter for her dorm room but she had already bought a full length mirror so I decided to keep it for her room here at home. I loved the vintage mirror-it’s from the 1950’s-but it had been spray painted silver which I didn’t really care for. I ended up painting it with some gold acrylic paint that I had in my stash. Which is kind of ironic because the mirror was originally gold.
The gold ended up being a little too shiny, and I wanted to give it more of an antiqued look so I ordered a can of the Annie Sloan dark wax. I had tried the clear wax, but was interested in experimenting with the dark.
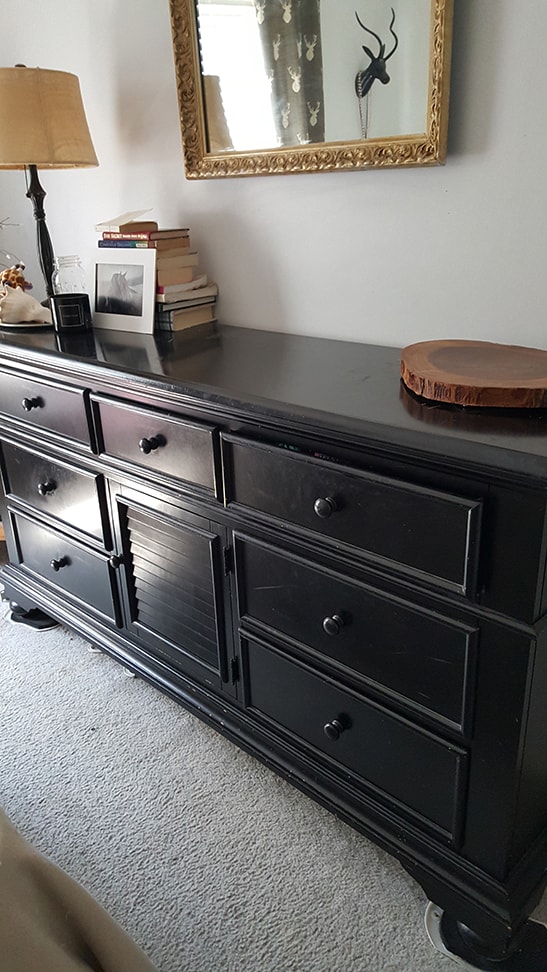
After I added it to the mirror and liked the finish, I became kinda mad-scientisty with it and started experimenting some more with the wax with the intention of making over that big black beast of a dresser you see above. If you are wondering what those things under the feet are, they are furniture sliders*. Amazing product that lets you slide heavy furniture around like it’s on wheels!
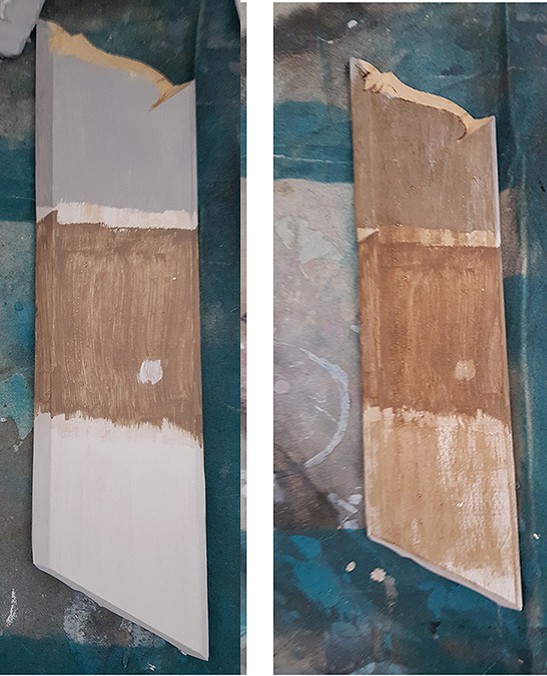
I found a piece of scrap wood and painted it with three different shades of chalk paint that I had, shown on the left. The top is Paris Gray, center is Cocoa and the bottom is pure white. Then I added the dark wax over each of them to see the finish I would get, shown on the right below. I really loved all 3, but I chose the Cocoa shade for the dresser.
What you will need to recreate this project:
Annie Sloan Chalk Paint in Cocoa
Cheese cloths (or an old t-shirt)
Disposable Gloves
Step 1: Paint
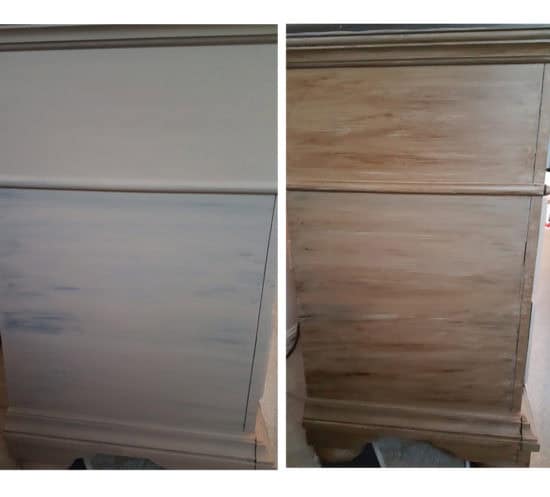
I did not sand this piece at all, which is the beauty of the chalk paint. I started on the far side of the dresser that you don’t see when you enter the room first. I did that little top section with 3 coats of the Cocoa and the lower section with only 2, leaving a little black showing through. I did this on purpose to see how it would look after waxing before I went ahead and did the front and the top of the dresser.
Step 2: Wax
I liked how it looked in all areas but I did like the upper section a little better so I did the rest of the piece with 3 coats of the Cocoa paint, letting each coat dry in between. Again, I didn’t sand it at all. Here is another shot showing the drawers before the wax was added and the frame after it was.

Waxing Tips
There are a few things I figured out while working with the wax that might be helpful to remember.
- First, wear gloves! The dark wax is like a stain and will get on your hands and under your nails.
- Less is more. Start with less than you think you need, you can always add more if needed.
- Start with small areas, it dries pretty quickly.
- Use a side to side motion (as opposed to circular) when applying and wiping off the wax.
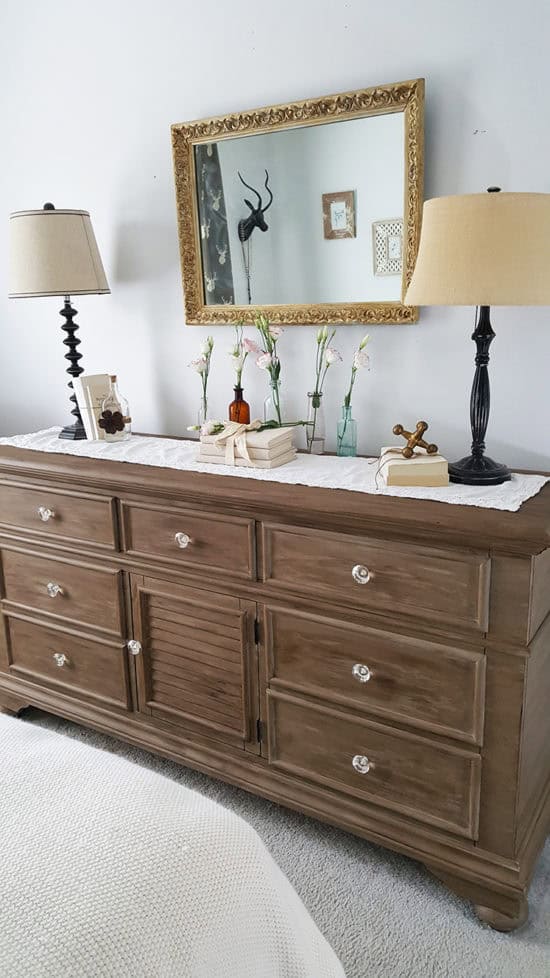
After the painting and waxing were complete, I decided the dresser needed some new knobs to dress it up a bit. I picked up these knobs from Hobby Lobby, which has an amazing selection to choose from. I really liked the kind of glam feel of these in contrast to the rustic barnwood finish of the dresser.

And that’s it, can you believe it’s that easy to get a rustic barnwood look? Just paint followed by some wax gives you this amazing barnwood rustic finish!
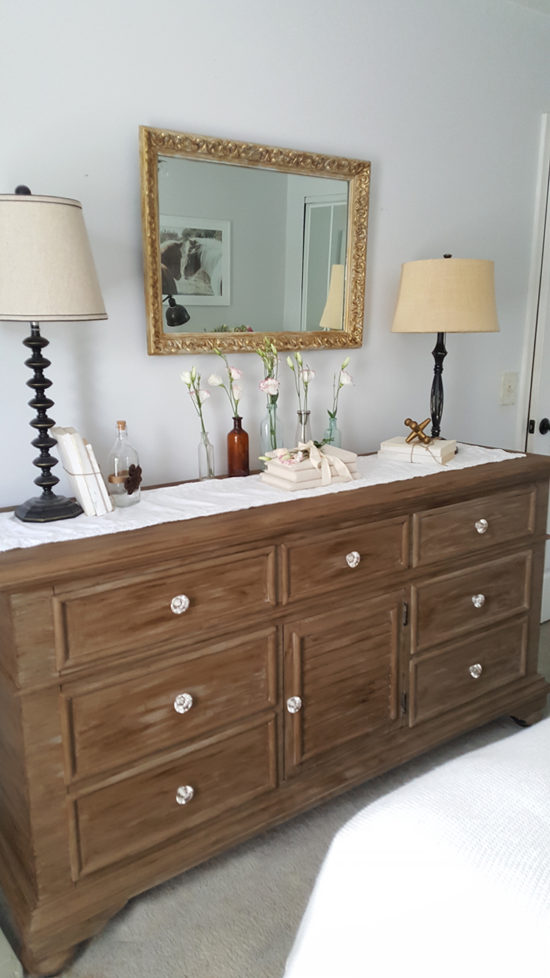
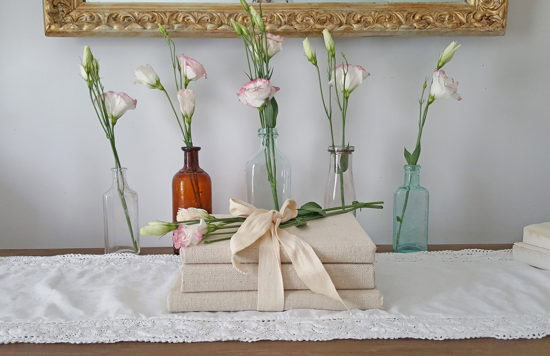
I love how this dresser makeover turned out so now I definitely have some plans for the Paris Gray plus dark wax next. I also prettied up the top of the dresser with my flea market find vintage bottles and some fresh flowers. The books in the picture were covered with drop cloths and wrapped in a ribbon.

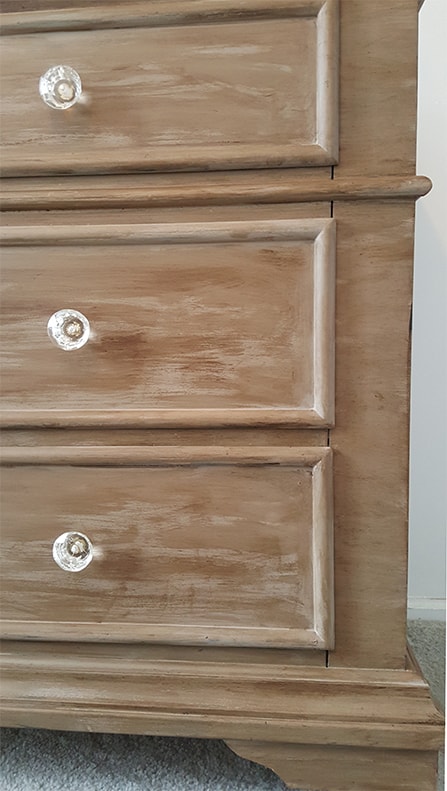
One more look at the finish close up.
When my daughter came home from college this weekend, she was shocked with the transformation. We are all happy to be rid of the black beast!
*This post contains affiliate links, see my full disclosure here.
That came out so good. Looks so much better.
Thanks! It made a big difference in the room!
That really looks great! Nicely done. Did you use clear wax first, or just the dark right over the cocoa to get that distressed/weathered look?
Thanks Kristen. I did not use any clear wax, just the dark right over the cocoa.
I love the variation the wax gave to the finish. It turned great!
Thanks Kim! 🙂
So cute! I can’t wait to redo our master bedroom dresser. Love it! I found you on the creative circle link party, glad I did! Yay!
Thanks Nicole, I like it so much that now I’m doing something similar to a set of night stands…good luck with yours!
This looks amazing! It looks like real wood finish in the pictures. Such a cool way to bring back a piece that’s been super painted up. It’s always a bummer to find something thrifting that’s a beautiful shape, but you want a more wood look and removing the paint is a pain or not possible in your rental 🙂 Keeping this in mind!
Thanks Leslie!
What a really really lovely makeover! Thank you for sharing with Thursday Favorite Things!
This looks amazing! I just might have to try this on a dresser that I have in the basement! It badly needs a makeover. I have never used AS products, is the wax very thick or is it more liquidy? Waxes I have used in the past were almost more of a paint consistency. Also saved this to my DIY Pinterest Board!
– Jaclyn